Recent Posts

How to Change Toyota Corolla Windshield Wipers


  • Determine the correct size of the Toyota Corolla windshield wipers before purchasing replacement wipers.
  • Buy the replacement wipers that match the correct size for your Toyota Corolla.
  • Remove the old windshield wipers from your Toyota Corolla carefully to avoid damaging the windshield or wiper arms.
  • Install the new windshield wipers onto your Toyota Corolla, following the manufacturer's instructions to ensure proper fit and function.

Ensure your safety and visibility in adverse weather conditions by maintaining your windshield wipers in good condition.

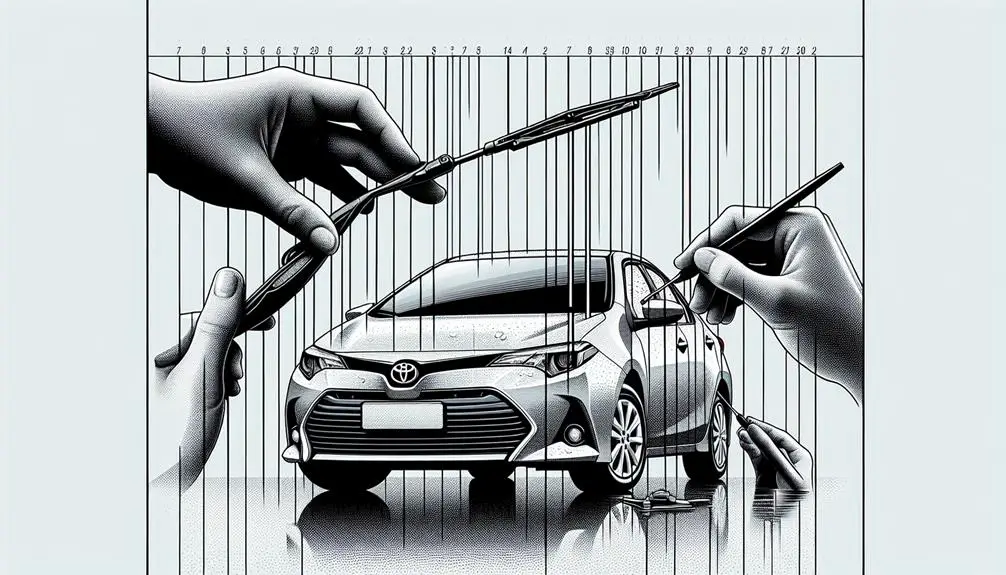
Identify Your Wiper Size

determine correct windshield wiper

To buy the right windshield wipers for a Toyota Corolla, find the correct size. Check the car's owner's manual for wiper sizes.

If the manual is lost, measure the wiper blades yourself or use an online wiper size finder by entering your car's make, model, and year.

This ensures effective windshield clearing for safe driving in bad weather.

Purchase the Right Wipers

To choose the right windshield wipers for your Toyota Corolla, focus on size, quality, and model year compatibility.

First, pick a reputable brand. High-quality brands last longer and perform better in different weather conditions. Look for reviews or get recommendations.

Next, decide on the wiper blade type:

  1. Traditional Bracket Blades are common and affordable but may struggle in heavy snow.
  2. Beam Blades have a frameless design that performs well in snow and ice due to even pressure distribution.
  3. Hybrid Blades mix traditional and beam blade features, offering good performance in all weather conditions.

Finally, check the installation mechanism. Choose wipers that are easy to install on your Corolla to avoid difficulty.
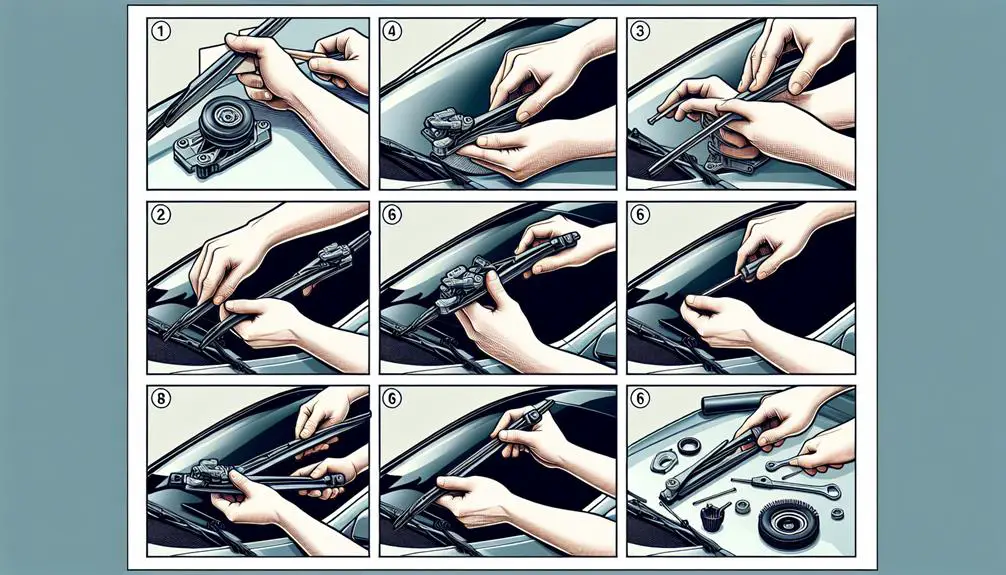
Remove Old Wipers

replace worn windshield wipers

To remove old wipers, first lift the wiper arms from the windshield carefully to avoid damage. The arms should stay up on their own.

Find a small tab or button where the wiper blade connects to the arm. This tab is usually plastic and releases the wiper blade. Press or slide this tab, depending on your car model. While pressing the tab, slide the wiper blade down towards the hood or push it outwards, depending on your car. This disconnects the blade from the end of the arm.

If pressing the tab and removing the blade at the same time is hard, don't force it. Check you're doing it right and try again. Forcing it can break the tab or damage the arm.

After disconnecting the blade, take it off the arm. Be careful with the metal arm; it can snap back and damage the windshield. Lower the arm gently to the windshield after removing the old wiper to avoid damage while getting ready to put on new wipers.

Install New Wipers

Remove your old wipers and follow these steps to install new ones for better visibility in rain or snow. Installing new wipers on a Toyota Corolla is easy.

  1. Align the New Wiper Blade
  • Lift the wiper arm off the windshield. Align the new blade with the arm. Toyota Corolla often uses a hook-type arm, making alignment easy. Ensure the blade's hook matches the arm's direction.
  1. Attach the Wiper Blade
  • Slide the blade into the arm's hook until it clicks, indicating it's secure. If you don't hear a click, check its placement again to ensure it's properly attached.
  1. Lower the Wiper Arm
  • Gently lower the arm back to the windshield. Be careful not to damage the new blade or windshield. Pull on the blade gently to check it's securely attached.

These steps will help you install new wipers on your Toyota Corolla, improving visibility and safety.

Test Your New Wipers

replace worn windshield wipers

After putting in new wipers, check if they work well for rain or snow. Do this without waiting for actual bad weather.

First, park your Toyota Corolla safely, away from traffic or obstacles. Turn on the ignition to get the electrical system working, but you don't need to start the car.

Then, wet the windshield. You can use a hose, a watering can, or a bottle of water. This is to make it like it's raining or snowing. Turn on the wipers by finding the wiper control next to the steering wheel. Use it to turn the wipers on at different speeds. Watch the wipers move on the windshield. They should move smoothly, without shaking or making noise.

Listen for any strange sounds. Odd noises could mean the wipers aren't put on right, or there's something wrong with the blades. Make sure they clear the water well, without leaving streaks or missing areas.

If everything looks and sounds right, your new wipers are good. If not, check how you put them in or try another kind or brand of wiper blade. Being able to see clearly is very important for safe driving.

Conclusion

You have just finished changing the windshield wipers on your Toyota Corolla.

First, you made sure to find the right size wipers and bought them.

Taking off the old wipers might've been a bit hard, but you managed to do it with some patience.

Putting on the new wipers was easier once you knew how to do it.

The most important part was checking to make sure the new wipers work well, so you can see clearly no matter the weather.

Now, you're ready to drive safely in any condition. Have a safe trip!

How to Turn Traction Control on Toyota Corolla


To turn on the traction control in a Toyota Corolla:

  • Locate the control button often found on the dashboard or near the shift lever.
  • Press it until the indicator light confirms the traction control is active.
  • This improves driving stability in poor conditions.

Locate the Control Button

find the control button

To find the traction control button in a Toyota Corolla, look near the steering wheel or the center console. It's usually labeled 'TRAC OFF' or has a symbol of a car with skid marks. The placement can vary by the year and model of the Corolla, but it's often on the lower dashboard to the left of the steering wheel or in the center console.

If you can't see it, you might need to move your seat or steering wheel. Be careful not to press it suddenly while driving fast or in bad weather. Knowing where this button is and how to use it's important for safe driving.

Understanding the Indicator Light

When you find the traction control button in your Toyota Corolla, it's important to know what the indicator light means. This light looks like a car with skid marks or the letters 'TRAC'. It tells you about the traction control system in your car.

If this light turns on for a short time when you start the car, it's normal. It means the system is checking itself to make sure it's working correctly. But, if the light stays on or blinks while you're driving, it means something different.

A light that stays on means the traction control system is on because it found a wheel without enough grip. It adjusts to help keep the car stable. This is good for driving on slippery roads.

If the light blinks, it means the system is actively working to control traction on a very slippery surface. This might happen when you accelerate quickly or drive on slick roads. It shows your Corolla is trying to keep you safe.

Engaging Traction Control

engaging traction control system

To turn on the traction control in your Toyota Corolla, follow these steps. First, turn on the car's ignition. You don't need to start the engine. Find the traction control button, which might be on the dashboard, near the steering wheel, or in the central console. The location can change based on the Corolla's model and year. If unsure, check the owner's manual.

Press the traction control button once. When the dashboard light flashes and then stays on, traction control is working. A steady light means it's active and will work if it senses wheel slip.

Traction control turns on automatically every time you start the car. If you turned it off before, it will be on again when you restart the car. This ensures the car is always ready with traction control for safety and stability.

Disabling the Feature

To turn off traction control in your Toyota Corolla, follow these steps:

First, find the traction control system (TCS) button. It's usually near the steering wheel or in the center console and has a car with skid marks icon. Press this button.

A light with the skid mark icon will turn on your dashboard, showing traction control is off. The car may handle differently, so be careful.

To turn traction control back on, press the button again. The light will turn off, indicating the system is active.

Troubleshooting Common Issues

understanding technical problem solving

If your Toyota Corolla's traction control isn't working, try these steps to fix it:

  1. Check the Traction Control Button: Make sure the traction control system (TCS) is on. Find the TCS button, usually on the dashboard or center console, and press it. If the dashboard TCS light turns off, the system is working.
  2. Inspect the Tires: Check if your tires are worn unevenly or not inflated properly. Make sure all tires are at the right pressure and look for any wear or damage. Sometimes, aligning or replacing tires can solve the problem.
  3. Scan for Error Codes: If the problem isn't fixed yet, use an OBD-II scanner to check for error codes. This can tell you more about what's wrong.
  4. Consult a Professional: If you can't solve the issue, see a mechanic. They can do a detailed check and repair any problems with the traction control system.

Conclusion

Now, you know how to use the traction control on your Toyota Corolla. Just look for the control button, watch the light that shows it's working, and you can turn it on or off whenever you need.

If something doesn't seem right, fixing common problems should help. Remember, if you want your car to be more stable or if you want better control while driving, managing the traction control is easy for you now.

How to Replace Toyota Corolla Tail Light Cover


To replace a Toyota Corolla tail light cover, follow these steps:

  • Access the tail light assembly
  • Remove the old cover
  • Install a new one

This simple process enhances safety and ensures compliance with traffic laws. Tools and patience are required for success.

Gather Required Tools

prepare for diy project

Before you start replacing the tail light cover on your Toyota Corolla, make sure you have the necessary tools. This will help you save time and avoid frustration.

You'll likely need a set of screwdrivers (both flat-head and Phillips), a pair of pliers, some masking tape, and a soft cloth. The screwdrivers are needed because the tail light cover might be secured with different types of screws. Pliers can help remove tight fasteners or clips.

Masking tape can protect your car's paint, and a soft cloth can be used for cleaning and to place the tail light cover on. Having these tools ready will make the replacement process easier and prevent damage to your car.

Accessing the Tail Light Assembly

To access the tail light assembly on a Toyota Corolla, start by opening the car's trunk. Inside, you'll find a panel or liner covering the tail lights, which you may need to remove. This can involve unscrewing or pulling away the panel, often held in place by clips or fasteners. Use a flathead screwdriver or your hands to carefully remove these, avoiding damage.

Next, locate the electrical connectors at the back of the tail light assembly. Disconnect these by pressing down on the tab and pulling out the connector. Handle gently to avoid breaking them.

With the electrical connectors off, the tail light assembly is accessible. You can now proceed with replacing the tail light cover or any other tasks, ensuring nothing is obstructing your work. Take your time to avoid any damage.

Removing the Old Cover

revealing a fresh start

To take off the old tail light cover, first carefully use a screwdriver to remove the clips or screws. Make sure you don't damage anything around it. After removing them, gently take off the cover, remembering how it was positioned for when you put the new one on.

Then, if the tail light bulb is connected to the cover, you need to disconnect it. Do this by turning the bulb holder to the left and pulling it out. Be careful with the bulb because it can break easily.

Check the area for any damage like cracks or corrosion before putting on the new cover. This ensures the new cover fits well and works right.

Here's a guide for removing the cover:

Step Tool Needed Note
1. Remove clips or screws Screwdriver Don't damage surroundings
2. Take off the cover Hands Remember how it was placed
3. Disconnect the bulb Hands Turn left and pull out

Installing the New Cover

Having taken off the old tail light cover, you're set to put on the new one. Here's how to do it correctly:

  1. Check the new tail light cover for any damage. If it's fine, you can proceed.
  2. Clean the area where the cover will go with a clean cloth. This ensures a good fit and prevents scratches.
  3. Align the new cover with the tail light assembly. It should have tabs or hooks that match slots on the assembly. Press it into place until it secures.
  4. Reattach any screws or bolts you removed earlier. Tighten them just enough to hold the cover in place without gaps. Avoid over-tightening to prevent damage.

Your new tail light cover is now installed on your Toyota Corolla.

Final Checks and Testing

final stage of development

After you install the new tail light cover on your Toyota Corolla, follow these steps to make sure it's correctly installed and working:

  1. Check that the tail light cover is firmly attached. It shouldn't move when pressed. If it does, recheck your installation to ensure all clips or screws are secure.
  2. Test the tail light by:
  • Turning on the headlights to see if the tail lights light up.
  • Using the turn signals to make sure they work with the new cover.
  • Having someone press the brake pedal to check that the brake lights get brighter as expected.

These steps help confirm the tail light works properly with the new cover and meets safety standards.

Conclusion

You did a great job changing the tail light cover on your Toyota Corolla. First, you got all the tools you needed. Then, you got to the light, took off the old cover, and put on the new one. You were like a pro.

Don't forget to check everything and make sure the lights work right. Fixing it yourself saved you money and made you feel good about handling car fixes. Good job!

How to Remove Toyota Corolla Windshield Wipers


To replace Toyota Corolla windshield wipers:

  • Lift the wiper arms.
  • Press the tab to release the old blades.
  • Attach new ones by sliding until they click.
  • Lower the arms back.

No special tools are needed.

Gather Your Tools

prep for diy projects

To remove your Toyota Corolla's windshield wipers, collect these tools:

  • A medium-sized flathead screwdriver for prying off wiper caps.
  • A socket wrench (preferably with 10mm to 14mm sockets) for unscrewing the nuts.
  • Gloves and safety glasses for protection.

This setup helps you remove the wipers easily and safely.

Locate the Wiper Blades

First, make sure your Toyota Corolla is parked on a level surface and turned off for safety.

To find the windshield wipers, look at the bottom of the windshield in front of both the driver's and passenger's side. You'll see the wiper blades resting against the windshield.

The metal parts extending from the base of the windshield to the blades are the wiper arms. Each arm is connected to a hinge that allows it to move.

Knowing these parts helps with removing the wipers and future maintenance.

Lift the Wiper Arms

clear snow from windshield

CURRENT SUBTOPIC: 'Lift the Wiper Arms'

To lift the wiper arms on your Toyota Corolla, first, turn off the car and take out the keys. This stops the wipers from moving by mistake. Handle the wiper arms carefully. They are made to stay flat against the windshield and may resist a bit when you try to lift them. Lift them gently to avoid damage.

Hold the wiper arm near where it connects, as this part is stronger. Slowly lift it until it stays up by itself. If it doesn't stay up, carefully pull it a bit more until it locks in position. This prevents it from snapping back and causing damage.

Here's a simple table of the steps:

Step Action Note
1 Turn off the car For safety
2 Hold the wiper arm Near the hinge
3 Lift it gently Until it locks

Disconnect the Blades

To remove the blades from your Toyota Corolla's windshield wipers, find the small tab or button where the blade connects to the arm. Press this tab or button to unlock the blade, then slide or pivot it off, depending on your model.

Here are some tips:

  • Wear gloves for a better grip.
  • Press the tab or button gently to avoid breaking it.
  • Hold the wiper arm to prevent it from hitting the windshield.
  • Remember how the blade fits onto the arm for easier reattachment.

Removing the blades is easy once you know how. Be patient and careful not to rush, ensuring you press the release mechanism correctly to avoid damaging your car.

Reassemble if Necessary

reassemble as needed carefully

To reattach the blades to your Toyota Corolla's windshield wipers, follow these steps.

First, take the wiper blade, whether it's new or the same one after maintenance. Be careful with the wiper arm as it can snap back.

Pull the arm away from the windshield gently and hold it. Align the wiper blade with the hook on the wiper arm. Press or slide the lever or button on the blade to attach it to the arm.

Make sure the blade is secure and not loose. Gently lower the wiper arm back to the windshield, guiding it softly. Repeat for the other blade if needed.

Conclusion

You've now taken off the windshield wipers from your Toyota Corolla, great job! Remember, you just need the right tools, find the wiper blades, lift up the arms, and carefully take the blades off.

If you're putting them back on, just do everything backwards. It's easy and quick to do.

So, when it's time to change your wipers again, you'll know just what to do. Keep this guide close by, and you'll always be ready.

How to Reset Check Engine Light Toyota Corolla


To reset the Check Engine Light on your Toyota Corolla, try disconnecting the battery for a few minutes or use an OBD-II scanner to clear the error codes.

Always ensure to address any underlying issues before resetting.

Understanding the Check Engine Light

decode car engine alerts

When your Toyota Corolla's check engine light turns on, it means there's a problem that needs checking. This light is part of the car's onboard diagnostics system (OBD-II) which notices issues. It's important to understand what the light means and to fix the problems it points out for your car's health and safe driving.

The reasons for the light to come on can be simple, like a loose gas cap, or serious, like a bad catalytic converter. Other reasons might be broken oxygen sensors, spark plug problems, or issues with the EVAP system that manages fuel vapors.

If you ignore the check engine light, it could lead to bigger, more expensive problems later. A blinking light means there's a serious issue that needs quick action to avoid damage. A steady light means the problem isn't urgent, but you should still get your car checked soon.

Understanding what the check engine light means helps you know if the problem is urgent or can wait a bit before fixing. This light is an important part of your car's system that helps keep you informed and your car working well.

Simple Reset Procedure

To reset the check engine light on your Toyota Corolla, follow these steps. Make sure your car is turned off before starting.

Find the car's battery under the hood, and focus on the negative terminal, identified by a minus (-) sign. Use a wrench to loosen the nut on the negative terminal and disconnect the cable.

Wait for 15 minutes to let the car's computer reset, which might turn off the check engine light. Then, reconnect the negative cable and tighten the nut securely.

Here's a summary of the steps and how long each takes:

  • Turn off the ignition: Immediately.
  • Locate the battery: Takes 1-2 minutes.
  • Disconnect the battery: Wait for 15 minutes.
  • Reconnect the battery: Takes 2-3 minutes.

After completing these steps, start your car. The check engine light should be off if the reset was successful. This method only resets the light and doesn't fix any problems causing the light to turn on. If the light comes back on, you might need to check for error codes or see a professional.

Checking for Error Codes

monitoring for system issues

If your Toyota Corolla's check engine light turns on again after resetting, it likely means the problem hasn't been fixed. Before resetting the light, check for error codes to identify the issue. Your Corolla has an OBD-II system that checks the engine and other important parts. This system tells you there's a problem when the check engine light is on. To find out what's wrong, you need to read these error codes.

Here's how to do it:

  1. Use an OBD-II Scanner:
  • Get an OBD-II scanner. These tools are easy to use and connect to your car's computer. Find the OBD-II port under the dashboard on the driver's side, plug in the scanner, turn the ignition to the 'on' position without starting the engine, and the scanner will get the codes from the car's computer.
  1. Understand the Codes:
  • Look up the codes online or in the scanner's manual to find out what they mean. Each code tells you about a specific problem.
  1. Fix the Problem:
  • Decide how to fix the issue based on the codes. Some problems you might be able to fix yourself, but others might need a professional.

Disconnecting the Battery

To reset the check engine light in your Toyota Corolla, you might disconnect the battery. Do this carefully to avoid problems. Turn off the car and park it safely. Open the hood to find the battery. Look for the negative terminal, marked with a minus (-) sign or a black cap. Use a wrench to loosen the nut on this terminal and remove the cable without touching the positive terminal or causing a short circuit.

Wait for about 15 minutes. This lets the car's computer reset, clearing the check engine light and error codes. Then, reattach the negative cable and tighten it with the wrench.

Start the car. If the check engine light is off, the issue might've been minor. If it comes back on, the problem needs more attention. Disconnecting the battery only resets the system; it doesn't fix mechanical problems. It's a starting point for troubleshooting but not a solution for serious issues.

Visiting a Professional

seeking expert advice online

If your Toyota Corolla's check engine light turns on again after you reset it, you should see a car expert for a detailed check. Here's what happens when you do:

  1. Diagnosis: The expert will use a special tool to find out what's wrong by reading the car's computer codes. This tells them exactly what needs fixing.
  2. Explanation: A good mechanic will clearly explain what's wrong and how much it will cost to fix it. Ask questions if you need to understand better.
  3. Repair: Once you agree to the fix, the mechanic will use good parts to solve the problem. After the repair, they'll turn off the check engine light, and it should stay off if the issue is completely fixed.

Conclusion

You've been working on the check engine light in your Toyota Corolla. You've tried a few things like resetting it, checking for any error messages, and even disconnecting the battery.

But, the light is still on. Now, it's time to ask a mechanic for help. It's important not to ignore this light because it could cause bigger problems later.

A mechanic can find out what's wrong and fix it, so your Corolla stays in good shape for a long time.

How to Change Car Headlight Bulb Toyota Corolla


To change a Toyota Corolla headlight bulb, gather basic tools. Access the headlight assembly and remove the old bulb. Install the new one with precision, ensuring proper alignment and connection for safe night driving.

Adding a double new line for clarity:

To change a Toyota Corolla headlight bulb, gather basic tools. Access the headlight assembly and remove the old bulb. Install the new one with precision, ensuring proper alignment and connection for safe night driving.

Gather Your Tools

organize your work station

Before changing your Toyota Corolla's headlight bulb, it is important to gather the necessary tools. This includes acquiring a new headlight bulb that is compatible with your specific Corolla model. The right bulb can be identified by referencing your car's manual or by searching online. Additionally, you will need a set of hand tools, such as a Phillips head screwdriver. It may also be beneficial to have both a flat-head and Phillips head screwdriver on hand for different parts of the process. To protect the bulb from oils on your skin, remember to wear gloves during the replacement. For improved visibility in darker areas, consider using a flashlight or headlamp. In case of minor adjustments, having electrical tape available can be helpful. Ensure you have all these tools ready before beginning the headlight bulb replacement process.

Accessing the Headlight Assembly

To change the headlight bulb in your Toyota Corolla, first open the hood to see the back of the headlight assembly. The assembly is found at the front of the car, on both sides, behind the grille.

Follow these steps:

  1. Find the Headlight Assembly: Decide if you're replacing the left or right bulb, and look at that side. The assembly has a protective cover over it.
  2. Remove Obstructions: Some models have the battery or air filter housing in the way. If so, move or take these out carefully to avoid damage.
  3. Open the Back Cover: After removing any obstacles, find the back cover of the headlight assembly. It's usually plastic with clips, screws, or a twist-off design. Open or remove it to get to the bulb.

Removing the Old Bulb

replace broken light fixture

To remove the old bulb from the headlight assembly, twist the bulb holder to the left until it comes loose. Be careful to avoid breaking it. If it doesn't come out easily, check you're twisting the right way and look for any dirt or rust that might make it harder to remove.

Once the bulb holder is loose, pull it out. The bulb will be connected to a plug. To disconnect it, hold the plug and gently pull it off the bulb. Don't pull the wires. If the plug is tight, wiggle it a bit as you pull.

Now you have the old bulb. Check the bulb holder and surrounding area for any damage or rust and make sure the headlight assembly is dry.

Be careful with the old bulb, especially if it was on recently because it could be hot. Throw it away as per your local rules because bulbs shouldn't go in the regular trash.

Now, you can put in the new bulb.

Installing the New Bulb

To install a new bulb in a Toyota Corolla's headlight:

  1. Prepare the New Bulb: Clean and dry your hands before handling the new bulb. Wearing gloves can help avoid transferring oils from your skin to the bulb, which can reduce its lifespan.
  2. Insert the New Bulb: Hold the new bulb by its base or use a clean cloth to avoid touching the glass. Align the notches or tabs on the bulb with those on the headlight assembly for a correct fit. Gently push the bulb into the socket until it's secure. Be careful not to use too much force to avoid damage.
  3. Secure the Bulb: Secure the bulb in place to prevent it from coming loose. This might require twisting it clockwise until it locks or reattaching a clip or ring from the old bulb. Ensure it's firmly in place but avoid excessive force to prevent breaking.

Installing the new bulb correctly is important for safe driving at night and meeting road regulations. The installation process may vary by the vehicle's year and model, so check the owner's manual for specific instructions.

Testing the New Headlight

inspecting vehicle s new headlight

After replacing the headlight bulb, test it to ensure it works well. First, put away your tools and close your car's hood to avoid blocking the light. Then, sit in the driver's seat to access the car's ignition and headlight switch.

Turn on the ignition, but you don't have to start the car unless it's necessary for the headlights to work. Turn on the headlights and aim them at a wall or garage door to check the light's pattern and brightness.

Look for a bright and evenly distributed light. If the light is weak or uneven, make sure the bulb is installed correctly and wasn't touched with bare hands, as skin oils can reduce the bulb's effectiveness.

Check both the low and high beams to ensure they work well. If both settings are good, your headlight bulb replacement was successful, and your car is ready for safer driving.

Conclusion

You've just changed the headlight bulb in your Toyota Corolla, so you're ready to drive safely again.

It's very important to keep your headlights working well to stay safe and make sure others are safe too.

If you're ever not sure how to change the bulb, you can look in your car's manual or ask an expert for help.

Safe driving starts with keeping your car in good shape, and changing your headlight bulb is a big part of that.

Keep your lights bright and drive safely!