To reset the maintenance light on a Toyota Highlander, push the odometer button to Trip A while the key is on, turn off the ignition after pushing the trip meter button to trip A, hold down the odometer button while turning on the ignition (don’t start the engine), and release the button when the reset completes. Resetting the maintenance light on your Toyota Highlander is a simple process that can be done in a few easy steps.
By following these instructions, you can quickly turn off the maintenance light and ensure your vehicle is running smoothly. Whether you’re a Toyota Highlander owner or a mechanic looking for a quick solution, this guide will provide you with the necessary steps to reset the maintenance light and keep your vehicle in top condition.
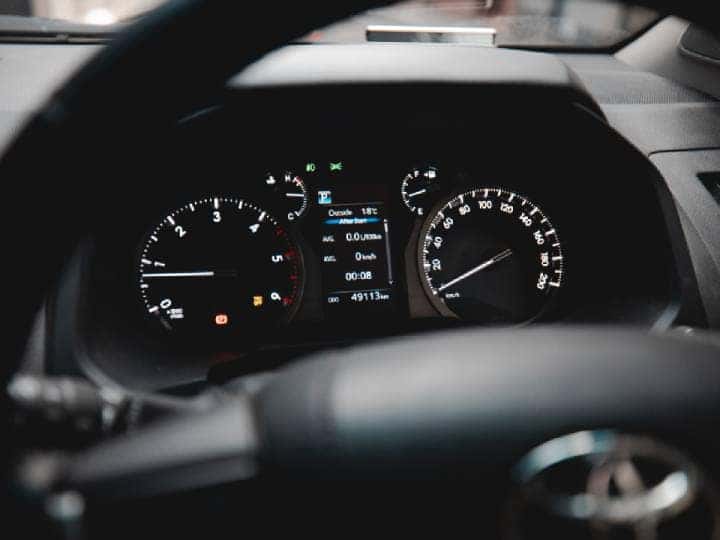
Credit: www.brentbrowntoyota.com
Methods To Reset Maintenance Light
Methods to Reset Maintenance Light on Toyota Highlander
Pushing The Odometer Button
1. Push the trip meter button to Trip A while the key is on.
2. Turn off the ignition after pushing the trip meter button to Trip A.
3. Hold down the odometer button while turning on the ignition, but don’t start the engine.
4. Release the button when the reset completes.
Using The Start Button
Just hit the start button twice without your foot on the brake. Then you can access all the displays and reset the maintenance.
Turning The Key To Position One
With the car on, toggle to Trip A using the odometer trip button. Then just hold it for a second or two, and it will reset it. Do the same for Trip B.
Credit: www.redmccombstoyota.com
Credit: m.youtube.com
Frequently Asked Questions On How To Reset Maintenance Light On Toyota Highlander
How Do You Reset The Maintenance Required Light On A Toyota?
To reset the maintenance required light on a Toyota, follow these steps: 1. Turn on the key without starting the engine. 2. Push and hold the trip meter button. 3. Turn off the key while holding the button. 4. Continue holding the button and turn on the key again.
5. Release the button when the reset is complete.
How Do You Turn Off The Maintenance Required Light On A Toyota Push Button Start?
To turn off the maintenance required light on a Toyota push button start, follow these steps: 1. Push the odometer button to Trip A while the key is on. 2. Turn off the ignition after pushing the trip meter button.
3. Hold down the odometer button while turning on the ignition, without starting the engine. 4. Release the button once the reset is complete.
How Do You Turn Off The Master Warning Light On A Toyota Highlander?
To turn off the master warning light on a Toyota Highlander, follow these steps:
1. Press the odometer button to Trip A while the key is on. 2. Turn off the ignition after you push the trip meter button to Trip A.
3. Hold down the odometer button while turning on the ignition, but don’t start the engine. 4. Release the button when the reset completes.
Conclusion
In just a few simple steps, you can reset the maintenance light on your Toyota Highlander. By following the instructions provided you can ensure that your vehicle’s maintenance light is accurately reset, allowing you to drive with peace of mind.
Keeping your vehicle in its best condition has never been easier!
How Many Catalytic Converters are in a Toyota Tacoma
The Toyota Tacoma typically has two catalytic converters.
Credit: www.tacomaworld.com
Why Catalytic Converters Are Important
A catalytic converter is an essential component of a vehicle’s exhaust system. It is responsible for converting harmful pollutants, such as carbon monoxide, nitrogen oxide, and hydrocarbons, into less harmful emissions. This process helps to reduce air pollution and protect the environment.
The function of a catalytic converter is to facilitate the chemical reactions needed for this conversion. Inside the catalytic converter, there are precious metals, such as platinum, palladium, and rhodium, which act as catalysts to speed up the reactions.
The importance of catalytic converters in vehicles cannot be overstated. They play a crucial role in ensuring that vehicles comply with emission standards and regulations. Without catalytic converters, the emissions from vehicles would be significantly higher, contributing to air pollution and its associated health risks.
Credit: www.toyotaofnorthcharlotte.com
Number Of Catalytic Converters In A Toyota Tacoma
There is a common misconception about the number of catalytic converters in a Toyota Tacoma. Many people believe that a Tacoma has only one catalytic converter, but this is not true. In fact, a Toyota Tacoma typically has two catalytic converters.
So why does a Tacoma have multiple catalytic converters? The main reason is to help reduce emissions and meet environmental regulations. By having two catalytic converters, the exhaust gases are further purified, resulting in cleaner emissions. Each catalytic converter is designed to remove specific pollutants from the exhaust gases, making the vehicle more eco-friendly.
Having multiple catalytic converters also ensures that the vehicle runs smoothly and efficiently. It helps to optimize engine performance and minimize any potential issues related to emissions. Additionally, having two catalytic converters provides a backup in case one fails or becomes clogged, ensuring that the vehicle remains compliant with emission standards.
Location Of Catalytic Converters In A Toyota Tacoma
The location of catalytic converters in a Toyota Tacoma may vary depending on the model year. However, most Toyota Tacomas have two catalytic converters, one located before the muffler and one after. These converters play a vital role in reducing harmful emissions and ensuring the vehicle meets environmental regulations.
Location of Catalytic Converters in a Toyota Tacoma
Where are the catalytic converters typically located in a Tacoma?
The Toyota Tacoma has two catalytic converters. One is located in the exhaust manifold, closer to the engine, and is known as the upstream catalytic converter. The other is located further downstream in the exhaust system, closer to the tailpipe, and is known as the downstream catalytic converter. The exact placement of the converters can vary depending on the model and year of the Tacoma. It is important to note that the placement of the catalytic converters in a Tacoma is crucial for reducing harmful emissions and ensuring compliance with environmental regulations.
Signs Of Catalytic Converter Problems
Signs of Catalytic Converter Problems:
There are a few common signs that indicate a failing catalytic converter. One of the most noticeable signs is a decrease in fuel efficiency. If you find yourself visiting the gas station more frequently than usual, it could be a result of a faulty catalytic converter. Another sign is a decrease in engine performance. You may notice that your vehicle is struggling to accelerate or that it has a lack of power. Additionally, a failing catalytic converter can cause a rotten egg smell coming from the exhaust. This is due to the converter not being able to effectively convert harmful gases. It is important to address catalytic converter issues as soon as possible, as neglecting them can lead to further damage to your vehicle’s engine. If you experience any of these signs, it is recommended to have your catalytic converter inspected and repaired or replaced if necessary.
Preventing Catalytic Converter Theft In A Toyota Tacoma
Preventing catalytic converter theft is crucial for Toyota Tacoma owners. It’s important to know that Toyota Tacomas have two catalytic converters, making them attractive targets for thieves. Protect your vehicle by investing in security measures and parking in well-lit areas.
Preventing Catalytic Converter Theft in a Toyota Tacoma
Why are Toyotas, including Tacomas, targeted for catalytic converter theft?
– Toyotas, especially Tacomas, are targeted for catalytic converter theft due to their popularity, ease of access, and high resale value of the stolen parts.
– The catalytic converters in Toyotas contain precious metals, such as platinum, palladium, and rhodium, which can be sold at a high price on the black market.
– Toyota vehicles, including Tacomas, have a reputation for reliability and longevity, making them prime targets for thieves looking to steal catalytic converters.
– The design and placement of the catalytic converter in Toyota Tacomas make it relatively easy for thieves to access and remove the component quickly without being noticed.
– The increasing demand for these precious metals in the global market has also contributed to the rise in catalytic converter thefts in recent years.
Tips for preventing catalytic converter theft:
– Park your Toyota Tacoma in a well-lit and secure area, preferably in a garage or a monitored parking lot.
– Install a catalytic converter protection device, such as a shield or cage, that makes it difficult for thieves to access and remove the converter.
– Consider engraving your vehicle identification number (VIN) or a unique identifier on the catalytic converter. This makes it easier to trace and identify stolen converters.
– Install a car alarm system that includes sensors for detecting vibrations and tilting, which are common signs of attempted catalytic converter theft.
– Use security cameras or motion-activated lights to deter potential thieves from targeting your Toyota Tacoma.
– If possible, park your vehicle in a way that makes it difficult for thieves to access the underside, such as against a wall or between other cars.
– Stay vigilant and report any suspicious activity or individuals loitering near parked vehicles to the authorities.
Alternate security measures to protect your catalytic converter:
– Consider installing a catalytic converter theft deterrent device, such as a catalytic converter lock or a GPS tracker that can alert you if the converter is tampered with or stolen.
– Park in well-populated areas or near security cameras to reduce the risk of theft.
– Speak to your local dealership or auto repair shop about additional security options, such as reinforcing the catalytic converter with a protective coating or installing security bolts.
– Explore insurance options that cover theft of catalytic converters and provide compensation for the replacement cost.
– Stay informed about local news and community alerts regarding catalytic converter thefts in your area.
– Consider joining a neighborhood watch or forming a community group to raise awareness and prevent catalytic converter theft in your community.
Credit: www.motortrend.com
Frequently Asked Questions Of How Many Catalytic Converters Are In A Toyota Tacoma
Do Tacomas Have Two Catalytic Converters?
Toyota Tacomas typically have two catalytic converters.
Can You Drive A Toyota Tacoma Without A Catalytic Converter?
Yes, you can drive a Toyota Tacoma without a catalytic converter, but it is strongly discouraged. Once the catalytic converter is missing, the exhaust is released into the outside air.
Are Tacomas Targeted For Catalytic Converter Theft?
Yes, Tacomas are targeted for catalytic converter theft due to their value and accessibility.
Conclusion
Overall, it is clear that the number of catalytic converters in a Toyota Tacoma varies depending on the model and year. While older models typically have one catalytic converter, newer models, particularly V6 engines, may have two. It is important to be aware of this information if you are looking to replace or repair a catalytic converter.
However, it is also worth noting that catalytic converter theft has become a concern for Toyota Tacoma owners, and taking precautions to protect your vehicle is essential.
To reset the maintenance light on a Toyota Corolla, turn the key to the “On” position, press and hold the trip reset button, and then turn the key back to the “Off” position while still holding the button.
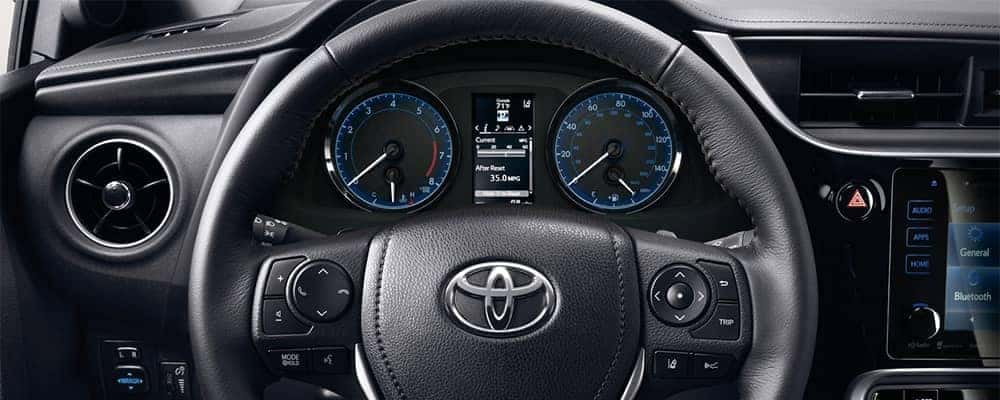
Credit: www.mariettatoyota.com
Methods To Reset Maintenance Light On Toyota Corolla
To reset the maintenance light on a Toyota Corolla, insert the key and turn it to the “On” position. Press and hold the trip reset button until “Trip A” appears on the screen. Return the key to the “Off” position and then back to “On” while still holding the button.
Method 1: Using Trip Reset Button
1. Place your key in the ignition, and turn it to the “On” position.
2. Press and hold the trip reset button.
3. Once the words “Trip A” appear, return the key to the “Off” position.
4. While holding the trip reset button down, turn the key back to the “On” position.
Method 2: Disconnecting the Battery
1. Turn off your engine and put on safety glasses and gloves.
2. Locate the negative terminal on your car battery.
3. Using a wrench, loosen the nut on the negative battery terminal and pull the negative connector from the battery.
4. Reconnect the negative cable and re-tighten it using your wrench.
These are two methods you can use to reset the maintenance light on a Toyota Corolla. The first method involves using the trip reset button. Simply place your key in the ignition and turn it to the “On” position. Next, press and hold the trip reset button until the words “Trip A” appear. Then, return the key to the “Off” position while still holding the trip reset button down. Finally, turn the key back to the “On” position.
If the first method doesn’t work for you, you can try the second method which involves disconnecting the battery. Start by turning off your engine and putting on safety glasses and gloves. Locate the negative terminal on your car battery and use a wrench to loosen the nut on the negative battery terminal. Pull the negative connector from the battery. After that, reconnect the negative cable and re-tighten it using your wrench.
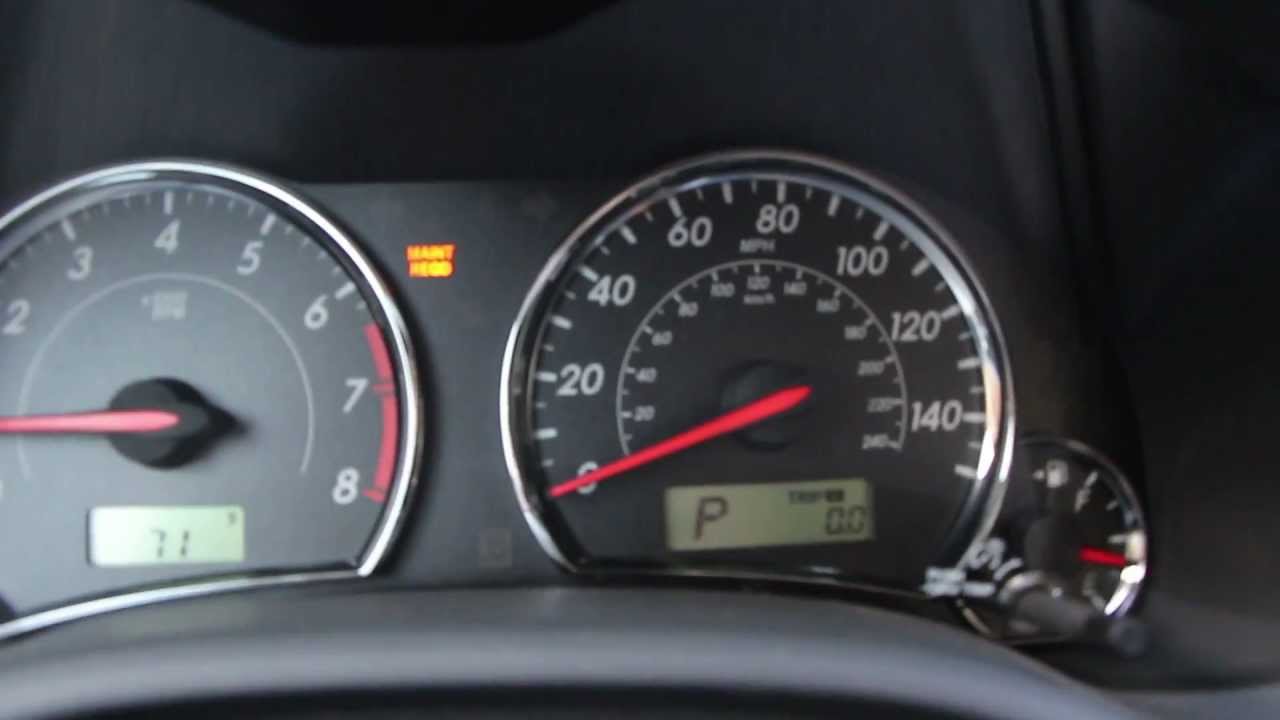
Credit: www.reddit.com
Instructions For Using Trip Reset Button
Instructions for Using Trip Reset Button:
Step 1: Turn the key to the ‘On’ position.
Step 2: Press and hold the trip reset button.
Step 3: Return the key to the ‘Off’ position.
Step 4: Turn the key back to the ‘On’ position.
If you are wondering how to reset the maintenance light on your Toyota Corolla, follow these simple steps using the trip reset button. First, turn the key to the ‘On’ position. Then, press and hold the trip reset button. Next, return the key to the ‘Off’ position. Finally, turn the key back to the ‘On’ position. By following these easy instructions, you will be able to reset the maintenance light on your Toyota Corolla without any hassle. Remember to always refer to your vehicle’s manual for specific instructions and consult a professional if you are unsure or need assistance.
Instructions For Disconnecting The Battery
Here is a simple guide on how to reset the maintenance light on a Toyota Corolla:
Turn off the engine and put on safety glasses and gloves.
Locate the negative terminal on your car battery.
Using a wrench, loosen the nut on the negative battery terminal.
Pull the negative connector from the battery.
Reconnect the negative cable and re-tighten it using your wrench.
Following these steps will help you reset the maintenance light on your Toyota Corolla. Remember to take the necessary safety precautions and consult your vehicle’s manual if you have any doubts.
Credit: m.youtube.com
Frequently Asked Questions On How To Reset Maintenance Light On Toyota Corolla
How Do You Turn Off The Maintenance Required Light On A 2017 Toyota Corolla?
To turn off the maintenance required light on a 2017 Toyota Corolla, follow these steps: 1. Place your key in the ignition and turn it to the “On” position. 2. Press and hold the trip reset button near the odometer.
3. Once “Trip A” appears on the screen, turn the key to the “Off” position while still holding the trip reset button. 4. With the trip reset button still pressed, turn the key back to the “On” position. The maintenance light should now be reset.
How Do I Erase A 2013 Corolla Maintenance Required Light?
To erase the maintenance required light on a 2013 Corolla, follow these steps:
1. Turn the key to the “On” position. 2. Press and hold the trip reset button near the odometer. 3. After “Trip A” appears on the screen, turn the key to the “Off” position.
4. While holding the trip reset button, turn the key back to the “On” position. 5. Release the trip reset button. The maintenance required light should be reset.
How Do You Reset The Maintenance Light On A Toyota Push To Start?
To reset the maintenance light on a Toyota push to start, turn the key to the “On” position, press and hold the trip reset button, wait for “Trip A” to appear, turn the key to the “Off” position, and release the button.
Done!
Conclusion
Resetting the maintenance light on your Toyota Corolla is a simple process that can save you time and money. By following the steps outlined in this blog post, you can easily reset the maintenance light and keep your Corolla in top condition.
Whether you are a seasoned DIYer or new to car maintenance, these instructions are easy to follow and will help you reset the maintenance light with confidence. Don’t let the maintenance light on your Corolla be a cause for stress – use this guide to reset it and keep your car running smoothly.
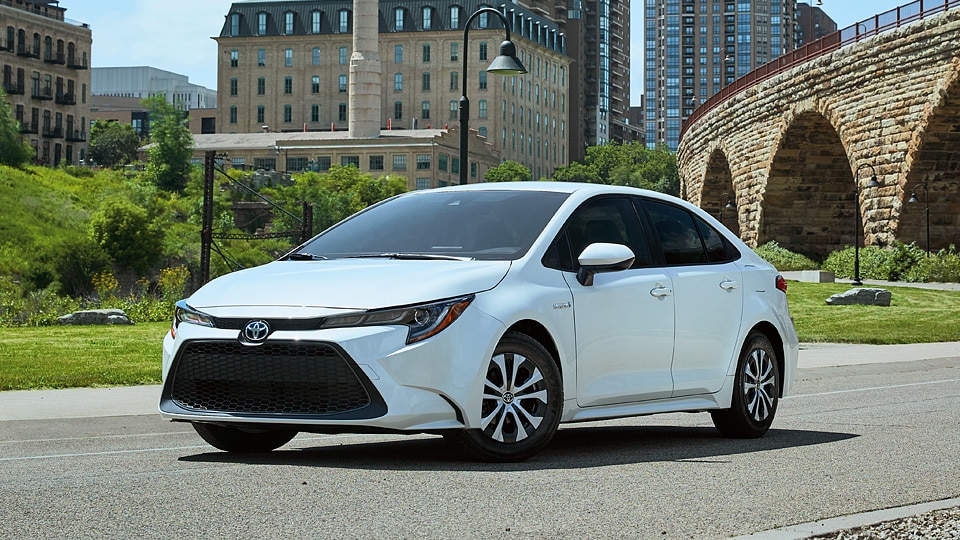
Toyota Camrys can last for hundreds of thousands of miles with proper maintenance and care. With features that help it withstand the test of time, the Toyota Camry is known for its reliability and durability.
Credit: www.galaxytoyota.net
Factors That Determine Longevity
When it comes to the longevity of Toyota Camrys, there are several factors that determine how long they last. The quality of build plays a significant role in the lifespan of a Camry. Toyota is known for its strong and durable construction, ensuring that the vehicle can withstand regular wear and tear. Additionally, proper maintenance and care are essential for maximizing the longevity of a Camry. Regular servicing, oil changes, and inspections can prevent mechanical issues and extend the lifespan of the vehicle. Moreover, driving habits also play a role in the durability of a Camry. Gentle acceleration, smooth braking, and avoiding harsh driving conditions can contribute to a longer lifespan.
Credit: www.bergetoyota.com
Average Lifespan Of Toyota Camrys
When it comes to the average lifespan of a Toyota Camry, research findings and statistics show that these vehicles can last a long time, with many examples reaching high mileage. The Camry is known for its reliability and durability, allowing it to remain on the road for hundreds of thousands of miles. The Toyota Camry has a reputation for being a well-crafted midsize sedan with features that contribute to its longevity. Many people have reported that their Camrys have lasted them for many years without any major issues. While the exact lifespan can vary depending on factors such as maintenance, driving habits, and environmental conditions, it is not uncommon to find Toyota Camrys that have been on the road for well over a decade. Overall, Toyota Camrys are known for their longevity and can provide reliable transportation for many years.
Longevity Of Different Camry Generations
The longevity of different generations of Toyota Camrys can vary. When it comes to early models, they have been known to last for many years with proper maintenance. These older models, such as those from the early 2000s, have a reputation for being durable and reliable.
On the other hand, recent models of Toyota Camry have continued this tradition of longevity. With advancements in technology and engineering, newer Camrys are designed to last even longer. The introduction of hybrid models has further enhanced the lifespan of these vehicles.
Overall, Toyota Camrys have a good track record for lasting a long time. With regular maintenance and care, they can often reach hundreds of thousands of miles. So whether you’re driving an older Camry or a newer one, you can have confidence in its durability and longevity.
Credit: www.kingstoyota.com
Tips To Extend The Lifespan Of A Toyota Camry
Toyota Camrys are known for their longevity and reliability. With proper care and regular maintenance, a Toyota Camry can last for many years.
Regular maintenance is the key to extending the lifespan of a Toyota Camry. This includes routine oil changes, tire rotations, and brake inspections. Keeping up with these maintenance tasks can prevent premature wear and tear on the vehicle.
Replacing worn parts is another important step in prolonging the life of a Toyota Camry. This includes replacing the timing belt, spark plugs, and filters as recommended by the manufacturer.
Additionally, practicing good driving habits can also help extend the lifespan of a Toyota Camry. Avoiding aggressive driving, excessive idling, and unnecessary heavy loads can reduce strain on the engine and other components.
In conclusion, by following a regular maintenance schedule, replacing worn parts, and adopting good driving habits, you can ensure that your Toyota Camry lasts for many years to come.
Frequently Asked Questions On How Long Do Toyota Camrys Last
Can A Toyota Camry Last 500 000 Miles?
A Toyota Camry can last up to 500,000 miles with proper maintenance and care.
Is Toyota Camry A Long Lasting Car?
Yes, the Toyota Camry is a long-lasting car known for lasting hundreds of thousands of miles.
What Is Considered High Mileage For A Toyota Camry?
A high mileage for a Toyota Camry is generally considered to be around 200,000 to 300,000 miles.
Conclusion
Toyota Camrys have a well-deserved reputation for lasting a long time. These reliable vehicles are built with quality craftsmanship and come equipped with features that contribute to their longevity. With proper maintenance and care, Camrys have been known to last hundreds of thousands of miles.
Whether you’re browsing used options or considering a new purchase, you can trust that a Toyota Camry will be a reliable companion for years to come.
How to Change Battery in Toyota Rav4 Key Fob? To change the battery in a Toyota Rav4 key fob, remove the key from the fob, open the fob, remove the green circuit board, replace the battery, and put the fob back together. It’s important to replace the battery every year or two to prevent any issues with unlocking your car.
Removing The Key Fob Shell
Replacing the battery in your Toyota Rav4 key fob is a simple process that you can do yourself. To begin, you’ll need to remove the key fob shell. Start by taking off the key ring from the fob.
Next, remove the back shell of the key fob by carefully prying it open. Once the back shell is removed, you can then take off the remote fob shell.
To access the battery, you’ll need to remove the green circuit board. Once the circuit board is removed, replace the battery with a new one. Afterward, put the fob back together and reattach the key ring.
That’s it! You have successfully changed the battery in your Toyota Rav4 key fob. Remember to replace the battery every year or two as part of regular maintenance to ensure your fob continues to function properly.
Replacing The Battery
To change the battery in your Toyota Rav4 key fob, you will need to follow a few simple steps.
First, remove the back cover of the key fob by using a small flathead screwdriver or a coin to twist and unlock it.
Once the back cover is removed, locate the battery inside and carefully remove it using a pair of tweezers or your fingers.
Take note of the battery type (usually a CR2032) and purchase a replacement battery of the same type. Insert the new battery into the key fob, making sure it is properly aligned.
Then, secure the back cover back into place until it clicks. Your Toyota Rav4 key fob should now have a new battery and be ready to use. Remember to properly dispose of the old battery in a designated recycling bin.
FAQ
How Do You Replace The Battery In A Rav4 Key?
To replace the battery in a RAV4 key, follow these steps:
1. Remove the key from the fob.
2. Open the fob and remove the green circuit board.
3. Replace the battery.
4. Put the fob back together and place the key back in.
It’s important to replace the battery every year or two for optimal performance.
What Size Battery Goes In A Toyota Rav4 Key Fob?
The Toyota RAV4 key fob uses a battery that needs to be replaced every year or two for optimal performance. To replace the battery, open the key fob, remove the green circuit board, replace the battery, put the fob back together, and place the key back in.
Can I Replace The Key Fob Battery Myself?
Yes, you can replace the key fob battery yourself. Simply open the fob, remove the green circuit board, replace the battery, and put it back together. It’s a good idea to replace the battery every year or two for proper functioning.
Wrapping Up
To ensure your Toyota Rav4 key fob continues to function properly, it’s important to know how to change the battery. By following the step-by-step instructions provided in this blog post, you can easily replace the battery in your key fob and avoid getting locked out of your vehicle.
Remember to perform this maintenance task every year or two to ensure the smooth operation of your key fob. Don’t let a dead battery ruin your day – take care of it today!