Recent Posts

How to Reset Maintenance Light on Toyota RAV4


To reset the maintenance light on a Toyota RAV4, follow these steps: Turn the ignition to the “ON” position without starting the engine. Ensure the odometer is set to display the total mileage. Turn off the ignition. Press and hold the trip meter reset button while turning the ignition back to “ON.” Continue holding the button until the maintenance light flashes and turns off. Release the button and start the engine to confirm the light is reset.

Resetting the Maintenance Light: General Steps

For most Toyota RAV4 models, the process to reset the maintenance light involves the following steps:

  1. Turn the Ignition On: Insert the key into the ignition and turn it to the “ON” position, but do not start the engine.
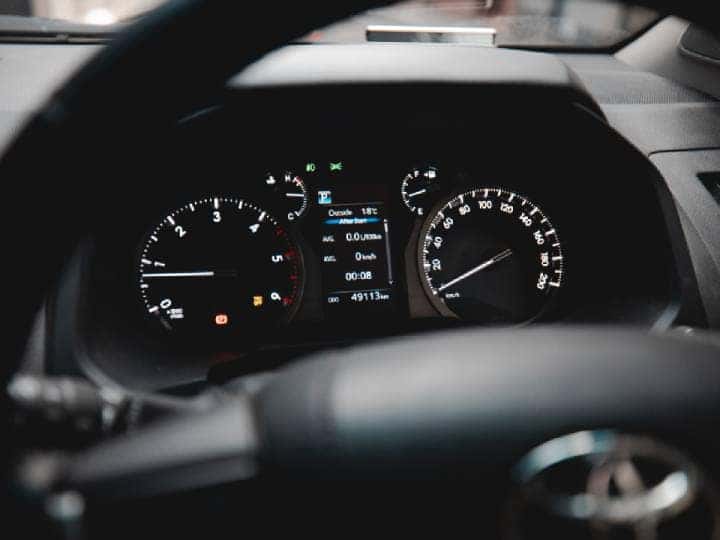
  2. Set the Odometer: Ensure the odometer is set to display the total mileage (not trip mileage).
  3. Turn Off the Ignition: Turn the key back to the “OFF” position.
  4. Press and Hold the Trip Meter Reset Button: While holding the button, turn the ignition back to the “ON” position. Continue holding the button.
  5. Wait for the Light to Flash: The maintenance light will flash, beep, and then turn off. Release the trip meter reset button.
  6. Start the Engine: Turn on the engine to ensure the maintenance light is off.

Model-Specific Instructions

Toyota RAV4 (2019-2022)

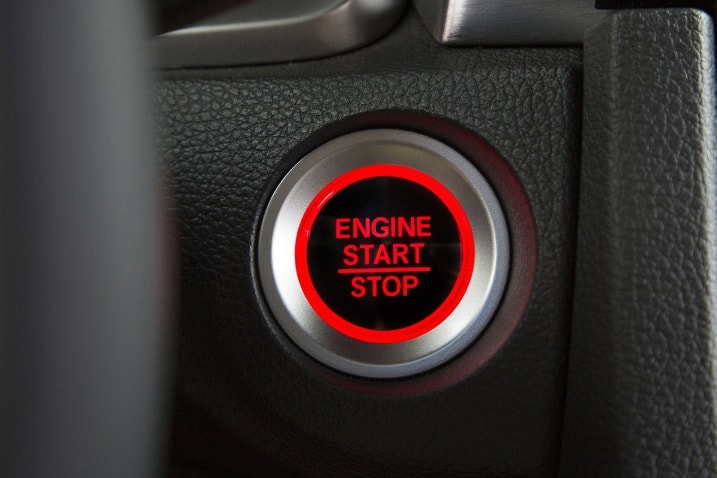
For newer models with a push-button start:

  1. Activate the Ignition: Press the start button twice without pressing the brake pedal to enter accessory mode.
  2. Access Vehicle Settings: Use the steering wheel buttons to navigate to the vehicle settings menu on the dashboard display.
  3. Reset Maintenance Data: Scroll to “Maintenance Reset” and press “OK” to confirm the reset.

Toyota RAV4 (2013-2018)

For models with a traditional key:

  1. Turn the Ignition On: Insert the key and turn it to the “ON” position without starting the engine.
  2. Display Odometer: Ensure the odometer reading is visible.
  3. Press and Hold the Trip Button: Turn the ignition off, then press and hold the trip meter reset button while turning the ignition back to “ON.”
  4. Wait for the Light to Turn Off: The maintenance light will flash and then turn off. Release the button.

Common Reasons for the Maintenance Light

  • Oil Change Required: The most common reason for the light.
  • Scheduled Maintenance: Other routine checks like tire rotation or brake inspection.
  • Sensor Issues: Occasionally, a faulty sensor might trigger the light.

Preventive Maintenance Tips

To avoid unnecessary alerts, adhere to the recommended maintenance schedule:

  • Every 3,000 Miles or 3 Months: Check engine oil, transmission fluid, and tire pressure.
  • Every 6,000 Miles or 6 Months: Inspect battery, brake pads, and rotate tires.
  • Annually: Comprehensive inspection including suspension and exhaust systems.

FAQs

Why does the maintenance light stay on after an oil change?

    The light needs to be manually reset after maintenance is completed.

    Can I drive with the maintenance light on?

      Yes, but it’s advisable to perform the necessary maintenance soon.

      What if the light comes back on immediately after resetting?

        This could indicate an underlying issue or that the reset procedure was not completed correctly.

        Is the maintenance light the same as the check engine light?

          No, the maintenance light is a reminder for routine service, while the check engine light indicates a potential problem.

          How do I know if my RAV4 needs more than just an oil change?

            Refer to the owner’s manual for a detailed maintenance schedule or consult a professional mechanic.

            How Many Seats in a Toyota Highlander


            How Many Seats in a Toyota Highlander? The Toyota Highlander offers seating for either seven or eight passengers, depending on the trim level and configuration. The base trims, such as the LE, typically come with a bench seat in the second row, allowing for eight passengers. Higher trims, like the XLE and Platinum, often feature second-row captain’s chairs, reducing the seating capacity to seven. This versatile seating arrangement makes the Highlander a popular choice for families seeking a spacious and comfortable three-row SUV.

            Seating Capacity Overview

            The Toyota Highlander typically offers seating for either seven or eight passengers. The configuration largely depends on the trim level and the options selected at the time of purchase.

            • Seven-Seater Configuration: This setup usually includes two front seats, two captain’s chairs in the second row, and a three-seat bench in the third row.
            • Eight-Seater Configuration: This configuration features a bench seat in the second row, allowing for three passengers, in addition to the three-seat bench in the third row.

            Seating by Model Year

            2022 Toyota Highlander

            • Seating Options: The 2022 Highlander offers both seven and eight-seat configurations. The base LE trim comes with eight seats as standard, thanks to a second-row bench seat. Higher trims, however, offer seven seats with the inclusion of captain’s chairs in the second row[6].

            2021 Toyota Highlander

            • Seating Options: Similar to the 2022 model, the 2021 Highlander provides options for seven or eight seats. The choice between a second-row bench and captain’s chairs determines the overall seating capacity.

            2020 Toyota Highlander

            • Seating Options: The 2020 Highlander continued the trend of offering both seating configurations. The standard setup included a bench seat in the second row, while higher trims featured captain’s chairs.

            Trim Levels and Seating Configurations

            The seating capacity in a Toyota Highlander is influenced by the trim level:

            • LE Trim: Typically comes with an eight-seat configuration due to the second-row bench seat.
            • XLE, Limited, and Platinum Trims: These trims often feature seven seats, with second-row captain’s chairs providing enhanced comfort and accessibility to the third row.

            Interior Features and Comfort

            The Toyota Highlander is designed with family comfort in mind, offering spacious seating and a range of features to enhance the driving experience:

            • Third-Row Access: The captain’s chairs in the seven-seat configuration provide easier access to the third row, which is particularly beneficial for families with children.
            • Interior Space: Both seating configurations offer ample legroom and headroom, making long journeys comfortable for all passengers.

            Comparison with Other Toyota Models

            The Toyota Highlander is often compared to the Toyota Sienna, another family-friendly vehicle:

            FeatureToyota HighlanderToyota Sienna
            Seating Capacity7 or 8 seats7 or 8 seats
            Hybrid OptionAvailableStandard

            FAQs

            What is the standard seating configuration for the Toyota Highlander?

              The standard configuration for most base models is eight seats with a second-row bench seat.

              Can I convert a seven-seat Highlander to an eight-seat configuration?

                Conversion is not typically supported by Toyota, as it involves significant changes to the interior layout.

                Is there a difference in cargo space between the seven and eight-seat configurations?

                  Cargo space remains similar, but the seven-seat configuration with captain’s chairs may offer slightly easier access to the third row.

                  Are the seating options the same for the hybrid model?

                    Yes, the hybrid version of the Highlander offers the same seating configurations as the non-hybrid models.

                    How does the seating in the Highlander compare to other midsize SUVs?

                      The Highlander’s seating capacity is competitive, offering similar options to other midsize SUVs in its class.

                      How to Roll Windows down With Key Fob Toyota


                      How to Roll Windows down With Key Fob Toyota

                      Have you ever parked your Toyota on a hot sunny day and wished you could roll down the windows before getting into the car? What if we told you there’s a hidden feature that allows you to do just that with your Toyota key fob? In this article, we’ll uncover the secret to rolling down your Toyota windows remotely using your key fob. Read on to learn how to unlock this convenient and practical feature for your Toyota vehicle.

                      Which Toyota Models Are Equipped With This Feature?

                      First things first, not all Toyota models have this functionality. This feature is typically found in newer Toyota vehicles with advanced key fob technology. Some of the models that may have this feature include the Toyota Camry, Toyota Corolla, Toyota RAV4, Toyota Highlander, Toyota Tacoma, and more. It’s essential to check your vehicle’s user manual or consult with your Toyota dealership to confirm if your specific model supports this feature.

                      How to Roll Windows down With Key Fob Toyota

                      Credit: www.wikihow.com

                      How to Roll Windows down With Key Fob Toyota

                      Credit: m.youtube.com

                      How to Activate the Window Roll-Down Feature

                      If your Toyota vehicle is equipped with this feature, activating it is fairly straightforward. Follow these simple steps to get started:

                      1. Stand within range of your vehicle and ensure the doors are locked.
                      2. Press and hold the “Unlock” button on your Toyota key fob.
                      3. As you continue to hold the “Unlock” button, observe the windows as they begin to roll down automatically.

                      By following these easy steps, you can conveniently lower the windows of your Toyota vehicle from a distance, allowing for improved ventilation and temperature control before you even step inside.


                      Practical Uses of Rolling Down Your Windows With the Key Fob

                      While the ability to roll down the windows with your key fob may seem like a small convenience, it can actually prove to be quite practical in various situations. Here are some scenarios where this feature can come in handy:

                      • On a hot day, you can lower the windows remotely to let out the accumulated heat before entering the car.
                      • If you’ve forgotten to lower the windows and need to ventilate the car after it’s been parked in the sun for an extended period.
                      • Allowing for quick and efficient ventilation of the vehicle before your passengers get in.

                      By making use of this feature, you can enhance the comfort and convenience of your Toyota driving experience, especially during extreme weather conditions.

                      Frequently Asked Questions For How To Roll Windows Down With Key Fob Toyota

                      Can You Roll Down The Windows With A Toyota Key Fob?

                      Yes, you can roll down the windows with a Toyota key fob. By pressing the unlock button twice and holding it on the second press, you can lower the windows remotely.

                      Will Rolling Down The Windows With The Key Fob Drain The Car Battery?

                      No, rolling down the windows with the key fob will not drain the car battery. The key fob uses a minimal amount of power to activate the window mechanism, so it won’t significantly impact the battery life.

                      Is It Possible To Roll Down All Windows At Once With The Key Fob?

                      Yes, it is possible to roll down all windows at once with the key fob. By pressing the unlock button twice and holding it down on the second press, all the windows will descend simultaneously, providing convenience and ventilation on a hot day.

                      Conclusion

                      Rolling down the windows of your Toyota using the key fob is not only a convenient feature, but it also adds a touch of practicality to your daily driving experience. By following the steps outlined in this article, you can unlock this hidden functionality and make the most out of your modern Toyota vehicle. Check your vehicle’s compatibility and start enjoying the benefits of this innovative feature today!

                      How to Reset Maintenance Light on Toyota Highlander 2018


                      How to Reset Maintenance Light on Toyota Highlander 2018? To reset the maintenance light on a 2018 Toyota Highlander, turn the ignition to the “on” position, but do not start the engine. Press and hold the trip meter reset button.

                      Then, turn the ignition off and start the engine to confirm that the maintenance light has been reset. When it comes to keeping your Toyota Highlander in top condition, resetting the maintenance light is an important task. It ensures that you stay on top of your vehicle’s service needs and maintains its reliability.

                      By following a few simple steps, you can easily reset the maintenance light on your Toyota Highlander 2018 model. This article will guide you through the process, so you can quickly and effortlessly reset the maintenance light and continue enjoying a smooth driving experience.

                      How to Reset Maintenance Light on Toyota Highlander 2018

                      Credit: www.brentbrowntoyota.com

                      How to Reset Maintenance Light on Toyota Highlander 2018

                      Credit: m.youtube.com

                      Frequently Asked Questions For How To Reset Maintenance Light On Toyota Highlander 2018

                      How Do I Reset The Maintenance Light On My Toyota Highlander 2018?

                      To reset the maintenance light on your Toyota Highlander 2018, follow these simple steps:
                      1. Turn the ignition key to the “ON” position without starting the engine. 2. Press the trip meter reset button until you see “Trip A” or “Trip B” displayed on the screen. 3. Turn off the ignition and then press and hold the trip meter reset button. 4. While holding the button, turn the ignition key to the “ON” position again. 5. Continue holding the button until the maintenance light starts to flash and then release it. 6. The maintenance light should now be reset and you can start your engine.

                      What Does The Maintenance Light On A Toyota Highlander 2018 Indicate?

                      The maintenance light on a Toyota Highlander 2018 indicates that your vehicle is due for a scheduled maintenance service. It is a reminder to take your car to the service center for an oil change, tire rotation, or other routine maintenance tasks.

                      Ignoring this light could lead to potential issues with your vehicle’s performance and longevity, so it’s important to address it promptly.

                      How Often Should I Perform Maintenance On My Toyota Highlander 2018?

                      To keep your Toyota Highlander 2018 running smoothly, it is recommended to follow the manufacturer’s maintenance schedule outlined in your owner’s manual. Generally, it is best to perform routine maintenance tasks such as oil changes, tire rotations, and fluid checks every 5,000 to 7,500 miles or every 6 months, whichever comes first.

                      However, it’s always a good idea to consult your owner’s manual for specific recommendations based on your driving habits and conditions.

                      Conclusion

                      Keeping up with the maintenance of your Toyota Highlander 2018 is crucial for its longevity. By knowing how to reset the maintenance light yourself, you can save time and money. Follow the simple steps outlined in this blog to keep your Highlander running smoothly for years to come.

                      Drive confidently!

                      How to Reset the Maintenance Light on a Toyota Highlander


                      How to Reset the Maintenance Light on a Toyota Highlander? To reset the maintenance light on a Toyota Highlander, turn the ignition key to the “off” position, press and hold the trip meter button, and then turn the key to the “on” position while still holding the button. Once the maintenance light starts flashing, release the trip meter button and start the vehicle to confirm the reset.

                      If you drive a Toyota Highlander, you may have noticed the maintenance light on your dashboard, indicating that it’s time for a service check. Knowing how to reset this light can save you time and money by avoiding unnecessary trips to the mechanic.

                      In this guide, we’ll walk you through the simple steps to reset the maintenance light on your Toyota Highlander, ensuring that you can keep your vehicle in top condition without any hassle. Let’s dive in and learn how to reset the maintenance light on your Toyota Highlander with ease.

                      How to Reset the Maintenance Light on a Toyota Highlander

                      Credit: www.redmccombstoyota.com

                      Resetting The Maintenance Light

                      Resetting the Maintenance Light on your Toyota Highlander is a simple yet essential task to ensure your vehicle is well-maintained.

                      Method 1: Using The Trip Meter Button

                      1. Insert the key into the ignition and turn it to the “On” position without starting the engine.

                      2. Locate the Trip button on the dashboard and press and hold it.

                      3. While holding the Trip button, turn the key to the “Off” position.

                      4. Continue holding the Trip button and turn the key back to the “On” position. The maintenance light should reset.

                      Method 2: Using The Dashboard Controls

                      1. Turn the ignition key to the “On” position without starting the engine.

                      2. Locate the Odometer button on the dashboard and press it until the odometer reading is displayed.

                      3. Turn the key to the “Off” position while still pressing the Odometer button.

                      4. Turn the key back to the “On” position. The maintenance light should be reset.

                      How to Reset the Maintenance Light on a Toyota Highlander

                      Credit: m.youtube.com

                      How to Reset the Maintenance Light on a Toyota Highlander

                      Credit: www.brentbrowntoyota.com

                      Frequently Asked Questions For How To Reset The Maintenance Light On A Toyota Highlander

                      How Do I Reset The Maintenance Light On A Toyota Highlander?

                      To reset the maintenance light on a Toyota Highlander, simply follow these steps:
                      1. Insert the key into the ignition and turn it to the “ON” position without starting the engine. 2. Locate the trip odometer reset button and hold it down. 3. While holding the reset button, turn the key to the “OFF” position. 4. Release the reset button, then turn the key to the “ON” position again. 5. The maintenance light should now be reset and turned off.

                      Why Is My Toyota Highlander’s Maintenance Light On?

                      If the maintenance light on your Toyota Highlander is on, it is an indication that your vehicle is due for routine maintenance. This can include oil changes, fluid checks, tire rotations, and other regular maintenance tasks. It’s important not to ignore this light, as neglecting scheduled maintenance can lead to costly repairs and decreased performance.

                      How Often Should I Reset The Maintenance Light On My Toyota Highlander?

                      The maintenance light on a Toyota Highlander should be reset after each routine maintenance is performed. This ensures that the light accurately reflects the next scheduled maintenance interval. It is recommended to consult your vehicle’s owner manual for specific maintenance schedule and guidelines.

                      Generally, routine maintenance should be performed every 5,000 to 7,500 miles or as recommended by the manufacturer.

                      Conclusion

                      Resetting the maintenance light on your Toyota Highlander is a simple task. By following the steps outlined in this post, you can easily take control of your vehicle’s maintenance alerts. Stay proactive and ensure your car runs smoothly for years to come.

                      Keep driving confidently!

                      How to Turn off Maintenance Light on Toyota Push Button Start


                      How to Turn off Maintenance Light on Toyota Push Button Start? To turn off the maintenance light on a Toyota with push button start, first press the “Engine Start Stop” button without pressing the brake pedal to switch the ignition to “On” mode. Then, use the trip meter reset button to select “Settings” and press and hold the trip meter reset button to enter the maintenance light reset mode.

                      Owners of Toyota vehicles with push button start may find it helpful to know how to turn off the maintenance light, which indicates that the vehicle is due for service. By following a few simple steps, you can reset the maintenance light yourself, saving time and money.

                      This article provides a clear and easy-to-follow guide on turning off the maintenance light on a Toyota with push button start, enabling you to keep your vehicle in optimal condition.

                      How to Turn off Maintenance Light on Toyota Push Button Start

                      Credit: www.caranddriver.com

                      Methods To Turn Off The Maintenance Light

                      Resetting The Maintenance Light Using The Odometer

                      Start your Toyota and ensure odometer is on total mileage display.

                      Turn off the engine; press and hold the trip reset button.

                      While holding, start the engine and continue holding until light turns off.

                      Resetting The Maintenance Light Using The Trip Button

                      Start your car and ensure trip meter A is displayed.

                      Turn off the engine, press and hold the trip button, then start the car.

                      Hold until the trip meter resets to zero, and maintenance light goes off.

                      Resetting The Maintenance Light Using The Display Button

                      Start the car and make sure the display shows the odometer reading.

                      Turn off the engine, press and hold the display button, and then start the car.

                      Hold until the display shows ‘000000’ and the maintenance light goes off.

                      How to Turn off Maintenance Light on Toyota Push Button Start

                      Credit: www.edmunds.com

                      How to Turn off Maintenance Light on Toyota Push Button Start

                      Credit: m.youtube.com

                      Frequently Asked Questions For How To Turn Off Maintenance Light On Toyota Push Button Start

                      How Do I Turn Off The Maintenance Light On Toyota Push Button Start?

                      To turn off the maintenance light on a Toyota push button start, follow these simple steps:
                      1. Press the “Engine Start/Stop” button twice without stepping on the brake pedal. 2. Cycle through the trip meters until you reach “Trip A.” 3. Press and hold the “Engine Start/Stop” button until the trip meter resets and the maintenance light turns off.

                      Why Is My Maintenance Light On In My Toyota Push Button Start?

                      The maintenance light in a Toyota push button start may turn on due to various reasons such as routine maintenance, low engine oil, or a malfunctioning sensor. It is essential to consult your owner’s manual or visit a certified mechanic to diagnose the exact cause.

                      Can I Drive With The Maintenance Light On My Toyota Push Button Start?

                      Yes, you can drive with the maintenance light on your Toyota push button start. However, it is recommended to schedule an appointment with a certified mechanic to identify and address the underlying issue as soon as possible to avoid potential damage and costly repairs.

                      Conclusion

                      Maintaining your Toyota is crucial for longevity. Easily turning off the maintenance light is essential. Keeping up with routine vehicle checks is key. Remember, staying on top of maintenance ensures a smooth driving experience. Simple steps like this save time and money in the long run.