Recent Posts

2010 Equinox Timing Chain


The 2010 Equinox may require a timing chain replacement. Signs of a bad timing chain include a rattle or slapping sound from under the hood or misfiring and rough running.

It is recommended to replace the timing chain if these issues are present. You can find timing chain replacement kits for the 2010 Equinox on various online platforms such as Amazon, AutoZone, and O’Reilly Auto Parts. Additionally, you can also consult a Chevrolet repair expert for further assistance.

2010 Equinox Timing Chain

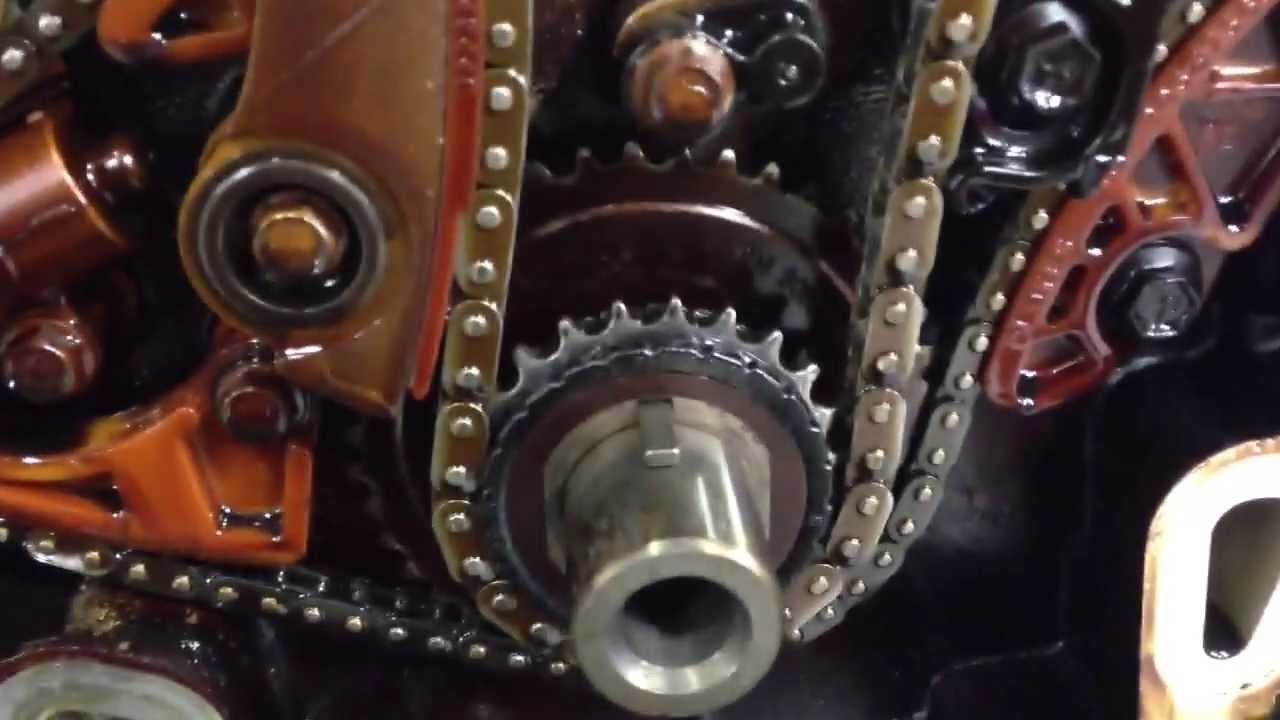
Credit: www.youtube.com

Overview Of 2010 Equinox Timing Chain

Common Timing Chain Issues:

  • You may hear a rattle or slapping sound from under the hood, which could indicate the chain is slapping the block or cover because it has stretched significantly and needs to be replaced.
  • Misfiring, poor idle, and rough running could mean the chain has jumped a tooth and the timing is off.

When to Replace Timing Chain:

  • If you experience any of the above signs, it is advisable to replace the timing chain as soon as possible to avoid further engine damage.

DIY Timing Chain Replacement:

  • If you have the necessary knowledge, tools, and experience, you can attempt to replace the timing chain yourself. However, it is recommended to consult a professional mechanic for this job to ensure it is done correctly.
2010 Equinox Timing Chain

Credit: s.click.aliexpress.com

Common Timing Chain Issues

Common Timing Chain Issues
Years with Timing Chain Problems
2010 Equinox

Signs of a bad timing chain include hearing a rattle or slapping sound from under the hood, which could indicate that the chain is slapping the block or cover due to significant stretching and should be replaced. Additionally, misfiring, poor idle, and rough running can indicate that the chain has jumped a tooth and the timing is off.

If you own a Chevrolet Equinox and you are wondering when to replace the timing chain, it is recommended to refer to the vehicle’s owner manual or consult with a professional mechanic. It is important to stay vigilant and address any timing chain issues promptly to avoid further damage to the engine.


Signs Of A Bad Timing Chain

You may hear a rattle or slapping sound from under the hood, which could indicate the chain is slapping the block or cover because it has stretched significantly and needs to be replaced. Misfiring, poor idle, and rough running could mean the chain has jumped a tooth and the timing is off.


Here are some signs of a bad timing chain:

  • Rattling or slapping sound from under the hood
  • Misfiring
  • Poor idle

When To Replace Timing Chain

When it comes to the timing chain of a 2010 Equinox, it is important to know when to replace it. Guidelines for replacement include listening for a rattle or slapping sound from under the hood, which can indicate a stretched chain that needs to be replaced. A misfiring engine, poor idle, and rough running can also be signs of a timing chain issue. If the chain has jumped a tooth, the timing may be off. It is recommended to check the timing chain regularly and replace it as needed to ensure proper engine function. Various websites and online retailers offer timing chain kits specifically for the 2010 Equinox, such as AutoZone, Advance Auto Parts, Amazon, and O’Reilly Auto Parts. It is important to choose a reputable seller and consider factors such as price, return policy, and delivery options.

Diy Timing Chain Replacement

Tools and Equipment Needed:
  • Socket set
  • Torque wrench
  • Ratchet
  • Timing chain kit
  • Lubricating oil
  • RTV silicone sealant
  • Gasket scraper
  • Screwdriver
  • Shop towels
  • Engine hoist
  • Engine support bar
  • Jack stands
  • Block of wood

If you’re experiencing issues with the timing chain on your 2010 Equinox, you might be considering a DIY timing chain replacement. This can be a complex process, but with the right tools and equipment, it is definitely something you can tackle yourself. Here is a step-by-step guide to help you through the process.

1. Start by gathering all the necessary tools and equipment. You’ll need a socket set, torque wrench, ratchet, timing chain kit, lubricating oil, RTV silicone sealant, gasket scraper, screwdriver, shop towels, engine hoist, engine support bar, jack stands, and a block of wood.

2. Begin by removing the necessary components to access the timing chain. This may include removing the PCM, air box, valve cover, front timing cover, and timing chain tensioner.

3. Once the timing chain is exposed, carefully remove it and replace it with the new timing chain from the timing chain kit. Make sure to lubricate the chain with oil before installing it.

4. Reinstall all the components you previously removed, following the reverse order of removal. Use RTV silicone sealant and a gasket scraper to ensure a proper seal.

5. After everything is reinstalled, double-check the timing marks to ensure they are lined up correctly and the timing is set properly.

By following these step-by-step instructions and using the right tools and equipment, you can successfully replace the timing chain on your 2010 Equinox. Make sure to take your time and be cautious throughout the process for the best results.

2010 Equinox Timing Chain

Credit: www.terrainforum.net

Frequently Asked Questions For 2010 Equinox Timing Chain

How Much Does A Timing Chain Cost For A 2010 Chevy Equinox?

A timing chain for a 2010 Chevy Equinox can cost around $51. 20 to $303. 83 on Amazon. com.

When Should I Replace My Timing Chain On My Chevy Equinox?

It is recommended to replace the timing chain on your Chevy Equinox if you hear a rattle or slapping sound from under the hood, experience misfiring, poor idle, or rough running. These could indicate a stretched chain or timing issues.

To ensure accuracy, consult a professional mechanic for proper diagnosis and replacement.

What Years Did Equinox Have Timing Chain Issues?

Equinox had timing chain issues in various years.

Conclusion

If you’re experiencing issues with the timing chain in your 2010 Equinox, it’s important to address them promptly. Signs such as a rattling sound or misfiring could indicate a stretched or jumped timing chain. While timing chain replacement can be a complex task, it’s best left to a professional mechanic to ensure the job is done correctly.

By taking action and getting the timing chain replaced as needed, you can restore the performance and reliability of your Equinox.

2014 Subaru Forester Key Stuck in Ignition


If your 2014 Subaru Forester key is stuck in the ignition, try unlocking the steering wheel, jiggling the key cylinder, and shaking the gear selector to resolve the issue. This can happen due to a binding steering column/lock, ignition switch problem, or an issue with the key itself.

Common Causes Of Key Stuck In Ignition

If your 2014 Subaru Forester key is stuck in the ignition, it could be due to a binding steering column/lock, an ignition switch issue, or a problem with the key itself. Try unlocking the steering wheel, jiggling the key, or shaking the gear selector to resolve the issue.

Common Causes of Key Stuck in Ignition
Binding Steering Column/Lock
One common cause of a key getting stuck in the ignition of a 2014 Subaru Forester is a binding steering column or lock. This can happen when the steering wheel is turned too far to the left or right, activating the locking mechanism. To unlock, try gently jiggling the steering wheel while turning the key. If this doesn’t work, a locksmith or auto repair professional may need to be consulted to disassemble and repair the steering column or lock.
Ignition Switch Issue
Another cause of a key getting stuck in the ignition is an issue with the ignition switch itself. Over time, the switch can wear out or become faulty, preventing the key from turning and releasing. In this case, it may be necessary to replace the ignition switch to resolve the problem.
Problem with Ignition Key
In some cases, the problem may lie with the ignition key itself. If the key is damaged, worn, or bent, it may not properly engage with the ignition tumblers, resulting in the key becoming stuck. In such situations, obtaining a replacement key from a Subaru dealer or locksmith may be necessary to solve the issue.
2014 Subaru Forester Key Stuck in Ignition

Credit: www.subaruoutback.org

Fixing A Key Stuck In Ignition

In this blog post, we will discuss how to fix a key stuck in the ignition of a 2014 Subaru Forester. If you find yourself in this situation, there are a few steps you can take to try and resolve the issue. Firstly, try unlocking the steering wheel. Many cars have a locking mechanism that can be activated when the steering wheel is turned too far to the left or right. Jiggle your key by using your left index finger to push down on the key cylinder. This may help to release any tension or obstruction preventing the key from turning. Finally, shake the gear selector to ensure it is fully engaged in the park position. These simple techniques may help to resolve the issue and allow you to remove the key from the ignition.


Video Tutorials

Video Tutorials:
Steering Column and Wheel Removal
  • Fix Subaru Forester key stuck in ignition – YouTube video by Yakfish Taco
  • Hecks Tennis YouTube video – Subaru key not turning solution
  • South Main Auto Repair YouTube video – Subaru Impreza key will not come out of ignition

If your Subaru Forester’s key is stuck in the ignition, there are several video tutorials available that can help you troubleshoot and fix the issue. The first video by Yakfish Taco provides a step-by-step guide, including steering column and wheel removal. In the video by Hecks Tennis, you can find an easy solution to the problem. The video by South Main Auto Repair specifically addresses the key interlock system and park range switch. These videos offer valuable insights into identifying and resolving the key stuck in the ignition issue. Remember to follow the instructions carefully and exercise caution while working on your vehicle.

2014 Subaru Forester Key Stuck in Ignition

Credit: www.reddit.com

Professional Solutions

If you’re experiencing the issue of your 2014 Subaru Forester key getting stuck in the ignition, professional solutions are available to help. Get expert assistance for unlocking the steering wheel, jiggling your key, or shaking the gear selector to resolve the problem.

Contacting Locksmith Services

If you find yourself with a key stuck in the ignition of your 2014 Subaru Forester, there are professional solutions available to help you. One option is to contact locksmith services that specialize in automotive lock and key issues. Locksmiths are trained and experienced in dealing with ignition-related problems and can provide you with the necessary repairs. Another option is to seek repairs at a dealership. Dealerships have technicians who are familiar with Subaru vehicles and can diagnose and fix the issue. Whether you choose to contact a locksmith or visit a dealership, it’s important to address the problem as soon as possible to ensure the safe operation of your vehicle.

Preventing Key Stuck In Ignition

Regular maintenance and lubrication are essential for preventing key stuck in the ignition. By keeping the ignition system in good condition, you can avoid any potential issues. Here are some tips to help you prevent key stuck in ignition:

  • Regularly clean and lubricate the key and ignition cylinder with a silicone-based lubricant.
  • Ensure that the key is not bent, damaged, or worn down.
  • Handle the key with care and avoid excessive force while inserting or removing it.
  • Do not force the key if it is difficult to turn. Instead, try jiggling the key gently to remove any debris or stiffness.
  • If the key is still stuck, try unlocking the steering wheel by jiggling it back and forth while applying slight pressure on the key.
  • Consult a professional locksmith or your car manufacturer for further assistance if the problem persists.

Remember, taking proactive steps to maintain your ignition system can save you from the frustration of a key stuck in the ignition.

2014 Subaru Forester Key Stuck in Ignition

Credit: m.youtube.com

Frequently Asked Questions For 2014 Subaru Forester Key Stuck In Ignition

Why Does My Key Get Stuck In The Ignition Subaru?

If your key gets stuck in the ignition of your Subaru, there are a few possible reasons for this issue. It could be due to a binding steering column or lock, an ignition switch problem, or an issue with the key itself.

Try unlocking the steering wheel, jiggling the key, or shaking the gear selector to resolve the problem.

What Do I Do If My Key Won’t Come Out Of The Ignition?

If your key won’t come out of the ignition, try these three steps: Unlock the steering wheel by turning it left and right, jiggle the key cylinder, and shake the gear selector. This should help release the key. If the problem persists, consult a professional locksmith or contact your car manufacturer for assistance.

Why Can’t I Turn The Key In My Subaru Forester?

If you can’t turn the key in your Subaru Forester, it could be due to a binding steering column/lock, an issue with the ignition switch, or a problem with the key itself. Try unlocking the steering wheel, jiggling the key, or shaking the gear selector.

If the problem persists, consult a professional.

Conclusion

To summarize, if you find yourself with a stuck key in the ignition of your 2014 Subaru Forester, there are a few potential causes and solutions. It could be a binding steering column/lock, an issue with the ignition switch, or a problem with the key itself.

Try unlocking the steering wheel, jiggling the key, or shaking the gear selector. If the problem persists, it may be best to consult a professional locksmith or mechanic for assistance.

How Much Does a Car Repair Cost


Car repair costs vary depending on the type of repair needed and the location. In Austin, Texas, the average cost of a car repair ranges from $200 to $500.

Factors such as the make and model of the car, the severity of the damage, and the labor costs of the repair shop can affect the final price. It is essential to get a detailed estimate from a reputable repair facility before proceeding with any repairs to ensure a fair and accurate cost assessment.

How Much Does a Car Repair Cost

Credit: www.thezebra.com

Factors Affecting Car Repair Costs

Car repair costs can vary depending on several factors such as the type of repair needed, the make and model of the car, and the location. Understanding these factors can help you estimate how much a car repair may cost you.

Factors Affecting Car Repair Costs
Labor Costs
Diagnostic Labor – This requires training and specialized tools, which can be expensive.
Repair Labor – This requires years of training and experience, which contributes to higher costs.
Cost of Parts
The cost of parts can vary depending on the make and model of the car, as well as the specific repair needed.
Type of Repair
The type of repair required, such as engine repair or bodywork, can significantly impact the overall cost.
Car repair costs can vary depending on several factors. The labor costs involved in car repairs include diagnostic labor and repair labor. Diagnostic labor requires specialized training and tools, which can add to the expense. Repair labor, on the other hand, requires years of experience and training, contributing to higher costs. Additionally, the cost of parts can also vary depending on the make and model of the car and the specific repair needed. Finally, the type of repair required, such as engine repair or bodywork, can have a significant impact on overall costs. Therefore, it’s essential to consider these factors when estimating the cost of a car repair.
How Much Does a Car Repair Cost

Credit: hillsideautomotiverepair.com

Most Expensive Car Repairs

Most Expensive Car Repairs:
Cylinder Repair or Replacement: Cylinders are some of the primary components of your engine that can be expensive to repair or replace.
Hybrid Inverter Assembly Replacement: The hybrid inverter assembly is a crucial part of hybrid and electric vehicles, and its replacement can be quite costly.
Transmission Replacement: A transmission replacement is a major car repair that can be expensive due to the complexity and labor involved.
New Engine Head: If your engine head is damaged, it may need to be replaced, which can be a costly repair.
Hybrid Battery Replacement: Hybrid vehicles have high-voltage batteries that can be expensive to replace if they become faulty.

Car repairs can vary significantly in cost depending on the specific issue and the type of vehicle. Some repairs, such as cylinder repair or replacement, hybrid inverter assembly replacement, transmission replacement, new engine head, and hybrid battery replacement can be among the most expensive. These repairs involve complex parts, high labor costs, and specialized expertise. It’s important to budget for car repairs and consider regular maintenance to prevent costly issues in the future. If you’re unsure of the cost of a specific repair, it’s recommended to consult with a professional or use online resources that provide car repair cost estimates. Remember, proper maintenance and prompt attention to any car issues can help minimize the cost of repairs in the long run.

Average Cost Of Car Repairs

The average cost of car repairs can vary depending on the type of repair needed. From simple scratches to engine replacements, car repairs can range from a few hundred dollars to thousands. It’s important to budget for unexpected repairs and consider investing in car maintenance to minimize future costs.

Average Cost of Car Repairs
How much money do people spend on car repairs?
The cost of car repairs can vary significantly depending on the type of repair needed, the make and model of the car, and the location of the repair shop. According to a study by Chime, the average cost for car repairs is around $500 per year. However, it is important to note that this is an average and costs can be much higher for more complex repairs or for luxury vehicles. Additionally, the cost of car repairs can also vary depending on the location. For example, car repairs in Texas may be more expensive compared to other states. Overall, it is recommended to budget for car maintenance and repairs to ensure you can cover unexpected expenses.
How Much Does a Car Repair Cost

Credit: www.aaa.com

How To Get A Car Repair Estimate

Looking for a car repair estimate? Find out how much a car repair costs by using online tools like Kelley Blue Book or AAA to get an estimate. These resources can help you budget and prepare for the expense of fixing your car.

Subheading: Using Car Repair Estimator Tools
When it comes to getting a car repair estimate, there are various tools available that can help you determine the cost. One option is using car repair estimator tools provided by AAA. AAA is a trusted source for automotive services, and their estimator tool can give you an accurate estimate for the cost of your repair. Another option is to find auto repair cost information on Yelp. Yelp offers a cost guide for auto repairs in different cities, including Austin, Texas. By using Yelp, you can get an idea of the average cost for specific repairs in your area. These tools can be valuable resources in helping you get a car repair estimate and making an informed decision about your repair needs.

Reasons For Increasing Car Repair Costs

Reasons for increasing car repair costs can be attributed to higher labor costs, advanced vehicle technology, and a complex diagnostic process. Labor costs account for a significant portion of car repair expenses. Skilled technicians require specialized training and tools, making their services more expensive. Additionally, advanced vehicle technology adds to repair costs. Newer vehicles are equipped with complex systems that require specialized knowledge and equipment to diagnose and fix. The diagnostic process itself has become more intricate, as technicians need to use advanced tools and spend more time identifying the root cause of the issue. All these factors contribute to the rising costs of car repairs.

Frequently Asked Questions On How Much Does A Car Repair Cost

What Is Most Expensive To Fix In A Car?

The most expensive thing to fix in a car is the cylinder repair or replacement, followed by hybrid inverter assembly replacement, transmission replacement, new engine head, and hybrid battery replacement. These components are crucial and require specialized training and experience to repair or replace.

How Much Money Do People Spend On Car Repairs?

On average, people spend a significant amount of money on car repairs. The exact amount can vary depending on the type of repair and the extent of the damage. However, it is common for car repairs to cost several hundred dollars or even thousands of dollars.

Why Is Fixing A Car So Expensive?

Fixing a car is expensive due to the high labor costs involved. Diagnostic labor requires specialized training and tools, while repair labor requires years of experience. Additionally, the cost of parts and materials can add up, making car repairs costly.

Conclusion

Car repairs can be a financial burden, but knowing how much they cost can help you plan and budget accordingly. The cost of car repairs can vary depending on factors such as the type of repair needed and the location.

It’s important to research and gather estimates from different mechanics to ensure you’re getting a fair price. Remember, regular maintenance can help prevent costly repairs in the long run. By staying on top of your car’s maintenance needs and being prepared for any unexpected repairs, you can keep your vehicle running smoothly and your wallet happy.


Oil Leak After Oil Change


After an oil change, it is normal for a small oil drip to occur as the oil filter is being changed, but there should not be any signs of a leak after a few hours. If there is a significant oil leak, it may be due to rotted engine gaskets, oil seals, or bad connections.

To determine the source of the leak, check the oil pan seals, oil pan drain plug, timing cover seal, and valve cover gaskets. It is important to address oil leaks promptly, as they can lead to more expensive repairs and potentially dangerous situations on the road.

Common Causes Of Oil Leak After An Oil Change

Common causes of oil leak after an oil change include rotted engine gaskets, oil seals, or bad connections. It is important to check the oil pan seals, oil pan drain plug, timing cover seal, and valve cover gaskets for any signs of damage or wear. Another potential cause of oil leaks is residual oil drips, which can happen after an oil change due to the placement of the oil filter. Additionally, mechanic error can lead to oil leaks if the drain plug is not properly tightened or the oil filter is not installed correctly.

Oil Leak After Oil Change

Credit: www.audinorthmiami.com

Potential Dangers Of Ignoring An Oil Leak

Ignoring an oil leak after an oil change can lead to potential dangers and risks, including the risk of engine seizure and safety hazards on the road. It is important to address oil leaks promptly to avoid further damage to the engine and ensure the safety of both the vehicle occupants and other motorists on the road.

An oil leak, if left unaddressed, can lead to a larger and more expensive repair in the future. A small oil leak can worsen while the vehicle is in operation, causing the engine to seize. This can create a dangerous situation and increase the risk of accidents and injuries.

Common reasons for oil leaks after an oil change include rotted engine gaskets, oil seals, or bad connections. It is advisable to check the oil pan seals, oil pan drain plug, timing cover seal, and valve cover gaskets to determine the source of the leak.

How To Determine The Source Of The Oil Leak

After an oil change, it is not unusual to experience a small oil leak. This can happen when the drain plug is placed back into the oil pan after draining the old oil. In some engines, the oil filter is positioned in a way that causes oil to spill out during the filter change. While there may be a small oil drip immediately after the change, it should not continue for more than a few hours.

If you notice a persistent oil leak after an oil change, it is important to determine the source of the leak. To inspect for potential leaks, start by checking the oil pan seals and drain plug. Look for any signs of damage or looseness that may be causing the leak. Additionally, it is also important to inspect the timing cover seal and the valve cover gaskets, as these components can also lead to oil leaks.

Identifying the specific source of the oil leak is crucial in determining the appropriate course of action. Whether it be rotted engine gaskets, oil seals, or bad connections, addressing the issue promptly can prevent further damage and costly repairs in the future.

Oil Leak After Oil Change

Credit: gobdp.com

Cost Of Repairing An Oil Leak

When it comes to the cost of repairing an oil leak, the average cost can vary depending on several factors. The main factor affecting repair costs is the extent of the leak and the location of the leak. A minor leak that can be easily fixed may cost less compared to a major leak that requires extensive repair or replacement of parts.

Other factors that can affect the cost of fixing an oil leak include the make and model of the vehicle, as some vehicles may have more expensive parts or require specialized labor. The availability of parts and labor rates in your area can also influence the overall cost.

It is important to address an oil leak promptly, as leaving it unattended can lead to more serious issues and potentially expensive repairs in the future. If you notice any signs of an oil leak, such as oil spots on the ground or a burning smell, it is recommended to have a professional mechanic diagnose and repair the issue.


Preventive Measures To Avoid Oil Leaks After An Oil Change

To prevent oil leaks after an oil change, ensure that the oil filter and drain plug are properly tightened. Check the condition of the engine gaskets, oil seals, and connections for any signs of damage. Additionally, be mindful of any residual oil drips that may occur in the hours following the oil change.

Choosing A Reliable Mechanic

One of the major reasons why an engine leaks oil after an oil change is from rotted engine gaskets, oil seals, or bad connections. If you get under the car, check the oil pan seals and oil pan drain plug. You’ll then want to check the timing cover seal and valve cover gaskets to see what shape they’re in.

Using High-quality Oil And Filters

Using high-quality oil and filters can significantly reduce the chances of an oil leak after an oil change. Cheap and low-quality oil or filters may not provide a proper seal, leading to leaks. It is important to choose oil and filters that are recommended by the manufacturer of your vehicle.

In conclusion, to avoid oil leaks after an oil change, it is crucial to choose a reliable mechanic who is experienced in handling oil changes. Additionally, using high-quality oil and filters can also help prevent leaks. Regularly checking the condition of engine gaskets, oil seals, and connections is also recommended to catch any issues early on.

Oil Leak After Oil Change

Credit: www.reddit.com

Frequently Asked Questions Of Oil Leak After Oil Change

Is It Normal To Leak Oil After An Oil Change?

It’s normal to have a few oil drips a few hours after an oil change. This can happen because some engine designs cause oil to spill out when the oil filter is being changed. However, if there are excessive oil drips or signs of a leak after a few hours, it’s necessary to determine the source of the leak.

Can You Drive A Car With An Oil Leak?

Yes, you can drive a car with an oil leak. However, it is not recommended as an oil leak can lead to further damage and costly repairs to the engine if left unaddressed. It is best to have the leak fixed as soon as possible.

How Expensive Is It To Fix An Oil Leak?

Fixing an oil leak can vary in cost, depending on the severity and location of the leak. Generally, the price can range from $150 to $1200 for a professional repair. It is important to address oil leaks promptly as they can lead to more expensive repairs if left untreated.

Conclusion

After an oil change, it is not uncommon to experience a small oil leak due to the way some engines are designed. This can be caused by the oil filter placement that can cause oil to spill out during the filter change.

However, if the leak persists or worsens, it may indicate rotted engine gaskets, oil seals, or bad connections. It is important to address any oil leaks to prevent further damage to the engine and ensure the safety of your vehicle and other motorists on the road.

Rx8 Coil Pack


The Rx8 coil pack can be purchased on various websites such as Amazon, eBay, and mazdaparts.org, with prices ranging from $34.89 to $759.97. Signs of a faulty ignition coil include difficulty starting, stalling and misfiring, bad fuel economy, and a lit check engine light.

Common symptoms of a faulty coil pack include a rough idle, louder-than-usual engine noise, lack of power, drop in RPMs while accelerating, and a blinking or intermittently activating check engine light. To check if a coil pack is bad, perform a visual inspection for cracks or burn marks, swap the ignition coil to another cylinder, or use a spark tester or coil-on-plug.

Rx8 Coil Pack

Credit: m.youtube.com

Signs Of A Faulty Ignition Coil

Difficulty starting is one of the signs of a faulty ignition coil. If your vehicle is having trouble starting, it could be due to issues with the ignition coil. Another sign to look out for is stalling and misfiring. A faulty ignition coil can cause your engine to stall or misfire, resulting in poor performance. Additionally, a bad ignition coil can lead to bad fuel economy, as the engine may not be efficiently burning fuel. Lastly, a lit check engine light can indicate a problem with the ignition coil. If you notice any of these signs, it is important to get your ignition coil checked and potentially replaced.

Rx8 Coil Pack

Credit: www.ryanrotaryperformance.com

Common Symptoms Of A Faulty Coil Pack

  • Rough idle
  • Louder-than-usual engine noise
  • Lack of power
  • Drop in RPMs while accelerating
  • Check engine light and gas warning light

If you experience a rough idle or notice your engine making louder-than-usual noise, it may be a sign that your coil pack is faulty. Another common symptom is a lack of power, where your vehicle may not accelerate as it should. You may also experience a drop in RPMs while accelerating for no apparent reason. These symptoms can be accompanied by the activation of the check engine light and gas warning light, even with plenty of gasoline in the vehicle.

To check if your coil pack is bad, you can perform a visual inspection for cracks, burn marks, or carbon tracking. Swapping the ignition coil to another cylinder can also help confirm if it’s faulty. Other methods include using a spark tester or a coil-on-plug.

If you notice any of these symptoms, it’s important to address the issue as soon as possible to prevent further damage to your vehicle.

Methods To Check A Bad Coil Pack

To check if a coil pack is bad, there are a few methods you can use. Firstly, you can perform a visual inspection to look for cracks or burn marks on the coil pack. Another method is to swap the ignition coil to another cylinder to see if the issue persists. This can help confirm whether the coil pack is faulty. You can also use a spark tester or a coil-on-plug to check the condition of the ignition coil. These tools can help you determine if the coil pack is producing enough spark. By using these methods, you can quickly diagnose and address any issues with your coil pack.

Options For Rx-8 Coil Packs

Options for RX-8 coil packs include various retailers such as Amazon, eBay, and Walmart, with prices ranging from $11. 99 to $759. 97. Signs of a faulty ignition coil pack can include difficulty starting, stalling and misfiring, bad fuel economy, and a lit check engine light.

Common symptoms of a weak coil pack include a rough idle, louder engine noise, lack of power, and a blinking check engine light. You can check if a coil pack is bad by performing a visual inspection for cracks or burn marks, swapping the coil pack to another cylinder, or using a spark tester.

Options for RX-8 Coil Packs
  • Amazon: Offers various options for RX-8 coil packs, with prices ranging from $182.95 to $266.95.
  • AutoZone: Provides RX-8 coil packs with a 90-day return policy.
  • eBay: Offers both new and used coil packs for the RX-8 at different price points.
  • Black Halo Racing: Sells single coil packs for the RX-8 at a price of $110.00.
  • BennettBuilt Performance: Provides coil packs for the RX-8 priced at $299.00.
  • RRP Performance Ignition Coil System: Offers high-performance coil packs for the RX-8.
If you are experiencing issues like difficulty starting, stalling, misfiring, bad fuel economy, or a lit check engine light, it may be a sign of a faulty ignition coil. Common symptoms of a weak coil pack include rough idle, louder-than-usual engine noise, lack of power, RPM drop while accelerating, and a blinking check engine light. To check if a coil pack is bad, you can perform a visual inspection for cracks or burn marks, swap the ignition coil to another cylinder, or use a spark tester. Consider these options for RX-8 coil packs to ensure optimal performance of your vehicle.

Where To Buy Coil Packs

When it comes to purchasing coil packs for your RX8, there are several reliable options available. These include:

NGK Denso Auto Parts AEM Performance Electronics Advance Auto Parts Walmart
Summit Racing Haltech Duralast NAPA Auto Parts MAPerformance
FCP Euro JEGS High Performance AutoZone Partsgeek.com StockWiseAuto.com
CarParts.com ECS Tuning Home Depot Zapparts.net

These suppliers offer a wide range of options for purchasing coil packs for your RX8. Whether you prefer to shop in-store or online, you’ll be able to find the right coil packs for your vehicle. Make sure to compare prices and read customer reviews to ensure you’re getting the best quality and value for your money. Don’t forget to check for any discounts or promotions that may be available.

Rx8 Coil Pack

Credit: www.ebay.com

Frequently Asked Questions For Rx8 Coil Pack

What Are The Symptoms Of A Bad Ignition Coil Rx8?

Symptoms of a bad ignition coil on an RX8 include difficulty starting, stalling, misfiring, bad fuel economy, and a lit check engine light.

How Long Do Rx8 Coils Last?

RX8 coils typically last for a long time without issues. However, if you start experiencing difficulty starting your vehicle, stalling, misfiring, bad fuel economy, or a lit check engine light, it may be a sign of a faulty ignition coil.

What Are The Signs Of A Weak Coil Pack?

Signs of a weak coil pack include difficulty starting, stalling and misfiring, bad fuel economy, and a lit check engine light. These symptoms can indicate a faulty ignition coil. A visual inspection and swapping the coil to another cylinder can help confirm if it’s damaged.

Conclusion

Upgrade your RX8 coil pack with confidence and improve your vehicle’s performance. Say goodbye to difficulties starting, stalling, and misfiring, and welcome better fuel economy and a smoother engine. Don’t ignore the warning signs of a faulty coil pack. Perform a visual inspection, swap the ignition coil, or use a spark tester to check its condition.

Invest in a high-quality coil pack from reputable sellers such as Amazon, eBay, or auto parts stores like AutoZone or Advance Auto Parts. Upgrade your RX8 for a smoother driving experience today.

Fuel Injector Relay Location


The fuel injector relay is located under the hood, beside the blue DME relay in most vehicles. It plays a crucial role in providing enough power to the fuel pump for combustion.

If you are experiencing issues such as a cranking engine that doesn’t start or rough idling, the fuel pump relay may be the culprit. It is important to locate and replace this relay if necessary to ensure proper fuel supply to the engine.

Refer to the vehicle’s manual or consult an expert for specific instructions on finding the fuel injector relay in your particular make and model.

Fuel Injector Relay Location

Credit: www.cargurus.com

What Is A Fuel Injector Relay?

What is a Fuel Injector Relay?

The fuel injector relay plays an integral role in getting fuel to your engine for combustion. Powered by the ignition and/or powertrain control module (PCM), the fuel pump relay’s main function is to provide the fuel pump with enough power.

Role of the fuel pump relay in the fuel system

The fuel pump relay is responsible for supplying power to the fuel pump. It ensures that the fuel pump receives enough power to deliver fuel to the engine. The relay is controlled by the ignition or powertrain control module (PCM), and it plays a critical role in the proper functioning of the fuel system.

How the fuel pump relay works

The fuel pump relay works by receiving signals from the ignition or PCM to activate the fuel pump. When the relay receives the signal, it closes an electrical circuit, allowing power to flow to the fuel pump. This action enables the fuel pump to pressurize the fuel system and deliver fuel to the engine.

Common symptoms of a bad fuel pump relay

Some common symptoms of a bad fuel pump relay include an engine that cranks but doesn’t start, rough idling, or poor acceleration. When the fuel pump relay fails, it often prevents the fuel pump from receiving proper voltage, causing fuel delivery issues.

Fuel Injector Relay Location

Credit: bimmercat.com

How To Identify A Faulty Fuel Pump Relay

If you are experiencing issues with your fuel pump relay, it’s crucial to know how to identify if it is faulty. One of the signs of a bad fuel pump relay is an engine that cranks but doesn’t start. This happens because the fuel pump relay typically fails in the open position, preventing voltage from reaching the fuel pump. As a result, the engine is starved of fuel and refuses to run.

So, how do you test for a faulty fuel pump relay? Start by locating the relay, which is often the light green one under the hood, beside the blue DME relay. Once you’ve found it, you can test it using a multimeter. Check for continuity across the relay terminals, and if there is no continuity, it indicates a faulty relay.

Remember that a faulty fuel pump relay can lead to various problems with your vehicle’s performance. It’s essential to address this issue as soon as possible to prevent further damage. If you are unsure or uncomfortable performing the testing procedure, it is recommende to seek professional help.

Note: Always consult your vehicle’s manual or a trusted mechanic for specific instructions and guidance tailored to your vehicle’s make and model.


Fuel Injector Relay Locations By Make And Model

Find fuel injector relay locations by make and model without any hassle. We provide a comprehensive guide on fuel injector relay locations for various car brands and models, ensuring you can easily locate and replace the relay when needed.

Fuel Injector Relay Locations by Make and Model In a Toyota Corolla, the fuel injector relay can be found as the light green one under the hood, beside the blue DME relay. For a Nissan Maxima, locating the fuel injector relay requires some searching. To access the fuel injector relay in a BMW E90, it is important to check under the hood. Identifying the fuel injector relay in a Ford F150 can be a bit challenging, but it is usually located under the hood. Lastly, finding the fuel injector relay in a Chevy Malibu can also be done under the hood. Once the fuel injector relay is located, it is important to test it for any signs of malfunction. A bad fuel pump relay can result in an engine that cranks but doesn’t start, as it prevents voltage from reaching the fuel pump. Overall, knowing the fuel injector relay location specific to your make and model can help troubleshoot any issues related to fuel injection.

Common Mistakes And Faqs

The location of the fuel injector relay can vary depending on the vehicle model. In most cases, it is found under the hood, usually next to the DME relay. However, for specific instructions on where to locate the fuel injector relay in your vehicle, it is recommended to consult the owner’s manual or seek professional assistance.

According to various sources, the fuel injector relay is located under the hood, next to the blue DME relay. It is typically a light green relay. When troubleshooting fuel injector relay issues, people often make some common mistakes. One of the frequently asked questions is about the sensor that sends signals to the fuel injectors. It is important to understand that the sensors do not directly communicate with the fuel injectors. Instead, they provide information to the PCM (powertrain control module), which then determines when the injectors should open based on multiple factors like throttle position, cam position, and manifold pressure. Another common mistake is not correctly diagnosing a faulty fuel relay. A common symptom of a bad fuel relay is an engine that cranks but does not start. This is because the relay fails to provide enough power to the fuel pump, causing the engine to be starved of fuel. It is essential to test the fuel relay if there are starting issues.

Fuel Injector Relay Location Solutions

Fuel Injector Relay Location Solutions offers expert assistance in locating the fuel injector relay in various vehicles. With their knowledge and expertise, they can help you find the exact location of this important component, ensuring your fuel system is functioning properly.

According to available resources, the fuel injector relay location for a Ford Escape is the light green one under the hood, beside the blue DME relay. If your Ford Escape is not starting, idles rough, or shudders when accelerating, it could be related to the fuel pump and fuel injectors fuse or relay. It is always recommended to consult a professional technician or refer to the vehicle’s manual for accurate information and proper troubleshooting steps. In addition to the Ford Escape, locating the fuel injector relay in other vehicles may vary. For example, in a Honda Integra, the fuel injector relay might be located in a different area, and the same goes for a Mazda Miata, Chevy diesel, or a Jaguar. It is crucial to follow the manufacturer’s recommendations and guidance when searching for the fuel injector relay in any vehicle. If you suspect a bad fuel pump relay causing issues with your engine, common signs include an engine that cranks but doesn’t start or a lack of fuel reaching the engine. In such cases, it is recommended to have the fuel pump relay tested or replaced by a qualified technician to ensure proper functioning. Remember, always consult a professional or refer to the vehicle’s manual for accurate and specific instructions related to your vehicle’s fuel injector relay location and troubleshooting.
Fuel Injector Relay Location

Credit: accessories.hitchcocksmotorcycles.com

Frequently Asked Questions Of Fuel Injector Relay Location

Where Is The Fuel Injector Fuse Located?

The fuel injector fuse is located under the hood, next to the blue DME relay. It is a light green relay.

What Is Fuel Injection Relay?

The fuel injection relay is responsible for providing enough power to the fuel pump so that it can deliver fuel to the engine for combustion. It is controlled by the ignition or powertrain control module (PCM). If the fuel pump relay is faulty, the engine may crank but not start.

What Sends Signal To Fuel Injectors?

The PCM sends the signal to the fuel injectors based on information from various sensors, such as throttle position, cam position, and manifold pressure. It decides when the injectors should open to deliver fuel to the engine for combustion.

Conclusion

Overall, finding the fuel injector relay location is essential for troubleshooting fuel system issues. The fuel pump relay is responsible for providing power to the fuel pump, ensuring proper fuel delivery to the engine. Symptoms of a bad fuel pump relay include engine cranking but not starting.

It is important to locate the relay, which is typically found under the hood or under the dash in different vehicle models. By understanding the fuel injector relay’s function and its location, you can take necessary measures to diagnose and resolve fuel system problems effectively.