Recent Posts

How to Switch From Trip Meter to Odometer Toyota


To switch from trip meter to odometer in your Toyota, locate the Trip Meter button near the speedometer. Turn the ignition key to ‘On’ without starting the engine. Press and hold the button to access the odometer reading showing total miles traveled. Easily toggle between Trip and Odometer by finding and pressing the display button labeled ‘ODO’ or ‘TRIP’. This allows you to view current trip distance or total mileage instantly. Additionally, you can reset the trip meter by holding the trip meter button to clear current trip data. Master these steps for quick access to important vehicle information.

Locate the Trip Meter Button

Have you ever wondered where to find the Trip Meter button in your Toyota? Let’s explore how to locate this essential feature in a few simple steps.

To locate the Trip Meter button in your Toyota vehicle, start by sitting in the driver’s seat and ensuring the ignition is turned on. Look towards the instrument cluster, which is typically located behind the steering wheel. On the dashboard, you will find a set of buttons or controls near the speedometer and tachometer. Locate the button labeled ‘Trip’ or ‘Trip Meter’ among these controls.

The Trip Meter button is usually small and may be marked with a symbol resembling a partial odometer. Once you have identified the Trip Meter button, press it to cycle through the different trip meter display modes on the instrument panel.

Familiarizing yourself with the Trip Meter button’s location will enable you to easily access and switch between the trip meter and odometer functions in your Toyota vehicle.

Understand the Display Modes

To gain a comprehensive understanding of the display modes, familiarize yourself with the various information options accessible through the Trip Meter button in your Toyota vehicle. The display modes on your Toyota can provide you with valuable information about your driving habits and the status of your vehicle. By pressing the Trip Meter button, you can cycle through different display modes such as the current fuel consumption, average fuel consumption, driving range, and more.

Start by locating the Trip Meter button on your dashboard, usually near the speedometer. Once you press the button, you will notice the display changing to show different sets of data. Take your time to explore each mode and understand the information it provides. This knowledge can help you monitor your fuel efficiency, track your driving distance, and stay informed about your vehicle’s performance.

Access the Odometer Reading

To access the odometer reading in your Toyota vehicle, locate the Trip Meter button on the dashboard and follow these simple steps.

Start by sitting in the driver’s seat and ensure the vehicle is turned off. Locate the Trip Meter button, which is typically located near the speedometer or tachometer on the dashboard.

Once you have located the button, turn the ignition key to the ‘On’ position without starting the engine. Press and hold the Trip Meter button until you see the odometer reading displayed on the screen.

The odometer reading will show the total number of miles or kilometers your vehicle has traveled since it was new. You can release the Trip Meter button once the odometer reading is visible. Remember, accessing the odometer reading can provide you with important information about your vehicle‘s usage and maintenance needs.

Toggle Between Trip and Odometer

Toggling between the trip meter and odometer in your Toyota is a straightforward process that allows you to switch between viewing your current trip distance and total mileage traveled.

To switch between the trip meter and odometer, locate the display button on your dashboard. This button is usually labeled ‘ODO’ or ‘TRIP.’ Press the display button repeatedly until you see the desired mode – either the trip meter or the odometer – appear on the screen.

As you press the button, the display will cycle through the available options, allowing you to easily switch between the trip meter and odometer readings. Once you have selected the mode you prefer, the display will show either your current trip distance or the total mileage traveled.

This simple step-by-step process ensures that you can access the information you need at a glance while driving your Toyota.

Reset the Trip Meter

Resetting the trip meter on your Toyota is a quick and simple process that allows you to clear the current trip distance and start fresh for your next journey. To reset the trip meter, follow these straightforward steps:

  1. Locate the trip meter button: Look for a button or knob on your dashboard that is specifically labeled for the trip meter function. It is usually located near the speedometer or tachometer.
  2. Press and hold the button: Once you have found the trip meter button, press and hold it down until you see the numbers on the trip meter reset to zero. Some models may require you to press the button multiple times to cycle through different trip meter options before resetting.
  3. Verify the reset: After holding down the button, check that the trip meter now displays zero or has been reset to your desired starting point.

Familiarize Yourself With Options

Explore the various options available on your Toyota to enhance your driving experience and customize settings to suit your preferences. Familiarizing yourself with these features can make your driving more enjoyable and convenient. Here are some key options to consider:

  1. Customizable Displays: Personalize the information displayed on your dashboard to focus on what matters most to you, whether it’s fuel efficiency, trip information, or navigation details.
  2. Driver Assistance Systems: Take advantage of advanced safety features like lane-keeping assist, adaptive cruise control, and parking sensors to make your driving experience safer and less stressful.
  3. Entertainment Settings: Sync your smartphone to access music, podcasts, and navigation apps directly through your vehicle’s infotainment system for a seamless driving experience.
  4. Climate Control: Adjust the temperature, fan speed, and seat heating/cooling settings to create a comfortable environment inside your car, no matter the weather outside.

Conclusion

In conclusion, switching from the trip meter to the odometer in a Toyota is a simple process that involves:

  • Locating the trip meter button
  • Understanding the display modes
  • Accessing the odometer reading
  • Toggling between trip and odometer
  • Resetting the trip meter
  • Familiarizing yourself with options

By following these steps, you can easily switch between the trip meter and odometer on your Toyota vehicle.

U0140 2011 Nissan Altima Sedan Meaning, Symptoms, Causes and How to Fix


Why settle for just any ride when you can experience the blend of style, comfort, and performance with the 2011 Nissan Altima Sedan? This vehicle isn’t just about getting you from point A to B; it’s about enjoying every mile in between. With its sleek design, advanced features, and reliable performance, the 2011 Nissan Altima Sedan stands out in its class.

Whether you’re commuting to work, heading out on a road trip, or simply running errands around town, this car promises a driving experience that’s both enjoyable and efficient. Dive into what makes this sedan not just a choice but a statement.

Deciphering U0140 in 2011 Nissan Altima

Error Explanation

U0140 represents a communication failure between the car’s Engine Control Module (ECM) and the Body Control Module (BCM). This issue often leads to various operational problems.

The BCM plays a crucial role in managing vehicle operations. It controls lighting, security, and comfort features. When U0140 occurs, these systems might not work correctly.

Impact on Altima

For the 2011 Nissan Altima, this error can be particularly troubling. The model relies heavily on its integrated vehicle systems for performance and convenience.

Drivers may notice issues with their car’s lights or alarm system. Comfort features like air conditioning could also malfunction. These problems stem from the BCM’s inability to communicate properly with the ECM.

Addressing the Issue

Fixing U0140 involves diagnosing and repairing the communication link between the ECM and BCM. Professional help is usually needed due to the technical nature of this task.

It’s important for owners to address this error promptly. Ignoring it can lead to more serious issues over time.

Symptoms of U0140 Code

Dashboard Lights

Malfunctioning dashboard lights are a common symptom. Drivers may notice their dashboard warning lights flickering or staying lit without reason. This can be confusing and worrying.

Central Locking

Issues with the central locking system often arise. The car might not lock or unlock properly, leading to security concerns. It’s frustrating when you press the remote and nothing happens.

Electronic Behavior

Erratic behavior of the vehicle’s electronic components is another sign. Windows may roll down unexpectedly or the radio could switch stations on its own. These odd occurrences hint at deeper electrical issues.

Electrical Problems

Intermittent electrical problems can leave drivers scratching their heads. One day everything seems fine, and the next, nothing works as it should. This inconsistency is a hallmark of the U0140 code.

Fuel Efficiency

Decreased fuel efficiency is an indirect symptom that drivers might overlook. If your Altima starts guzzling more gas than usual, it could be related to this error code.

Performance Issues

Finally, performance issues such as sluggish acceleration or rough idling could indicate U0140 troubles. These symptoms affect your driving experience and can lead to bigger problems if ignored.

Common Causes Behind U0140

Damaged Wiring

Damaged wiring or connectors are often at the heart of the U0140 code in the 2011 Nissan Altima. Over time, wires can wear out or get damaged by heat, physical stress, or even rodents. This damage disrupts signals between the car’s electronic control module (ECM) and body control module (BCM).

A visual inspection might reveal these issues. Look for exposed wires or connectors that seem out of place. It’s a key step to diagnose this problem accurately.

Corrosion Intrusion

Corrosion or moisture intrusion significantly affects communication between the ECM and BCM. Water damage, especially in areas prone to flooding or heavy rains, can lead to corrosion inside electrical components. This not only interrupts signal transmission but can also cause long-term damage if not addressed promptly.

Regular maintenance checks can help identify and prevent these issues before they escalate into more significant problems.

Faulty BCM

A faulty BCM could be the root cause of the U0140 code in your Nissan Altima. The BCM is vital for managing various electrical systems in the car, including lighting, security, and more. If it fails, it can lead to a range of issues beyond just the U0140 code.

Replacing a BCM is more complex and should be done by professionals. They have the tools and expertise to ensure it’s done correctly without causing further issues.

Diagnosing U0140 Code Issues

Professional Scanner

Professionals often use a high-grade scanner to diagnose the U0140 code. This tool reads trouble codes from both the Engine Control Module (ECM) and the Body Control Module (BCM). It’s crucial for pinpointing the exact issue.

They connect the scanner to your 2011 Nissan Altima Sedan. They look for error messages in both modules. This step is key in understanding the problem’s root.

Wiring Inspection

A thorough check of wiring and connectors is next. Experts look for damage or corrosion. These can cause electrical issues leading to the U0140 code.

They inspect each wire closely. They also check connectors for any signs of wear or corrosion. Finding and fixing these problems can solve the U0140 code issue.

BCM Update

The BCM’s software version is another critical area to examine. Sometimes, an outdated software can trigger trouble codes like U0140.

Technicians check the current version against available updates. If needed, they update the BCM’s software. This could fix communication problems between modules.

Solutions for Fixing DTC U0140

Wire Repairs

Repairing or replacing damaged wires and connectors often stands as the first step in addressing the U0140 code. It’s crucial to inspect all related wiring thoroughly. Look for any signs of wear, tear, or corrosion. Damaged components should be replaced immediately. This approach can prevent further issues.

Professionals usually recommend this as a starting point because it’s relatively straightforward and often resolves the problem.

BCM Update

etimes, the issue stems from the Body Control Module (BCM). In such cases, a software update or reprogramming may be necessary. This process requires specialized equipment and knowledge. Therefore, it’s best handled by professionals.

Updating the BCM can resolve communication issues that trigger the U0140 code. It ensures that all vehicle systems are on the same page, so to speak.

Diagnostic Tool

After repairs or updates, using a professional diagnostic tool is essential to clear the U0140 code. This step confirms that the issue has been resolved. Without it, the check engine light might remain on, causing unnecessary worry.

A high-quality diagnostic tool not only clears codes but also provides peace of mind. It confirms that your Nissan Altima Sedan is back in top shape.

Replacement of Control Module

Initial Steps

The process begins with diagnosing the issue. A scanner checks for lost communication with the Body Control Module (BCM). If faulty, replacement is necessary.

Technicians use their experience and qualifications to pinpoint the problem. They rely on specific tools and information from trusted sites. This ensures accurate diagnosis before proceeding.

BCM Installation

After removing the old BCM, installing the new one is straightforward. However, proper programming is crucial. It ensures the new module communicates effectively with the Engine Control Module (ECM).

This step requires specialized software and a deep understanding of the car’s systems. Technicians often refer to general information provided by manufacturers or seek help from experts through a phone call.

System Reprogramming

etimes, other vehicle systems need reprogramming to recognize the new BCM. This might include ignition, security, and infotainment systems.

Reprogramming these systems maintains the car’s functionality and client relationship. It prevents future issues related to lost connections between modules.

Estimated Cost for U0140 Diagnosis

Diagnostic Fees

Professionals might charge differently for diagnosing a U0140 error in a 2011 Nissan Altima. The fees usually range between $75 and $150. This cost covers the time and tools needed to identify the issue.

The price can vary based on the garage’s location and its equipment quality. Some places have advanced tools that find problems faster, making them more expensive.

Repair Costs

After finding the root of the U0140 code, fixing it often involves extra expenses. These could be for replacing damaged wires or fixing connections. Costs here can start from $100 and go up significantly, depending on what needs fixing.

etimes, parts inside your car might need replacing. This could make the repair bill higher than expected. It’s important to remember that these are additional costs to the diagnostic fee.

Location Variance

Where you live can change how much you pay for repairs. In big cities, labor rates are higher because living costs are more. This means getting your 2011 Nissan Altima fixed in a city might cost more than in a smaller town.

Complexity also plays a big role in determining price. If the problem is hard to solve, it will take more time and money. Mechanics charge by the hour, so more complex issues lead to bigger bills.

Labor Insights for U0140 Repair

Repair Hours

Diagnosing and fixing U0140 issues usually takes a specific number of hours. On average, technicians might spend 1 to 3 hours pinpointing the problem.

Repair times can increase based on the severity of the issue. It’s crucial to remember that these are estimates. Actual hours may vary.

Cost Variance

Labor costs for U0140 repairs can differ greatly between locations. Dealerships often charge more than independent shops.

This variance is due to their specialized knowledge and tools. However, don’t assume higher prices mean better service.

Expertise Importance

Selecting a facility experienced with Nissan vehicles is vital. They ensure efficient and accurate repairs.

Experience leads to quicker diagnostics and fixes, saving time and money.

Summary

Tackling the U0140 code in your 2011 Nissan Altima doesn’t have to be a headache. You’ve got the rundown: from understanding what U0140 means, spotting symptoms, figuring out causes, to nailing down solutions and costs. Whether it’s a DIY fix or a pro job, you’re equipped to handle it. Remember, keeping your ride in top shape not only saves you money down the line but also ensures your safety on the road. So, don’t ignore those warning signs.

Now’s the time to act. If you’ve spotted these issues in your Altima, reach out to a trusted mechanic or grab your tools. Your car’s health isn’t something to put off. And hey, we’re here for all your car care needs, offering tips and tricks to keep your wheels turning smoothly. Dive deeper into our resources or hit us up for advice. Your Altima deserves the best, and so do you.

Frequently Asked Questions

What does the U0140 code mean in a 2011 Nissan Altima?

The U0140 code indicates a communication issue with the Body Control Module (BCM), which can affect various electronic functions in your Nissan Altima.

What are common symptoms of a U0140 code?

Symptoms include erratic behavior of interior lights, power windows, and locks, or issues with the instrument cluster display.

Why does my Nissan Altima have a U0140 code?

Common causes include damaged wiring, a faulty BCM, or problems with the CAN bus network used for module communication.

How is the U0140 code diagnosed in a 2011 Nissan Altima?

Diagnosis involves checking the BCM’s wiring and connections, testing communication lines, and possibly consulting vehicle-specific wiring diagrams.

What solutions are available for fixing DTC U0140?

utions may involve repairing or replacing damaged wires, fixing connection issues, or replacing the faulty BCM to resolve the problem.

What is involved in replacing the control module for a U0140 issue?

Replacing the control module typically requires programming it to match your vehicle’s specifications, ensuring proper communication with other modules.

How much does it typically cost to diagnose and repair a U0140 code?

Diagnosis costs vary but expect to pay between $75 and $150 for diagnosis alone. Repair costs can significantly vary based on required solutions.

How to Check Tire Pressure on 2021 Toyota Corolla


To check tire pressure on a 2021 Toyota Corolla:

  • Locate the recommended pressure in the owner’s manual or doorjamb sticker.
  • Use a tire pressure gauge on each tire.
  • Adjust accordingly to ensure optimal performance and tire longevity.

Locate the Recommended Pressure

monitor tire pressure regularly

To check your tire pressure correctly, find the recommended PSI for your 2021 Toyota Corolla. This information is in the owner’s manual or on a sticker inside the driver’s side door. Knowing the correct PSI is important for fuel efficiency, tire longevity, and safety.

If you don’t have the owner’s manual, look for a sticker on the driver’s door or door frame when you open it. This sticker shows the ideal PSI for front and rear tires and the maximum weight your car can carry.

Sticking to the recommended PSI is vital. Overinflating tires can cause extra wear in the middle of the tread and make the ride rougher. Underinflating tires can lead to overheating, increased wear on the tire edges, lower fuel efficiency, and can affect how well your car handles, making it less safe.

Prepare Your Tools

Start by getting a reliable tire pressure gauge that works well. This step is important for keeping your car safe and running well. A correct tire pressure reading helps you adjust the pressure properly to make sure your car drives well and the tires last longer.

Here’s what you need:

  1. Tire Pressure Gauge: Choose either a digital gauge for easy reading or a dial gauge for a more traditional feel. Make sure it’s for cars.
  2. Owner’s Manual: This has the recommended tire pressure for your Corolla, which is important for setting the right pressure.
  3. Notebook and Pen: Use these to write down the tire pressures before you make any changes. This helps keep track of the pressure over time.

It’s very important that your tire pressure gauge is accurate. If you can, get a gauge that can be recalibrated for the most accurate readings. Also, check your gauge often for any damage; a broken gauge can give wrong readings, which can affect your car’s performance and safety.

With these tools, you’re ready to check your Corolla’s tire pressure. Having the right, working tools is key to looking after your car’s tires, which makes driving safer and can help save fuel.

Check Tire Pressure

inflate tires before driving

Prepare your tools and check the tire pressure of your 2021 Toyota Corolla.

First, make sure your car has been parked for at least three hours for an accurate pressure reading. Tires heat up when driving, which can change the pressure reading. Find the recommended tire pressure for your Corolla on the sticker inside the driver’s side door or in the owner’s manual. It’s important to use this pressure for the best performance and safety.

Use a tire pressure gauge on each tire’s valve stem. It’s normal to hear a hiss of air. Read the pressure on the gauge. Check all four tires and the spare, as they can lose pressure even if not used.

If the pressure readings are correct, your tires are properly inflated. If not, don’t adjust the pressure yet.

Also, look at the tires for wear or damage like cuts, bulges, or objects in the tread. These can affect pressure and safety.

Adjusting Pressure Correctly

Adjusting your 2021 Toyota Corolla’s tire pressure is important for fuel efficiency, tire longevity, and safe handling. Here’s how to do it in three simple steps:

  1. Find an Air Pump

Locate an air pump at a gas station or buy a portable air compressor to use at home.

  1. Change the Tire Pressure

Use the air pump to add air in short bursts if the pressure is low, checking the pressure after each burst to avoid overinflation. If the pressure is too high, release small amounts of air by pressing the valve stem and check the pressure repeatedly until it’s right.

  1. Check All Tires

Ensure all tires are at the recommended pressure, especially when the tires are cold, as temperature changes affect pressure readings.

Regular Maintenance Tips

regular car maintenance advice

To maintain your 2021 Toyota Corolla, focus on tire care. Check tire pressure monthly since tires lose air over time and temperature changes affect it. Proper inflation improves fuel efficiency and reduces wear. Use a tire pressure gauge and follow your car’s manual for the right pressure.

Check tire tread monthly too. Use a penny; if Lincoln’s entire head is visible, replace the tires. Rotate your tires every 5,000 to 7,500 miles following your Corolla’s manual to wear them evenly.

If your car pulls to one side or tires wear unevenly, get an alignment to ensure smooth driving and prevent early wear.

Following these steps will keep your Corolla’s tires in good shape.

Conclusion

Now that you know how to check and fix the air in your 2021 Toyota Corolla’s tires, you’re ready to keep your car safe and running well.

First, find the right air pressure for your tires. Then, use a gauge to check the air in each tire. If needed, add or let out some air.

Remember, keeping your tires at the correct air pressure is something you need to do often. If you keep doing this, your car will work better and use less gas.

Drive safely!

How to Turn off Cruise Control Toyota Corolla


To turn off cruise control in a Toyota Corolla:

  • Press the brake pedal or the 'CANCEL' button on the steering wheel.
  • For a complete shutdown, push the cruise control lever away from you or turn off the ignition.

Understanding Cruise Control

cruise control functions explained

Cruise control is a system in cars that keeps the speed constant automatically, making long drives easier. When turned on, it adjusts the car's speed to what the driver sets, helping to prevent speeding and reduce tiredness on long journeys. It's best used on highways or roads with consistent speed and few stops.

However, it shouldn't be used in bad weather, heavy traffic, or on curvy roads, as it requires the driver to control the vehicle actively. Understanding how cruise control works is important for using it safely and effectively. It's meant to assist the driver, not to replace paying attention while driving.

Locating the Controls

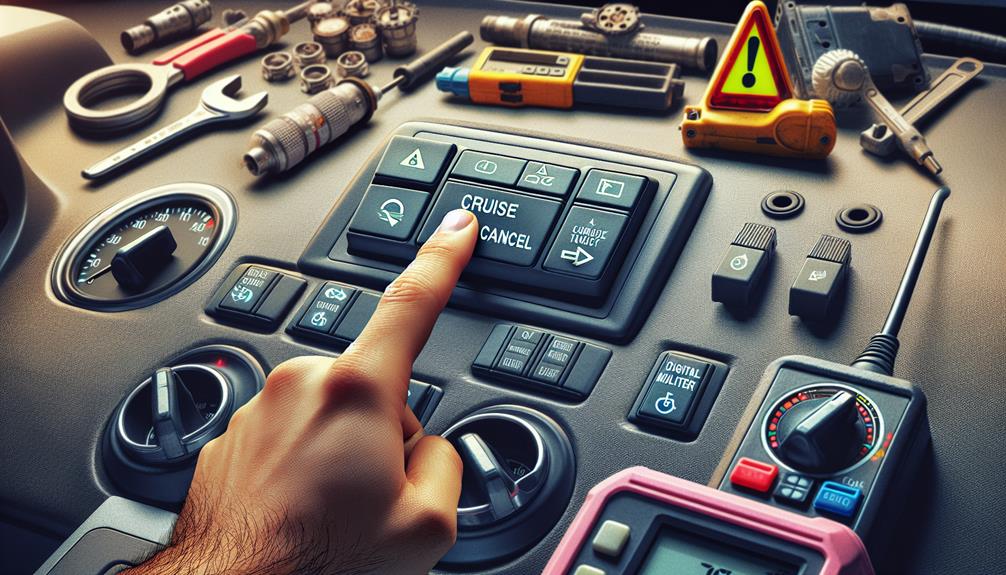
To turn off cruise control in your Toyota Corolla, you need to know where the controls are. The layout of cruise control buttons might change based on the year and model of your Toyota Corolla, but they're always easy to reach while driving. Here's a simple guide to find the main controls:

  • Steering Wheel: The cruise control lever or buttons are on or near the steering wheel.
  • Instrument Panel: Some models show cruise control indicators or settings on the instrument panel.
  • On/Off Button: There's a button to turn the cruise control system on or off, usually on the steering wheel or a stalk attached to it.
  • Set/Accel Button: This button sets the speed or speeds up while using cruise control.
  • Cancel Button: This button cancels the cruise control setting without turning the system off.

Deactivating Cruise Control

properly deactivating cruise control

To turn off cruise control in your Toyota Corolla, you can follow one of the steps below:

  1. Press the cancel button on the steering wheel to temporarily stop cruise control without losing your set speed. This is useful when you need to slow down quickly, like in heavy traffic or bad road conditions.
  2. Hit the brake pedal to completely stop cruise control and start slowing down right away. This is a good option for immediate speed reduction.
  3. Push the ON/OFF button on the control stalk to turn off cruise control completely. If you choose this, you'll have to turn it on and set your speed again when you want to use it next.

Quick guide:

  • Cancel Button: Stops cruise control temporarily.
  • Brake Pedal: Stops cruise control and slows the car.
  • ON/OFF Button: Turns off cruise control completely.

Tips for Safe Disengagement

When turning off the cruise control in your Toyota Corolla, ensure safety for a smooth switch to manual driving. Safe disengagement prevents unexpected road situations. Here's how to do it safely:

  • Look around: Before turning off cruise control, check mirrors and blind spots for nearby vehicles. Ensure there's enough space to slow down without affecting others.
  • Slow down gradually: Use the cruise control buttons to reduce speed slowly before turning it off. This avoids sudden slowing that could surprise following drivers.
  • Brake lightly: To disengage cruise control, lightly press the brake pedal. Only brake hard in emergencies. Gentle braking is important for control and safety.
  • Switch to manual carefully: After cruise control is off, carefully control your speed. Avoid quick speed changes until you're in full control.
  • Stay focused: Keep your attention on the road and hands on the wheel, ready to adjust speed or direction as needed.

Troubleshooting Common Issues

troubleshooting technical difficulties guide

Let's discuss how to fix common cruise control problems in a Toyota Corolla.

If cruise control won't turn off, start by checking the brake pedal. Make sure it's moving freely and that the brake lights work when you press it. If that's not the issue, look at the cruise control switch and its connections. These might need cleaning or reconnecting. If you're not sure how to do this, ask a professional for help.

If your cruise control doesn't keep a steady speed or turns off by itself, the problem might be with the speed sensor or the car's computer. The speed sensor tells the computer how fast you're going. If it's broken, cruise control won't work properly. You might need a mechanic to diagnose and fix this issue.

Conclusion

To turn off cruise control in your Toyota Corolla, just look for the cancel button and press it, or you can lightly step on the brake pedal.

Make sure you're always ready to steer the car yourself. If it's not working right, you can check for simple problems before going to a mechanic.

Knowing how to use all the parts of your car makes driving safer and more fun.

How to Replace Cabin Air Filter Toyota Corolla


To replace the cabin air filter in a Toyota Corolla, follow these steps:

  • Locate the filter in the designated area of the vehicle.
  • Prepare basic tools such as screwdrivers or pliers for the removal process.
  • Carefully follow the replacement process outlined in the vehicle's manual or online guides.
  • Ensure you use the correct filter type specified for your Toyota Corolla model.
  • Avoid common installation mistakes to guarantee fresher air inside the cabin.

Remember, maintaining a clean cabin air filter contributes to a healthier driving environment for you and your passengers.

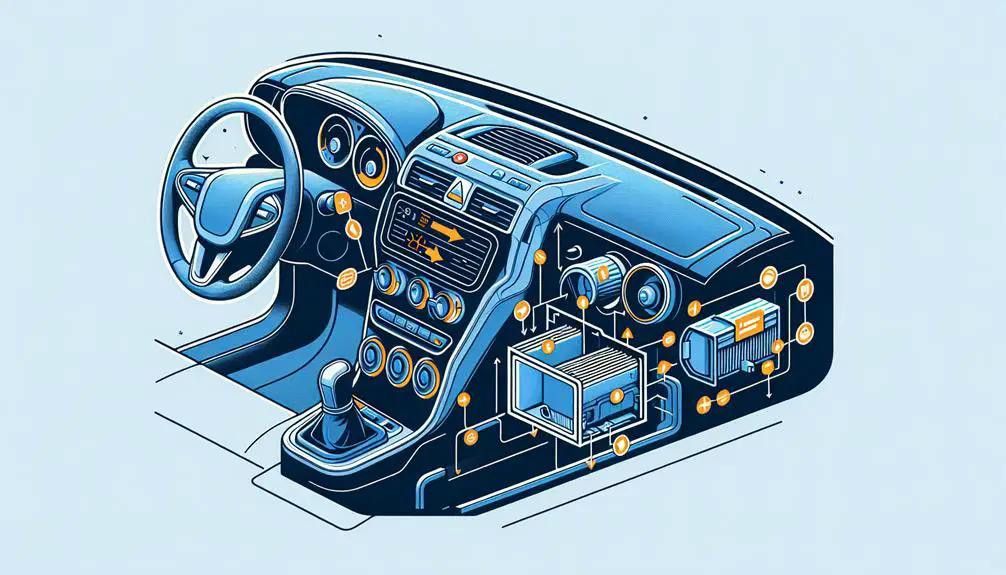
Identifying Your Filter's Location

locating your air filter

To replace your Toyota Corolla's cabin air filter, first find where it is. Most new Corollas have the filter behind the glove box or under the passenger side dashboard. Older models might've it somewhere else, like the center console or near the windshield under the hood.

To find the exact location, if it's behind the glove box, open it and remove any tabs or screws. You might need a screwdriver. If it's under the dashboard or elsewhere, you may need to look closely to find it.

Gathering Necessary Tools

To replace your Toyota Corolla's cabin air filter, collect the following tools:

  1. Gloves: Protect your hands and keep them clean.
  2. Flashlight or headlamp: Helps see inside the filter housing, especially in dark areas.
  3. Screwdriver: The type needed (Phillips head or flat head) varies by Corolla model. Check your car's manual or the filter housing. Having a set of screwdrivers might be useful.
  4. Small plastic bag or container: Hold screws and small parts to avoid losing them.
  5. Ensure a clean workspace with enough room and a flat surface for your tools and the new filter.

Having these tools ready before starting will make the replacement process easier and more efficient.

Removing the Old Filter

updating air conditioning systems

Prepare to remove the old cabin air filter from your Toyota Corolla. Find the cabin air filter compartment, usually behind the glove box or under the dashboard on the passenger side. Open and empty the glove box.

Next, remove the glove box. Unscrew or unfasten it. If there's a stopper arm on the right, push or slide it out. Press the sides of the glove box to release the clips and lower it, revealing the filter housing.

The filter housing has a cover secured by clips or tabs. Press or slide these to open the cover and access the old filter. Note the filter's position for later.

Remove the old filter. It may be dirty or clogged, affecting airflow and the car's HVAC system efficiency. Dispose of it properly.

You have now removed the old cabin air filter and can proceed to install a new one for clean air in your Toyota Corolla.

Installing the New Filter

After removing the old filter, install the new cabin air filter in your Toyota Corolla.

Ensure the new filter's airflow direction arrow points towards the car's back. This is important for the filter to work properly.

Slide the new filter into the slot gently, ensuring it fits well. If it doesn't fit, check its orientation and try again. It should go in easily.

Next, reassemble any parts you removed. If there's a cover for the filter compartment, replace it and secure it with clips or latches. This prevents unfiltered air from entering.

Replace any components or mats you moved during the process.

With the new filter installed, your Toyota Corolla will have cleaner air.

Maintenance Tips

proper care for machines

To keep your Toyota Corolla's cabin air filter working well, check and replace it when needed. This helps keep the air in your car clean and prevents bigger HVAC problems. Here's how to maintain your cabin air filter:

  1. Check the Filter Every 15,000 Miles

It's advised to check your cabin air filter every 15,000 miles or once a year. If you drive in dusty or polluted places often, check it more frequently. A quick look will tell you if it's dirty or clogged and needs changing.

  1. Replace Regularly

Change your cabin air filter every 25,000 to 30,000 miles to keep the air quality high and the HVAC system working well. Doing this regularly helps prevent sudden HVAC issues and keeps the air in your car clean.

  1. Choose Quality Filters

When replacing, choose high-quality filters that fit your Toyota Corolla. Less expensive filters mightn't work as well and can affect the system's efficiency. Good filters make sure the air is clean and help your car's HVAC system last longer.

Conclusion

You have now found, taken out, and put in a new cabin air filter in your Toyota Corolla. With just a few easy tools and by following these simple steps, you've made the air inside your car cleaner.

Remember, it's important to check and change the filter once a year or as often as suggested to keep the air inside your car fresh and clean. Doing this not only makes the air better but also helps your car's heating and cooling system work better.

Great job in taking care of your car!

How to Turn on Passenger Airbag Toyota Corolla


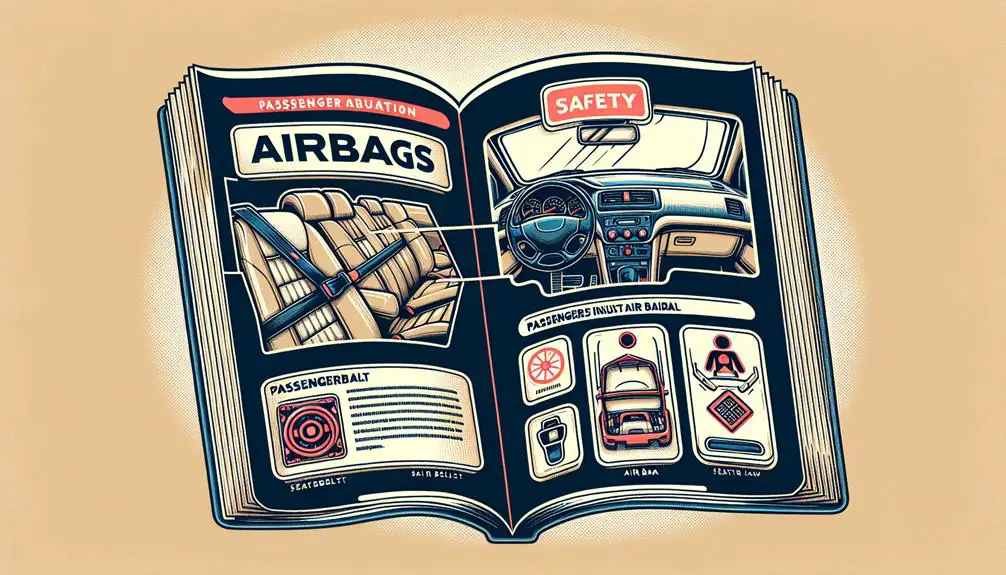
To turn on the passenger airbag in a Toyota Corolla, you need to locate the airbag status indicator or the passenger airbag control switch. These are usually found in the glove box or on the dashboard. Follow your vehicle's manual for specific instructions and safety considerations.

Understanding Your Airbag System

stay safe in cars

Before trying to activate the passenger airbag in your Toyota Corolla, it's important to know how the airbag system works. Your Toyota Corolla has an advanced airbag system for protection during a crash. This system isn't just a simple switch; it's made up of sensors and modules that work together for safety.

The system has Supplemental Restraint System (SRS) airbags located in different parts of the car, including the passenger side. These airbags deploy in certain severe crashes. The front passenger airbag is crucial for protecting the front seat passenger in a frontal collision.

Your Corolla may also have a feature that detects the front seat passenger's presence and size. This helps decide whether to turn the front passenger airbag on or off. If it detects a small child or a child seat, it might turn the airbag off to avoid injury.

You can't manually switch the airbag on or off. The system's automatic features make these decisions for you, based on real-time data and safety rules. Knowing this shows the importance of your Corolla's safety features and why you should trust them as designed.

Preparing to Reactivate the Airbag

To reactivate your Toyota Corolla's passenger airbag, follow these simple steps.

First, turn off the car and take out the keys to avoid any electrical issues or unintended airbag deployment. Wait a few minutes after shutting off the car to let any leftover electrical charge go away.

Then, read your car's owner's manual carefully. It has important instructions and warnings about the airbag system that you need to know for safety.

Additionally, consider these steps:

  • Make sure to follow the safety steps in the manual.
  • Have the basic tools you might need ready.
  • Before starting, check the passenger airbag indicator to make sure the airbag is currently off. This helps you know if you've successfully reactivated it later.

Locating the Airbag Control

locating airbag control module

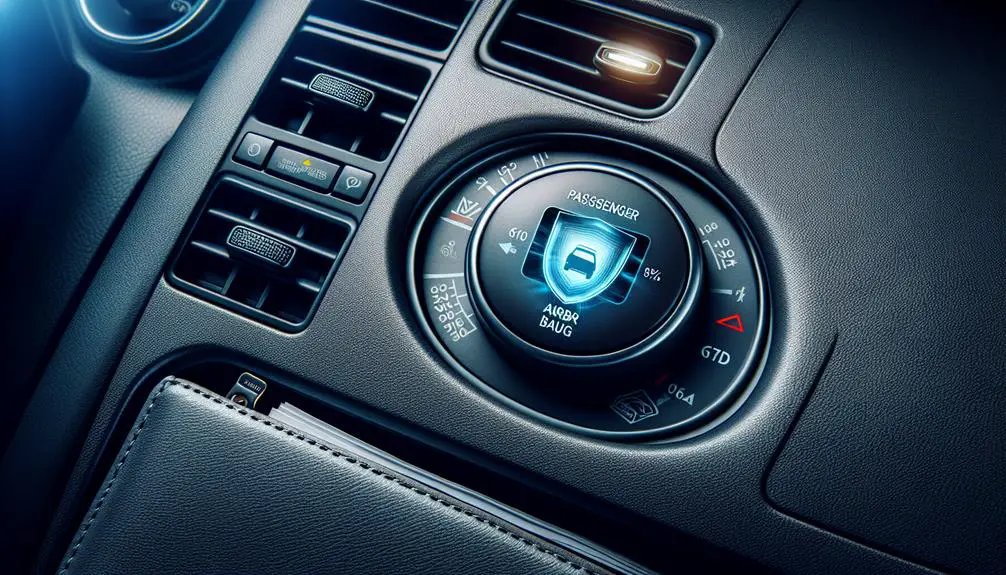
To find the airbag control in your Toyota Corolla, look on the passenger side dashboard or the side of the glove box for a small panel or switch. It's designed to blend in with the car's interior, so it might not be immediately obvious. Knowing where this control is is important for passenger safety.

Here's a guide to help you find the airbag control in your Toyota Corolla:

Location Feature
Side of Glove Box Small, marked panel
Passenger Dashboard Discreet switch or button
Under the Dashboard Hidden toggle
Near the Center Console Integrated control system

The exact location can vary based on the Toyota Corolla's year and model. Once you find the airbag control, don't adjust it until you know the proper steps to safely reactivate the passenger airbag.

Understanding where the airbag control is and how it works is important for ensuring passenger safety. The design of the control is meant to be not easily noticed but still accessible when needed.

Reactivating the Passenger Airbag

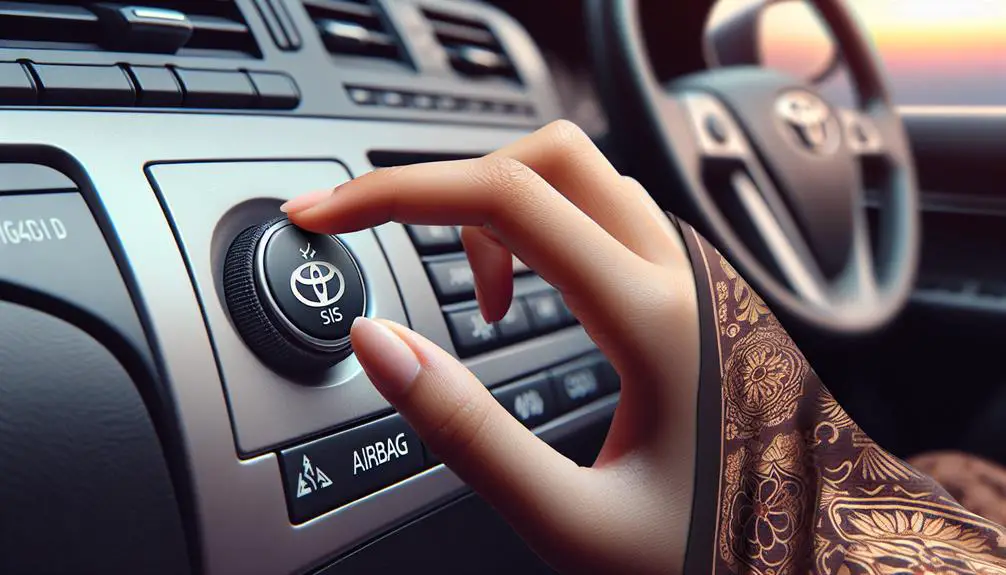
To reactivate the passenger airbag in your Toyota Corolla, follow these simple steps. Firstly, make sure your car is safely parked and the ignition is off to avoid any accidental airbag deployment. Then, find the passenger airbag control, which is usually in the glove compartment or on the dashboard on the passenger side. You may need to check your car's manual for the exact location and access method as it can vary by model and year.

To reactivate the airbag, simply:

  • Turn a key or press a button to the 'On' position.
  • Look for an indicator light or a dashboard message confirming the airbag is active.
  • Make sure the airbag area is clear of any objects.

Safety Tips and Considerations

safety in outdoor activities

Before turning on the passenger airbag in your Toyota Corolla, follow these safety steps for everyone's safety. First, read your car's manual for any specific instructions about the airbag system.

Airbags are meant to work with seat belts, not replace them. Everyone should wear seat belts correctly, especially in the front passenger seat where the airbag is.

If placing a child seat in the front, it's better to keep the airbag off. If you need to turn it on, use a rear-facing child seat and secure it as the manufacturer advises. The back seat is the safest for children.

Keep a safe distance between the passenger and the dashboard. Don't put objects on the dashboard; they can be harmful if the airbag opens.

If your Toyota Corolla was in an accident, get the airbag system checked by a professional. It may need service or resetting to work right in the future.

Conclusion

You know how to work with the airbag system in your Toyota Corolla, and safety is very important. Before you start, make sure you're ready and understand what to do.

Find the airbag control and turn the passenger airbag back on carefully. Always remember safety tips and take your time. You're making sure everyone in the car is safe, not just turning on a switch.

With this guide, you can keep everyone safe and have peace of mind while driving.