Recent Posts

How to Switch From Trip Meter to Odometer Rav4


To switch from the trip meter to the odometer in your Rav4, locate the control button near the steering wheel on the dashboard. Press this button to toggle between the trip meter and odometer displays. Understand the different information options available, such as fuel efficiency and outside temperature. You can access the trip meter by pressing the control button and reset it by holding it down. For odometer reading, press the button until the odometer display appears to track your total distance. Need more detailed steps and insights to optimize your Rav4’s features? Start by locating the control button for seamless transitioning.

How to Switch From Trip Meter to Odometer Rav4

Step 1: Locate the Control Button

When locating the control button to switch from the trip meter to the odometer in your Rav4, begin by examining the dashboard near the steering wheel.

In most Rav4 models, this control button is typically located on the instrument panel, close to the speedometer and fuel gauge. It is essential to familiarize yourself with the layout of your specific Rav4 model to pinpoint the exact location of this button.

Once you have located the control button, you can easily toggle between the trip meter and the odometer by pressing it. The trip meter is used to track the distance traveled for a specific trip, while the odometer displays the total distance the vehicle has covered since it was first driven.

This functionality can be useful for monitoring fuel efficiency, maintenance schedules, and overall usage of your Rav4.

Familiarizing yourself with the control button’s location and function will make it easier for you to access and utilize the trip meter and odometer features in your Rav4 conveniently.

Step 2: Understand the Display Options

Exploring the various display options available on the Rav4 allows for a comprehensive understanding of the vehicle’s information presentation capabilities. The Rav4 provides a range of display options that allow drivers to access essential information at a glance.

The display typically includes information such as the trip meter, odometer, fuel efficiency, and outside temperature. By familiarizing yourself with the different display options, you can easily navigate through the information the vehicle provides.

The Rav4’s display options can usually be accessed through the control button on the dashboard. This button allows you to cycle through the various display modes available on the vehicle.

Some Rav4 models may also offer customization options, allowing you to prioritize the information that is most important to you on the display.

Step 3: Access the Trip Meter

To access the trip meter in the Rav4, drivers can utilize the control button on the dashboard to navigate through the display options available on the vehicle. By pressing the button multiple times, users can cycle through the different displays until they reach the trip meter screen.

Once on the trip meter screen, drivers can reset the trip meter to zero by pressing and holding the same button for a few seconds. This allows users to track the distance traveled for a specific trip, making it useful for monitoring fuel efficiency or estimating travel time.

The table below outlines the steps to access the trip meter in the Rav4:

Steps to Access Trip Meter
1. Turn on the vehicle
2. Locate the control button on the dashboard
3. Press the button to cycle through display options
4. Stop when the trip meter screen is displayed
5. Hold the button to reset the trip meter to zero

Step 4: Switch to Odometer Reading

To transition from the trip meter display to the odometer reading on the Rav4, drivers can access the essential mileage information by following a straightforward method via the dashboard controls.

The odometer provides the total distance the vehicle has traveled since it was first driven and is a crucial metric for monitoring the car’s usage and maintenance schedule.

To switch to the odometer reading, locate the control button on the dashboard that allows you to toggle between the trip meter and odometer. Typically, this button is labeled ‘ODO’ or ‘Trip/Odo‘ and can be pressed or held to switch the display.

Once you have found the button, simply press it until the odometer reading appears on the screen. This action will ensure that you have access to the accurate and cumulative mileage data of your Rav4, enabling you to track its overall usage effectively.

Step 6: Reset the Trip Meter

Resetting the trip meter is a straightforward process that allows drivers to track individual distances traveled on specific trips. To reset the trip meter in a Rav4, locate the trip meter button on the dashboard.

This button is usually labeled ‘Trip’ and is situated near the speedometer or tachometer. Once you have located the trip button, press and hold it until the trip meter resets to zero.

Some Rav4 models may require you to turn the ignition to the ‘On’ position without starting the engine before you can reset the trip meter.

Resetting the trip meter is useful for monitoring fuel efficiency, tracking distances between fill-ups, or keeping a record of mileage for maintenance purposes.

Step 7: Practice Toggling Between Functions

When familiarizing yourself with the trip meter functions in a Rav4, practicing toggling between different modes can help you efficiently navigate and access various information displays while on the road.

To begin, locate the trip meter button on your dashboard. Pressing this button will cycle through the different modes available, such as the trip meter A, trip meter B, and the odometer.

By toggling between these functions, you can track your mileage for specific trips, monitor fuel efficiency, and view the total distance your vehicle has traveled.

Engaging in this practice regularly will make it easier for you to switch between functions without distraction while driving. It is essential to understand the different displays each mode offers, so you can utilize the information to enhance your driving experience.

Wrapping Up

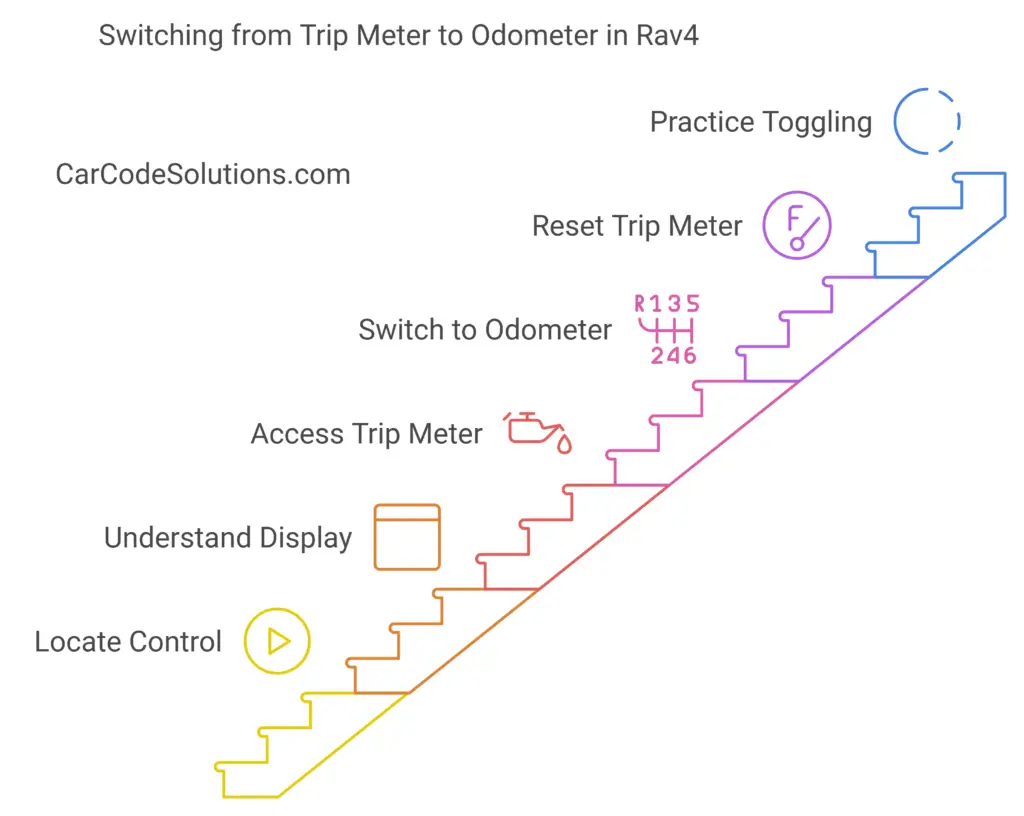
In conclusion, switching from the trip meter to the odometer in a Rav4 involves:

  • Locating the control button
  • Understanding the display options
  • Accessing the trip meter
  • Switching to the odometer reading
  • Resetting the trip meter

By following these steps, you can easily toggle between functions to access the desired information on your vehicle’s display.

Mastering this process will enable you to track your mileage and trips effectively.

How to Switch From Trip Meter to Odometer Toyota Camry


To switch from the trip meter to the odometer in your Toyota Camry, locate the trip meter button near the speedometer and tachometer gauges. Press the button to cycle through display options until you reach the odometer reading. This will show the total distance traveled. Toggle between the trip meter and odometer easily by pressing the control button on the dashboard. Confirm the switch on the instrument cluster. Verify the total mileage displayed for accuracy. For a more detailed walkthrough of switching between the trip meter and odometer, keep exploring the steps provided.

How to Switch From Trip Meter to Odometer Toyota Camry – Step By Step

Step 1: Locate the Trip Meter Button

To begin the process of switching from the trip meter to the odometer in your Toyota Camry, the first step is to locate the Trip Meter button on the vehicle’s dashboard. The Trip Meter button is typically situated near the speedometer and tachometer gauges. It may be labeled as ‘Trip’ or ‘Trip Meter’ and is used to cycle through different display options on the instrument cluster.

Once you have located the Trip Meter button, you can press it to switch from the trip meter reading to the odometer reading. The trip meter is used to measure the distance traveled for a specific trip, while the odometer provides the total distance the vehicle has covered since it was manufactured.

Step 2: Understand the Display Options

Understanding the display options available on the instrument cluster of your Toyota Camry provides valuable insight into the different information and settings that can be accessed while driving. Here are five key display options you may encounter:

  • Trip Meter: Displays the distance traveled since the last reset.
  • Odometer: Shows the total distance the vehicle has traveled.
  • Average Fuel Consumption: Indicates the average fuel efficiency over a specified period.
  • Outside Temperature: Displays the current temperature outside the vehicle.
  • Clock: Shows the current time.

Each of these display options serves a specific purpose, allowing you to stay informed about important aspects of your driving experience.

Step 3: Access the Odometer Reading

Accessing the odometer reading in your Toyota Camry is a straightforward process that provides you with essential information about the total distance your vehicle has traveled. To access the odometer reading, follow these simple steps:

  1. Step 1: Sit in the driver’s seat of your Toyota Camry and ensure the vehicle is turned off.
  2. Step 2: Locate the dashboard display where the odometer reading is shown.
  3. Step 3: Turn the ignition key to the ‘On’ position without starting the engine. This will power up the vehicle’s systems.
  4. Step 4: Look for the total mileage displayed on the odometer. This number represents the total distance your Toyota Camry has traveled since it was new.

Step 3: Toggle Between Trip Meter and Odometer

Switching between the trip meter and odometer on your Toyota Camry can be done easily using the control button provided on the dashboard. This feature allows you to conveniently switch between tracking your overall mileage and monitoring the distance covered during specific trips.

Here are some simple steps to toggle between the trip meter and odometer:

  • Locate the control button: Identify the button on your dashboard that is specifically designated for switching between the trip meter and odometer.
  • Press the button: Press the button to cycle through the different display options available for your Toyota Camry’s mileage tracking.
  • Watch the display: Keep an eye on the information displayed on your instrument cluster as you toggle between the trip meter and odometer.
  • Confirm the selection: Ensure that the desired mileage tracker (trip meter or odometer) is being shown on the dashboard.
  • Enjoy the flexibility: Appreciate the convenience of easily switching between monitoring your overall mileage and tracking individual trip distances with just the push of a button.

Step 4: Confirm the Switch Has Been Made

To verify the selection made between the trip meter and odometer on your Toyota Camry, refer to the displayed mileage information on the instrument cluster. If you see the total mileage of your vehicle, then the switch from the trip meter to the odometer has been successfully completed.

The odometer typically shows the overall distance your car has traveled since it was manufactured. It is a useful tool for keeping track of the total wear and tear on your vehicle. Once you have confirmed that the odometer is displaying, you can rest assured that the changeover has been executed correctly.

It is essential to double-check this switch to ensure that you have accurate mileage information at your disposal. If you encounter any issues or uncertainties regarding the switch from the trip meter to the odometer, consult your Toyota Camry’s user manual for further guidance.

People Also Ask

Where is the odometer button on a Toyota Camry?

To find the odometer button on your Toyota Camry, look near the speedometer and tachometer gauges. It is typically located to the right of the instrument cluster. If there isn’t an ODO or TRIP button visible, check for a thin black dial on the dashboard screen between the speedometer and the multi-information display. You can press this dial to cycle through the odometer display options.

How do you show the odometer on a Toyota?

To display the odometer on your Toyota Camry, press the odometer button to cycle through the display options until you reach the odometer reading, which indicates the total distance traveled. If you want to switch from “Trip A” to the total odometer reading, press the long skinny button to the right of the instrument cluster screen. This will allow you to cycle through “Trip B” and then display the total mileage.

How do I turn off the trip on my Toyota Camry?

To turn off the trip meter on your Toyota Camry, first navigate to the trip meter display you want to reset. Then, press and hold the relevant button for 3-5 seconds. This will reset the trip meter to zero, effectively turning it off.

Wrapping Up

In conclusion, switching from the trip meter to the odometer on a Toyota Camry is a simple process that involves:

  • Locating the trip meter button
  • Understanding the display options
  • Accessing the odometer reading
  • Toggling between the two

By following these steps, you can easily switch between the trip meter and odometer to monitor your mileage and trips effectively.

How to Switch from Trip Meter to Odometer Toyota Corolla


To switch from the trip meter to the odometer in a Toyota Corolla, locate the trip meter button on the dashboard near the speedometer. Ensure the car is turned on. Press and hold the button to toggle between trip meter and odometer displays. Release the button after selecting the desired mode for a smooth transition. Confirm the odometer display near the speedometer for total distance traveled. By following these steps, you can easily switch between tracking trips and viewing overall mileage on your Toyota Corolla. Unlock the full potential of your dashboard functionality effortlessly.

How to Switch From Trip Meter to Odometer Toyota Corolla – Step By Step

Step 1: Locate the Trip Meter Button

To locate the Trip Meter Button in your Toyota Corolla, begin by examining the dashboard controls near the driver’s side. The Trip Meter Button is typically positioned among the cluster of buttons and knobs located close to the steering wheel. In most Toyota Corolla models, it is situated either on the instrument panel near the speedometer or on the dashboard near the driver’s side door. The Trip Meter Button is usually labeled with the letter ‘A’ or ‘B,’ corresponding to the two trip meters available in the vehicle.

Locating this button is essential for accessing and switching between the trip meter and odometer functions in your Toyota Corolla. By pressing the Trip Meter Button, you can cycle through the different display options on the multifunction display, including the trip meters and the odometer. Familiarizing yourself with the position of this button will facilitate seamless navigation through the various functions offered by your vehicle’s dashboard controls.

Step 2: Turn the Ignition Key to On

With your Toyota Corolla in park, ensure that the vehicle’s gear shift is in the ‘P’ position before proceeding to turn the ignition key to the ‘On’ position. This step is crucial as it allows the vehicle’s electrical systems to power up without starting the engine.

The ‘On’ position is typically the second position when turning the key clockwise after the ‘Off’ position. You should see various dashboard lights illuminate, indicating that the car is ready to be operated.

Step 3: Press and Hold the Trip Meter Button

Pressing and holding the trip meter button on your Toyota Corolla is the next step to switch from the trip meter to the odometer display.

To begin, locate the trip meter button, usually situated on the dashboard near the speedometer. Once you have found the button, press and hold it for a few seconds until the display changes from the trip meter reading to the odometer reading.

The trip meter button is designed to toggle between different display modes, allowing you to easily switch between tracking your trips and viewing the overall mileage of your vehicle.

Step 5: Switch Between Trip and Odometer

When switching between the trip meter and odometer on your Toyota Corolla, locate the trip meter button and follow the specified steps to navigate between the two display modes seamlessly. To switch between the trip meter and odometer in your Toyota Corolla, follow these steps:

StepInstructions
Step 1Ensure your Toyota Corolla is turned on.
Step 2Locate the trip meter button on the dashboard.
Step 3Press the trip meter button to switch between the trip meter and odometer.
Step 4Toggle between the trip meter A, trip meter B, and the odometer by pressing the button repeatedly.

Step 6: Release the Trip Meter Button

To disengage the trip meter button in your Toyota Corolla, simply release the button after selecting the desired mode. Once you have chosen between the trip meter and odometer display, press the trip meter button until the display shows the mode you want.

To switch from the trip meter to the odometer, hold down the trip meter button until the display changes to the odometer reading. When you are ready to release the trip meter button, ensure that you do so without applying excessive force to avoid any damage to the button or the dashboard.

Releasing the trip meter button promptly after selecting the desired mode allows the system to register your choice accurately. By following these simple steps and handling the trip meter button gently, you can smoothly transition between the trip meter and odometer functions in your Toyota Corolla.

Step 7: Confirm the Odometer Display

After confirming the selected mode on the trip meter button, proceed to verify the odometer display in your Toyota Corolla. The odometer display is typically located on the dashboard near the speedometer and fuel gauge. It shows the total distance the vehicle has traveled since it was first driven off the lot.

To confirm the odometer display, take a look at the numbers shown. The odometer will typically display mileage in miles or kilometers, depending on the unit of measurement preferred. Ensure that the numbers are steady and not flashing, as a flashing display could indicate a possible issue that may require attention from a certified technician.

Once you have verified the odometer display, you can be confident that you are now viewing the total mileage of your Toyota Corolla. This information is crucial for keeping track of regular maintenance schedules and monitoring the overall usage of your vehicle.

People Also Ask

How do you show the odometer on a Toyota?

To display the odometer on your Toyota, locate the button labeled ‘DISP’ or ‘DISPLAY’ on the steering wheel. Press this button repeatedly until the odometer reading appears on the display. The odometer shows the total distance your vehicle has traveled since it was manufactured.

How to reset trip meter on Toyota Corolla?

To reset the trip meter on your Toyota Corolla, first navigate to the trip meter display you want to reset. Press and hold the relevant button for 3-5 seconds. The display should zero out, effectively resetting the trip meter.

Why does my odometer say trip?

If your odometer display shows “trip” instead of the total mileage, it means you are currently viewing the trip meter rather than the odometer. To switch to the odometer, locate the ‘DISP’ or ‘DISPLAY’ button on the steering wheel and press it repeatedly until the odometer reading appears.

Wrapping Up

In conclusion, switching from the trip meter to the odometer in a Toyota Corolla is a simple process.

By locating the trip meter button, turning the ignition key to on, pressing and holding the trip meter button, switching between trip and odometer, and releasing the trip meter button, you can easily switch the display.

Make sure to confirm the odometer display to ensure accuracy in your mileage tracking.

How to Reset Maintenance Required on Toyota Corolla 2020


To reset the maintenance required on a Toyota Corolla 2020: Locate the Odometer Button near the speedometer, turn off the engine, press and hold the button, turn the ignition to the 'On' position, and continue holding until the light stops flashing. This process ensures successful maintenance light reset.

Locate the Odometer Button

To begin resetting the maintenance on a Toyota Corolla 2020, the first step is to locate the Odometer Button on the dashboard. The Odometer Button is typically situated near the speedometer and tachometer, and it is used to navigate through the different settings and functions displayed on the dashboard. Once you have located the Odometer Button, make sure the vehicle is turned off to avoid any mishaps during the resetting process.

When you locate the Odometer Button, you will notice that it has a few different functions, including toggling between the trip meter and the odometer. To access the maintenance settings, you will need to press and hold the Odometer Button while turning the engine switch to the 'On' position. This will initiate the maintenance reset procedure, allowing you to clear the maintenance required light and start fresh with your maintenance schedule. Familiarizing yourself with the location and function of the Odometer Button is crucial for efficiently resetting the maintenance on your Toyota Corolla 2020.

Turn Off the Engine

Ensuring the engine of your Toyota Corolla 2020 is turned off is the next crucial step in the maintenance resetting process. Before proceeding with resetting the maintenance light, it is essential to switch off the engine to prevent any mishaps during the procedure. Turning off the engine will also ensure that the reset is done accurately without any interruptions.

To turn off the engine of your Toyota Corolla 2020, simply shift the gear into park or neutral, apply the parking brake, and then turn the ignition key to the off position. Wait for a few moments to allow the engine to completely power down before continuing with the maintenance reset process.

Press and Hold Odometer Button

After ensuring the engine of your Toyota Corolla 2020 is turned off, the next step in resetting the maintenance involves pressing and holding the odometer button.

Locate the odometer button on the dashboard, usually situated near the speedometer. Once you have found it, press down on the button and hold it firmly.

While holding the odometer button, turn the engine switch to the “On” position without starting the engine. You will notice the dashboard lights illuminate, indicating the car is in accessory mode.

Continue holding the odometer button until the maintenance required light on the dashboard starts flashing. This flashing light signifies that the maintenance reset process is underway.

Release the odometer button once the light stops flashing. At this point, the maintenance required light should be successfully reset, and you can restart your Toyota Corolla 2020 knowing the maintenance reminder has been cleared.

Turn Ignition to On Position

With the engine switch in the 'On' position and the odometer button held down, the next step in resetting the maintenance on a Toyota Corolla 2020 involves turning the ignition key to activate the electronic systems.

Once the odometer button is securely pressed, move the key into the ignition and turn it to the 'On' position without starting the engine. This action will power up the vehicle's electronics, preparing it for the maintenance reset procedure. It is crucial to ensure that the key is fully turned and that all warning lights on the dashboard illuminate.

Continue Holding Odometer Button

To proceed with the maintenance reset process on your Toyota Corolla 2020, maintain pressure on the odometer button as you progress to the next step. Continuing to hold the odometer button is crucial for ensuring that the reset procedure is executed successfully. This step indicates to the vehicle's system that you are actively engaged in the maintenance reset process.

To emphasize the importance of holding the odometer button, consider the following points in the table below:

Point 1 Point 2 Point 3
Maintain pressure Ensure consistency Follow instructions

Reset Maintenance Light

Resetting the maintenance light on your Toyota Corolla 2020 is a straightforward process that ensures your vehicle's system is up to date with its maintenance schedule.

When the maintenance light illuminates on your dashboard, it indicates that it's time for a regular service check.

To reset the maintenance light, start by turning the ignition key to the 'On' position without starting the engine. Locate the trip reset button on the dashboard and press it until you see the odometer reading on the display.

Next, turn the ignition key back to the 'Off' position. Press and hold the trip reset button again while turning the key back to the 'On' position. Continue holding the button until the maintenance light turns off, indicating that the reset is complete.

This simple process ensures that your Toyota Corolla 2020 is ready for its next scheduled maintenance without any hassle.

Conclusion

In conclusion, resetting the maintenance required light on a Toyota Corolla 2020 is a simple process that can be done by following a few easy steps.

By locating the odometer button, turning off the engine, and holding the odometer button while turning the ignition to the on position, you can successfully reset the maintenance light.

This quick and easy procedure will ensure your vehicle is properly maintained and running smoothly.

How to Reset Maintenance Required on Toyota Corolla 2007?


How to Reset Maintenance Required on Toyota Corolla 2007? To reset the maintenance required light on your Toyota Corolla 2007, locate and press the reset button beneath the dashboard near the steering column or hood release lever. Make sure the vehicle is off before pressing. Insert the key, turn to ‘On,’ and wait for the maintenance light to flash and go off. Hold the key briefly in the ‘On’ position before removing it.

This process ensures successful resetting of the maintenance indicator. Following these steps helps you maintain your car’s maintenance schedule. Ready to keep your Toyota running smoothly?

Step 1: Locate the Reset Button

To reset the maintenance light on a Toyota Corolla 2007, begin by locating the reset button within the vehicle. The reset button is typically found beneath the dashboard on the driver’s side.

It may be situated near the steering column or the hood release lever. Once you have identified the reset button, ensure the vehicle is turned off to initiate the reset process.

Locating the reset button is crucial as it is the initial step in resetting the maintenance light. By pressing and holding the reset button, you can clear the maintenance light indicator on the dashboard.

This action is instrumental in ensuring that the vehicle’s maintenance schedule is accurately monitored and adhered to.

Step 2: Turn the Ignition Key

With the reset button pressed, proceed to turn the ignition key in the Toyota Corolla 2007 to complete the maintenance light reset process. Once you have located the reset button and ensured it is pressed, insert the key into the ignition.

Turn the key to the ‘On’ position without starting the engine. You should see various dashboard lights illuminate, indicating the car’s systems are powering up. Pay close attention to the maintenance light; it should start flashing and eventually turn off. This action signifies that the maintenance required light has been successfully reset.

It is important to hold the key in the ‘On’ position for a few seconds to allow the reset process to finalize. After the maintenance light has turned off, you can now remove the key from the ignition.

You have now completed the reset process by simply turning the ignition key, and your Toyota Corolla 2007 is ready to hit the road without any lingering maintenance reminders.

Step 3: Press and Hold the Button

Press and hold the reset button firmly to initiate the maintenance light reset process on your Toyota Corolla 2007. This step is crucial in ensuring that the maintenance required light is successfully reset. Follow these simple instructions to complete the process smoothly:

  1. Locate the reset button: Identify the reset button in your Toyota Corolla 2007. It is typically located near the dashboard instrument panel.
  2. Press and hold firmly: Use your finger to press down on the reset button firmly. Hold it in this position for the next steps to follow.
  3. Ignition key position: Ensure your ignition key is in the ‘Off’ position before proceeding with pressing and holding the reset button.
  4. Maintain pressure: Keep holding down the reset button firmly until you see the maintenance light on your dashboard start to flash or turn off.

Step 4: Wait for the Light to Flash

After holding the reset button firmly on your Toyota Corolla 2007, the next step is to wait for the maintenance light on the dashboard to flash, indicating that the reset process is in progress.

This flashing light is a signal that the system is acknowledging the reset command and is in the process of clearing the maintenance required light. It is crucial to pay attention to this step as it confirms that you have correctly initiated the reset procedure.

To provide a clearer understanding, let’s look at the following table showcasing the sequence of actions required to reset the maintenance light on your Toyota Corolla 2007:

Step No.Action Required
1Press and hold reset button
2Wait for maintenance light to flash
3Release the button
4Start the engine
5Confirm maintenance light is off

Step 5: Release the Button

Upon observing the maintenance light flash, the next crucial step in resetting the maintenance on your Toyota Corolla 2007 is to release the button firmly. This step is essential to ensure that the reset process is completed successfully. Here are some key points to consider when releasing the button:

  1. Firm Pressure: Apply firm and consistent pressure while releasing the button to avoid any accidental disruptions in the resetting process.
  2. Smooth Release: Ensure a smooth and steady release of the button to prevent any potential errors in resetting the maintenance light.
  3. Avoid Abrupt Movements: Steer clear of sudden or jerky movements when releasing the button to maintain a stable reset procedure.
  4. Hold for a Moment: After releasing the button, hold for a moment to confirm that the reset has been initiated before proceeding to the next step.

Step 6: Confirm the Reset

To ensure the successful completion of the maintenance reset process on your Toyota Corolla 2007, a thorough verification of the reset status is imperative. After releasing the button and witnessing the maintenance light turn off, it is crucial to confirm that the reset was executed correctly.

Start your car and check if the maintenance light remains off. Drive the vehicle for a short distance to ensure that the light does not reappear. Additionally, it is beneficial to inspect the dashboard for any other warning lights that may indicate unresolved issues.

If the maintenance light stays off and no other warnings are present, the reset was successful. By confirming the reset, you can be confident that the maintenance required notification has been properly addressed, allowing you to continue driving your Toyota Corolla 2007 without any lingering concerns regarding outstanding maintenance tasks.

Wrapping Up

Resetting the maintenance required light on a Toyota Corolla 2007 is a simple process. It involves locating the reset button, turning the ignition key, pressing and holding the button, waiting for the light to flash, and then releasing the button.

By following these steps, you can easily reset the maintenance required light on your vehicle.

How to Reset Maintenance Required on Toyota Corolla 2013?


How to Reset Maintenance Required on Toyota Corolla 2013? To reset the maintenance required indicator on your Toyota Corolla 2013: Check dashboard reminder with a wrench symbol, turn ignition to ‘On,’ press and hold trip button, toggle to ‘Maintenance Required’ option, confirm reset, then complete the process. Keeping up with maintenance ensures optimal performance.

Step 1: Check Maintenance Reminder

To begin the process of resetting maintenance on your Toyota Corolla 2013, the first step is to check the maintenance reminder on your dashboard display. This reminder typically appears as a wrench symbol accompanied by a numerical value indicating the remaining mileage before the next service is due.

It is important to address these reminders promptly to ensure the optimal performance and longevity of your vehicle.

Taking note of the maintenance reminder is crucial as it helps you stay on top of your car’s service needs. By being proactive and addressing maintenance requirements in a timely manner, you can prevent potential issues and maintain the reliability of your Toyota Corolla 2013.

Once you have confirmed the maintenance reminder status, you can proceed with the necessary steps to reset it and ensure your vehicle continues to run smoothly.

Step 2: Turn Ignition to “On” Position

Engage the vehicle’s ignition to the ‘On’ position to initiate the maintenance reset process smoothly and efficiently. Once the ignition is in the ‘On’ position, you are ready to proceed with resetting the maintenance required notification on your Toyota Corolla 2013.

Here are some simple steps to guide you through the process:

  • Ensure the vehicle is parked safely with the engine off.
  • Insert the key into the ignition and turn it to the ‘On’ position without starting the engine.
  • Look for the trip meter button, which is typically located near the speedometer.
  • Locate and identify the trip button to prepare for the next step in resetting the maintenance reminder.
  • Familiarize yourself with the dashboard indicators that will assist in confirming the successful completion of the maintenance reset.

Step 3: Press and Hold Trip Button

With the vehicle’s ignition in the ‘On’ position and the trip meter button identified, the next step is to press and hold the trip button to proceed with resetting the maintenance reminder on your Toyota Corolla 2013.

To guide you through this process, follow the steps below:

StepActionResult
1Locate the trip meter button in your CorollaReady to reset maintenance reminder
2Press and hold the trip buttonMaintenance reminder will reset
3Continue holding until reset is confirmedMaintenance reminder successfully reset

Pressing and holding the trip button is a straightforward task that allows you to take control of your vehicle’s maintenance schedule. By following these simple steps, you can ensure that your Toyota Corolla 2013 continues to run smoothly and efficiently.

Once you have completed this step, you will be ready to toggle through the options to complete the maintenance reset process.

Step 4: Toggle Through Options

Navigating through the options on your Toyota Corolla 2013 for the maintenance reset process is a straightforward task that ensures your vehicle’s continued smooth operation. To toggle through the options effectively, follow these simple steps:

  • Locate the trip button on the dashboard.
  • Press the trip button until you reach the ‘Settings’ option on the display.
  • Once in the ‘Settings’ menu, use the trip button to scroll through the available options.
  • Look for the ‘Maintenance Required’ or ‘Maintenance Reset’ option.
  • Select the ‘Maintenance Required’ or ‘Maintenance Reset’ option by pressing the trip button to enter the submenu.

Step 5: Confirm Reset

To finalize the maintenance reset on your Toyota Corolla 2013, proceed with verifying the selected option for confirmation. Confirming the reset ensures that the changes made will be implemented correctly. Below is a table to guide you through the confirmation process:

Option SelectedAction RequiredConfirmation
Maintenance ResetPress and hold “Reset” buttonYes/No
Reset CompleteCheck for maintenance light on dashboardYes/No
Check SettingsVerify maintenance schedule is clearedYes/No

Step 6: Complete Reset Process

After confirming the maintenance reset on your Toyota Corolla 2013, proceed to complete the reset process to ensure all changes are successfully implemented.

Follow these simple steps to finalize the reset:

  • Step 1: Turn off your vehicle’s engine.
  • Step 2: Press and hold the Trip Meter button.
  • Step 3: While holding the Trip Meter button, turn the engine switch to the ‘ON’ position.
  • Step 4: Continue holding the Trip Meter button until the maintenance light starts flashing.
  • Step 5: Release the Trip Meter button, and the maintenance light should stop flashing, indicating that the reset is complete.

Wrapping Up

Resetting the maintenance required on a Toyota Corolla 2013 is a simple process that can be easily done by following a few steps.

By checking the maintenance reminder, turning the ignition to the ‘on’ position, pressing and holding the trip button, toggling through options, and confirming the reset, you can successfully complete the reset process.

Keep your vehicle in top condition by staying on top of your maintenance reminders.