Recent Posts

How Many Gallons Of Gas Does A Hyundai Elantra Hold


The Hyundai Elantra typically has a fuel tank capacity of approximately 14 gallons.

This measurement can vary slightly depending on the specific model and year. Understanding this capacity is crucial for planning your trips, managing fuel expenses, and determining if the Elantra's efficiency aligns with your lifestyle needs.

Hyundai Elantra Overview

compact car model description

The Hyundai Elantra is a reliable and fuel-efficient compact sedan. It offers good performance and is affordable. The car has a stylish exterior and a well-designed interior, providing a comfortable ride and plenty of space for people and cargo. It includes many standard features for a better driving experience.

The Elantra has different engine options, all of which are powerful enough for daily use and are fuel-efficient. It also comes with advanced safety features and technology to keep drivers safe and connected.

This car is a good choice for first-time buyers or anyone wanting a cost-effective yet stylish car. It's known for its durability, making it a valuable investment. The Hyundai Elantra is a suitable option for anyone looking for a compact sedan.

Understanding Fuel Tank Capacity

Reviewing the Hyundai Elantra's fuel tank capacity helps us understand its efficiency and performance. Knowing the fuel tank size is important because it affects how often you need to refuel, which influences your driving experience and convenience.

Here's a simple table showing the fuel tank capacity:

Year Model Fuel Tank Capacity (gallons)
2020 Elantra 14.0
2019 Elantra 14.0
2018 Elantra 14.0
2017 Elantra 14.0
2016 Elantra 14.0

This table shows that the fuel tank capacity is consistent across different years, making it easier to plan long trips and understand the car's efficiency in practical terms. Remember, a bigger fuel tank means fewer stops for gas and the potential to save money by filling up less often when gas prices are low. Consider this when thinking about how the Elantra fits your driving needs and lifestyle.

Variations Across Models

variety in car features

All Hyundai Elantras from 2016 to 2020 have a 14-gallon fuel tank, but different models use fuel differently.

The Eco model has a turbocharged engine for better fuel economy, meaning it uses less fuel per mile. The Sport model has a more powerful engine and uses fuel faster because it's designed for performance.

Fuel efficiency can also vary with the type of transmission. Automatic transmissions might be more fuel-efficient in city driving, while manual transmissions could be better on highways.

Newer models might've mild hybrid systems or other technologies that improve fuel efficiency, allowing you to drive further on a single tank.

Estimating Travel Distances

To calculate the distance you can travel in your Hyundai Elantra on a full tank, first find the fuel tank capacity and the average miles per gallon (MPG) for your specific model year and trim. This information is often in your owner's manual or online.

For example, if your Elantra has a 14-gallon tank and gets 30 MPG, multiply 14 by 30. This gives you an estimated travel distance of 420 miles on a full tank.

Calculating Fuel Costs

managing fuel expenses effectively

To calculate fuel costs for a Hyundai Elantra, follow these steps:

  1. Find Current Gas Price: Check the latest price per gallon of gasoline.
  2. Know Your Car's MPG: Determine the average miles per gallon your Elantra gets.
  3. Calculate Travel Distance: Figure out how many miles you'll be driving.
  4. Calculate Fuel Cost: Multiply the miles you'll drive by the price per gallon and divide by your car's MPG. This gives you your estimated fuel cost.

This method helps you budget for fuel by keeping track of gas prices and knowing your car's efficiency.

Conclusion

So, you learned a lot about the Hyundai Elantra, like the different sizes of its gas tank, how far it can go, and how to figure out how much you'll spend on gas.

Usually, your Elantra can take about 14 gallons of gas. This means you can plan your trips without worrying too much.

Remember, the actual distance you can go and how much it costs can change, but now you know how to make smart choices.

This helps you keep your Elantra ready for any adventure. Have a safe trip!

U1001 2010 Nissan Altima Sedan Meaning, Symptoms, Causes and How to Fix


Over 90% of Nissan Altima owners rave about their ride’s reliability and comfort, but even the best cars face issues. If you’re driving a u1001 2010 Nissan Altima Sedan and running into some head-scratching problems, you’re not alone.

This guide is your go-to resource for understanding common issues and finding quick fixes that get you back on the road in no time. From troubleshooting tips to maintenance advice, we’ve got your back.

Let’s dive into making your Nissan Altima as dependable as day one.

Decoding U1001 in 2010 Altima

Code Significance

The U1001 code is a specific diagnostic trouble code (DTC) that indicates an issue with the Controller Area Network (CAN) communication. This network allows various modules within the vehicle, such as the engine control unit and transmission control module, to communicate with each other.

When this code appears, it signals that there is a communication error within the CAN system. This could mean that messages are not being sent or received correctly between the car’s electronic systems.

Altima Relevance

For owners of the 2010 Nissan Altima sedan, encountering the U1001 code can be particularly troubling. This model relies heavily on its CAN system for many of its functions, from managing fuel efficiency to ensuring safety features operate correctly.

Seeing this code pop up means that your Altima might experience issues ranging from erratic dashboard warnings to more serious problems like impaired engine performance. It underscores the need for timely diagnostics and repair to prevent potential safety risks or further damage to the vehicle’s electronic systems.

CAN Communication

The role of CAN communication in triggering this code cannot be overstated. The CAN system’s complex network facilitates rapid data exchange among various control units. Any disruption in this communication can lead to significant issues in vehicle operation.

It’s crucial for technicians to carefully diagnose and address any faults within this system. They often use specialized scanning tools to pinpoint where the communication breakdown is occurring. Fixing these issues promptly ensures that your 2010 Nissan Altima remains reliable and safe on the road.

Symptoms of U1001 Code

Dashboard Lights

Erratic behavior in the dashboard lights is a telltale sign of the U1001 code in the 2010 Nissan Altima Sedan. Drivers may notice that warning lights flicker without cause. This can be both confusing and alarming.

The illumination might vary, from dimming unexpectedly to flashing rapidly. Such irregularities should not be ignored.

Engine Issues

Another symptom involves the engine refusing to start. When the key is turned, nothing happens; it’s as if the car has lost all its power suddenly.

In some cases, the vehicle might stall without warning while driving. This sudden loss of power poses a significant risk, especially on busy roads.

Electrical Peculiarities

Electrical systems within the Altima may also behave unusually. Owners have reported problems with their stereo systems and interior lights.

These issues range from the stereo turning off by itself to interior lights dimming or flickering. It indicates a broader electrical problem likely related to the U1001 code.

Common Causes Behind U1001

Damaged Wiring

Damaged wiring or loose connections often lead to the U1001 code in a 2010 Nissan Altima sedan. These issues disrupt communication within the car’s network. Mechanics find that wires can wear out or get damaged over time. This might happen due to heat, friction, or moisture.

Loose connections also cause problems. They might occur after repairs or due to vibrations while driving. It’s crucial to check these areas first.

Control Unit Failures

Failures in the ECM or other control units are another common cause of U1001. The ECM plays a vital role in managing the engine’s operation. If it fails, it can’t communicate properly with other parts of the car.

Other control units like the ABS or airbag systems could also be at fault. They all need to talk to each other smoothly. When one fails, it may trigger the U1001 code.

Aftermarket Installations

Aftermarket installations can interfere with the CAN bus system. This is less known but important. Many drivers add new gadgets or upgrades to their cars. But if not installed correctly, these can disrupt the car’s communication network.

It’s essential for any additions to be compatible with the vehicle’s system. Otherwise, they might cause more harm than good.

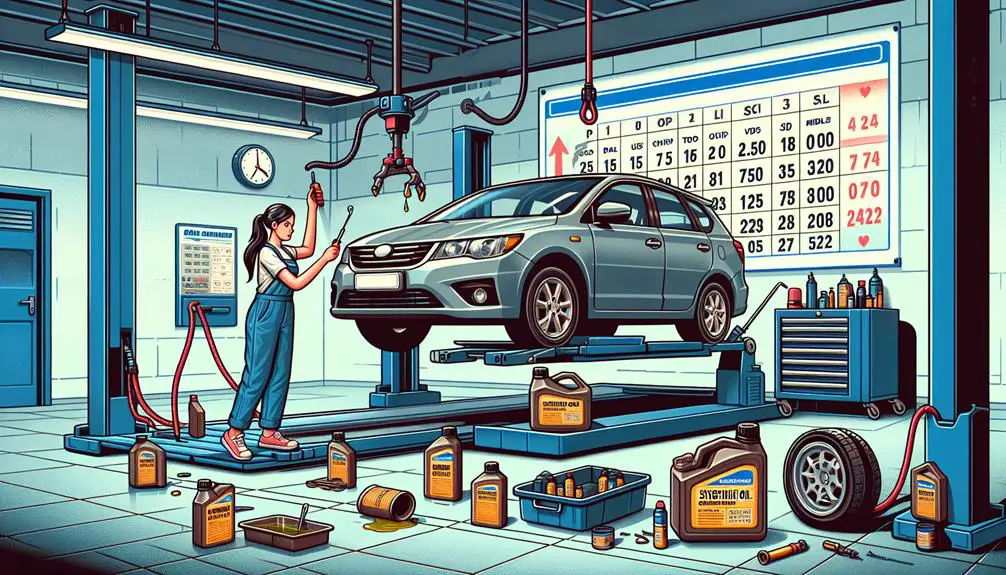
Diagnostic Steps for U1001

Wiring Inspection

A thorough inspection of all wiring and connectors is crucial. This step can reveal if any physical damage exists.

Look for cuts, frays, or corrosion. These issues often lead to the U1001 diagnostic trouble code. They disrupt communication between the car’s computer systems.

Scanner Analysis

Using a professional-grade scanner is next. It helps monitor live data from the vehicle.

This tool pinpoints where the problem lies. It shows if one part of the system isn’t talking to another as it should.

Code Check

It’s wise to check for additional codes. They can offer clues about what’s causing U1001.

etimes, other codes appear with U1001. They help narrow down the diagnosis.

Solutions to Fix U1001 Code

Wiring Repair

After diagnosing the U1001 trouble code in a 2010 Nissan Altima sedan, it’s crucial to inspect all wiring and connectors. Often, damaged wiring or loose connections can disrupt communication between the vehicle’s control units. Mechanics should look for any signs of wear and tear.

They must repair or replace any compromised parts they find. This step is vital for restoring proper communication within the vehicle’s network.

ECM Reset

etimes, the issue lies within the vehicle’s ECM (Engine Control Module). A simple reset or software update might fix the communication problems causing the U1001 code. This process involves using specialized tools to interface with the vehicle’s computer system.

Technicians may need to download the latest software version from the manufacturer. Updating the ECM can resolve many issues without replacing hardware components.

Control Unit Reprogramming

If diagnostics point towards a faulty control unit, reprogramming or replacement becomes necessary. Each control unit has a specific role in managing various aspects of the vehicle’s operation. Identifying which one is malfunctioning is critical.

Reprogramming involves installing new software that corrects errors in how the unit communicates with other parts of the car. If this doesn’t work, replacing the faulty unit is the next step.

Preventive Measures for Future

Regular Maintenance

Regular vehicle upkeep is crucial. It helps avoid many issues down the line. Mechanics can spot problems early during these check-ups. This saves time and money.

They use their expertise and ASE certifications to provide answers. They also explain the cause of potential troubles. This communication is key to maintaining your car’s health.

Software Updates

Keeping the vehicle’s software updated is vital. It ensures smooth communication between control units. Outdated software can lead to a communication problem.

This issue might trigger the U1001 code in your 2010 Nissan Altima Sedan. Always seek help from professionals for updates. They have the right tools and information.

Compatible Devices

Using only compatible aftermarket devices is essential. Incompatible ones may interfere with the CAN bus system. This can cause unnecessary problems.

Before adding any device, ask questions about compatibility. Mechanics or posts on reputable forums can provide useful answers.

Professional Assistance vs DIY

Expert Tools

Professionals at auto repair shops have access to advanced diagnostic tools. These tools can quickly identify issues like the U1001 error in a 2010 Nissan Altima Sedan.

They save time and ensure accuracy. DIY methods lack this precision, often leading to misdiagnosis.

Technical Skills

Experts possess years of training and experience. They handle complex repairs daily.

This expertise is crucial for intricate problems. Most car owners lack this level of skill, making some DIY attempts risky.

Cost Efficiency

Seeking professional help can be more cost-effective. Technicians prevent further damage by accurately fixing the issue.

DIY repairs might seem cheaper but can lead to costly mistakes. It’s important to weigh the potential savings against the risk of additional expenses.

In scenarios involving complex systems, like the U1001 error, professional assistance outweighs DIY efforts. Not only does it guarantee excellent service, but it also ensures that your car receives the care it needs without compromising safety or performance.

Before deciding on a DIY repair, realistically assess your technical skills. Consider if the task is within your capabilities or if it’s better left to an expert from JustAnswer or local auto repair shops.

Summary

Dealing with a U1001 code in your 2010 Nissan Altima sedan can seem daunting, but you’ve got the knowledge now. From understanding what triggers this error to diagnosing and fixing it, we’ve covered all bases. Whether you choose to handle it yourself or get professional help, remember prevention is key. Regular checks and maintenance can save you time and money down the line.

Don’t let car troubles slow you down. Take action on what you’ve learned today. If DIY feels overwhelming, reach out to a pro. They’ll sort it fast so you can get back on the road without stress. Your car is a big part of your life; keep it running smooth with the right care and attention.

Frequently Asked Questions

What does the U1001 code mean for a 2010 Nissan Altima Sedan?

The U1001 code indicates a communication issue within the car’s computer systems. It suggests that the Engine Control Module (ECM) cannot communicate with other control modules.

What are common symptoms of a U1001 code in a 2010 Altima?

Symptoms include the engine light turning on, the car’s performance may decline, or it might not start at all.

What causes the U1001 code to appear in my Nissan Altima?

Common causes include faulty wiring or connections, bad control modules, or issues with the CAN (Controller Area Network) bus.

How can I diagnose the U1001 code in my 2010 Altima?

Diagnosing involves checking the vehicle’s wiring, inspecting control modules for faults, and using a scanner to monitor communication between modules.

What solutions are available to fix a U1001 code in a 2010 Nissan Altima?

Fixes often involve repairing or replacing damaged wires, connectors, or faulty control modules to restore communication.

Are there preventive measures to avoid future U1001 codes in my Altima?

Regular maintenance checks of the electrical system and ensuring all software is up-to-date can help prevent future issues.

Should I seek professional assistance for a U1001 code or attempt DIY repairs?

For accurate diagnosis and repair, especially with complex electrical systems, seeking professional assistance is recommended over DIY.

How Long Is Hyundai Palisade


The Hyundai Palisade is approximately 196.1 inches (4981 mm) long.

This dimension is crucial for understanding how it fits into tight parking spaces, its maneuverability, and overall driving experience, indicating if it's suitable for your needs.

Palisade Dimensions Overview

palisade size specifications summary

The Hyundai Palisade is a large vehicle, offering a lot of space for both people and items. It's 196.1 inches long, 77.8 inches wide, and 68.9 inches tall, making it spacious inside. There's enough room for everyone to be comfortable during long journeys.

The Palisade has a cargo space of 18 cubic feet behind the third row. If you fold down the second and third rows, this space increases to 86.4 cubic feet, which is great for carrying luggage, sports gear, or big shopping items.

Despite its size, the Palisade has features that make it easier to drive in small spaces. Overall, it's designed to handle both large and small trips comfortably.

Comparing to Competitors

The Hyundai Palisade often has more space and features than its competitors, like the Honda Pilot and Toyota Highlander.

It has more legroom and cargo space, includes advanced safety technology and a large touchscreen as standard, and offers great value due to its competitive price and comprehensive warranty.

This makes the Palisade a good choice for families or those needing a lot of passenger space.

Parking and Maneuverability

parking skills and techniques

The Hyundai Palisade makes parking in tight spots and maneuvering easy, despite its large size. It has well-designed steering and parking assist technology, making difficult parking simpler. A rearview camera and sensors provide a clear view behind the car, helping with safe maneuvering. The Palisade also has a tight turning radius, making it easy to navigate sharp turns and crowded areas.

Here's how the Palisade compares to others in parking and maneuverability:

Feature Hyundai Palisade Competitor A Competitor B
Parking Assist Advanced Basic None
Rearview Camera Standard Standard Standard
Turning Radius Tight Average Wide

This shows the Hyundai Palisade is designed for easy driving and parking, even in small spaces.

Interior Space Considerations

Evaluating the interior space of the Hyundai Palisade is important for families. The Palisade offers a lot of room, making rides comfortable for both short errands and long trips. However, there's more to think about than just room for legs and heads.

Keep these points in mind when considering the Palisade's interior:

  1. Seating: The Palisade can seat up to eight people, good for big families or groups. Its third row is roomier than many rivals, comfortable for adults.
  2. Cargo Space: With all seats up, the cargo space is good. Folding the second and third rows increases space, great for large items.
  3. Features: The Palisade has many features for comfort and convenience, like USB ports, climate control, and storage solutions.

Knowing these points helps decide if the Palisade meets your needs.

Impact on Driving Experience

driving experience transformation impact

The Hyundai Palisade's big size helps make your driving experience better. Its long and wide shape makes the car stable and safe when driving fast. It's also easy to drive in cities because it can move smoothly in tight spaces. This size helps you see the road better from a high seat, with good windows and mirrors that help you see around the car easily. This makes driving less stressful, especially in busy traffic.

The Palisade's big size also makes long trips comfortable. It moves smoothly over bumps in the road, and the big inside space keeps passengers comfortable during the trip.

Conclusion

The Hyundai Palisade is big enough to be noticed and easy to drive and park. Inside, it has a lot of room and is made to make driving better.

It works well in the city and on long trips because it's comfortable but still easy to move around. In simple terms, it's made to make your drives enjoyable.

How Often Do You Change Synthetic Oil in Toyota Corolla


For a Toyota Corolla using synthetic oil, it's recommended to change the oil every 10,000 miles or 12 months, whichever comes first.

This interval may vary based on driving habits and conditions, following Toyota's specific guidelines ensures optimal performance.

Understanding Synthetic Oil Benefits

exploring synthetic oil advantages

Synthetic oil improves Toyota Corolla's engine performance and protection better than regular oils. Its special makeup offers better lubrication, making the engine run cleaner and more efficiently, which can also improve gas mileage. In cold or hot weather, synthetic oil helps the engine start easier and run smoother. It doesn't break down as quickly as regular oil, reducing engine sludge and keeping the engine cleaner for longer, which saves money on future maintenance and repairs.

Additionally, synthetic oil produces fewer emissions from your Toyota Corolla. It's cleaner and has fewer impurities than regular oil, reducing harmful emissions and helping the environment.

Recommended Change Interval

Change your Toyota Corolla's synthetic oil every 10,000 miles or every 12 months, whichever comes first. This keeps your engine in good condition. Synthetic oil lasts longer and works better than regular oil, especially in tough conditions. It reduces engine wear.

Check your oil level and its condition regularly, about once a month. If the oil is low, add more. If the oil looks dirty or smells burnt before it's time to change it, change it early.

Factors Influencing Oil Change Frequency

oil change frequency factors

The recommended time to change your Toyota Corolla's synthetic oil is a general guide, but some things can make you need to change it more often. Keep these in mind:

  • Driving Conditions: If you drive in very hot or cold weather, on dusty roads, or in heavy traffic, your oil could break down faster. These situations make your engine work harder, so you might need to change the oil more often to keep your car running well.
  • Type of Driving: How you drive affects your oil. If you often make short trips without letting your engine warm up, your oil can get water in it and break down faster. This means you'll need to change it more often. But if you mostly drive on highways and your engine stays at a steady temperature, you mightn't need to change the oil as much.
  • Towing or Heavy Loads: If you tow a trailer or carry heavy stuff in your Corolla, your engine gets hotter and works harder. This can make your oil go bad faster, so you'll need to change it sooner.
  • Age of Your Vehicle: Older Corollas mightn't use oil as well as newer ones, meaning you might need to change the oil more often to keep your car working well and to avoid damage.

Comparing Synthetic Vs. Conventional Oil

Are you deciding between synthetic and conventional oil for your Toyota Corolla?

Synthetic oil is made in labs and offers better performance in extreme temperatures and lasts longer. It protects your engine more effectively and needs changing less often. This is good for your Corolla, especially under tough conditions or extreme weather.

Conventional oil comes from crude oil. It's been used for many years and is cheaper than synthetic. But, it doesn't protect as well or last as long. You'll need to change it more often because it breaks down faster in heat and with heavy use.

Synthetic oil is also smoother, which means it can reduce wear and tear on your engine. This might make your Corolla run smoother and help the engine last longer.

However, synthetic oil costs more. You pay extra for better protection and longer intervals between changes. This might be worth it for the health and performance of your car in the long run.

Choosing between synthetic and conventional oil depends on what you value more: better protection and longevity, or lower initial costs and more frequent changes.

Maintaining Your Toyota Corolla

toyota corolla maintenance guide

Understanding the difference between synthetic and conventional oil for your Toyota Corolla is important. Here are more tips to keep your car running well:

  • Air Filter: Check and change the air filter regularly, every 15,000 to 30,000 miles, or more often in dusty areas. A clean air filter helps your engine perform better and use less fuel.
  • Tires: Keep your tires properly inflated and check for even wear. Follow your Corolla's manual for tire rotation to help tires last longer.
  • Fluids: Regularly check and maintain the levels of coolant, brake fluid, and transmission fluid. Low fluid levels can cause damage.
  • Maintenance Schedule: Follow your Corolla's maintenance schedule for checks and replacements, like brake inspections and timing belt changes, to keep your car in good condition.

Conclusion

Knowing why synthetic oil is good and when to change it's important for keeping your Toyota Corolla running well. Remember, how you drive can change how often you need to change the oil.

Even though synthetic oil costs more than regular oil, its benefits are worth it for your car. Make sure to keep up with your Corolla's upkeep so it stays in good shape for a long time.

The Hyundai Elantra Is One Of The Most Popular Compact Sedans In The Market


The Hyundai Elantra is a popular compact sedan known for its:

  • Sleek design
  • Fuel efficiency
  • Advanced safety features
  • Comfortable interior
  • Competitive pricing

Making it a top choice in the automotive market.

Sleek and Modern Design

simple and elegant aesthetics

The Hyundai Elantra has a modern look that catches your eye right away. Its exterior has a prominent front grille and sharp lines that make it look dynamic. The design isn't only about looks but also about function, making sure you get noticed while having a smooth drive.

Inside, the cabin combines comfort with technology easily. The dashboard is easy to use, with everything positioned within reach. The materials and finishes inside are of high quality, adding a touch of sophistication not often found in compact sedans. There's also plenty of room for both you and your passengers, making it comfortable for city driving or highway trips.

The Elantra also focuses on providing a great driving experience. The layout of controls and the design of the seats are all made with the driver in mind. This car is about making every trip enjoyable, not just getting to your destination.

Fuel Efficiency Excellence

The Hyundai Elantra is fuel-efficient, which means it uses less gas and saves you money. This is especially useful when gas prices change a lot. The Elantra is designed to use fuel well without making it less fun to drive.

Choosing the Elantra helps the environment because it uses less fuel. This car has technology that makes sure it uses fuel efficiently.

The Elantra also has different driving modes. You can choose a mode that uses less gas, whether you're driving on the highway or in the city. This makes the car more efficient and saves you money.

Advanced Safety Features

advanced safety features highlighted

Your Elantra has advanced safety features to help keep you safe. These include:

  • Forward Collision-Avoidance Assist (FCA): Helps prevent front crashes.
  • Blind-Spot Collision Warning (BCW): Warns you of cars in your blind spot when changing lanes.
  • Smart Cruise Control (SCC): Keeps a set distance from the car ahead, adjusting to traffic speed.
  • Lane Keeping Assist (LKA): Helps you stay in your lane.
  • High Beam Assist (HBA): Adjusts headlights automatically for better night vision without blinding others.

These features are designed to protect you, your passengers, and pedestrians.

Comfortable Interior Space

When you enter the Elantra, you'll find it spacious and comfortable, suitable for both the driver and passengers. The seats are made of high-quality materials, making them ideal for both short and long trips. There's plenty of legroom in the front and back, allowing everyone to stretch and relax.

The dashboard and controls are well-designed, making it easy to use them without looking away from the road. The Elantra is also quiet inside because it uses materials that block road noise, making it easier to talk or listen to music without shouting.

Additionally, the Elantra has adjustable features like the driver's seat and steering wheel to improve comfort. It also offers heated seats for cold weather. In the Elantra, comfort is a standard feature.

Competitive Pricing Strategy

effective marketing through pricing

The Elantra's pricing strategy makes it a great choice in the compact sedan market because it offers good value for the money. Hyundai focuses on providing more for your money, which makes the Elantra appealing for budget-conscious buyers.

  • You get a great deal.
  • You pay less for a car with many features.
  • You save money, which you can use for personalizing the car.
  • Hyundai's warranty adds value to your purchase.
  • The Elantra is affordable and fun to drive.

Hyundai's pricing strategy for the Elantra is about smart buying, feeling good about your purchase, and enjoying driving without spending too much.

Conclusion

The Hyundai Elantra is a very popular small car. It looks modern and cool. It also uses less gas, which saves you money. The car is safe and has features to protect you when you drive.

Inside, it's comfortable for long trips. The price is good, too, so you get a lot for your money. In short, the Elantra is a smart choice for a car.

How to Remove Antenna From Hyundai Veloster


To remove an antenna from a Hyundai Veloster:

  • Locate the antenna.
  • Carefully disconnect it.
  • Remove the mounting screws.

Use basic tools and ensure you're cautious to avoid damaging the vehicle.

Gather Necessary Tools

Before starting the antenna removal from your Hyundai Veloster, collect the necessary tools. You need a socket wrench set for unscrewing bolts. Have various sizes since the exact bolt size is unknown until you start.

Also, have pliers for a better grip on stubborn parts, but be gentle to avoid damage. A plastic trim tool is important for removing car interior parts without scratches. If unavailable, a flathead screwdriver can substitute, but use it with caution to prevent damage.

Masking tape is useful for marking progress or holding parts temporarily, and for protecting surfaces from scratches.

Keep a clean, small container to hold small bolts or screws to prevent losing them.

With these tools, you're ready to proceed with removing the antenna from your Hyundai Veloster. Work carefully and take your time for a smooth process.

Locate the Antenna

To remove the antenna from your Hyundai Veloster, first find its location, which varies by model and year. Follow these steps:

  1. Roof: Check the roof, often towards the rear, for a small, visible antenna.
  2. Rear End: If not on the roof, it might be near the back of the car or in the rear windshield.
  3. Front Windshield: Some newer models have the antenna in the front windshield.
  4. Owner's Manual: For exact location, refer to the vehicle's owner's manual.

Disconnect the Antenna

strengthening the wi fi signal

To disconnect the antenna on your Hyundai Veloster, follow these steps:

  1. Find the antenna cable at the base of the antenna.
  2. Hold the base where the cable is attached.
  3. Look for a clip or locking mechanism on the cable.
  4. Press or squeeze the mechanism to release the cable.
  5. Pull the cable away from the base gently.
  6. If the cable doesn't come off easily, check the locking mechanism again before pulling.
  7. If your Veloster's antenna can be unscrewed, do this after disconnecting the cable by turning it counterclockwise.

Remove Mounting Screws

After disconnecting the antenna cable on your Hyundai Veloster, the next step is to take off the mounting screws that hold the antenna in place. It's important to do this carefully to avoid damaging your car. Follow these steps to remove the screws safely:

  1. Find the Screws: The antenna is usually held by two to four screws at its base. These might be under a rubber gasket or plastic cover, which you should gently remove to access the screws.
  2. Use the Correct Screwdriver: Make sure you use a screwdriver that fits the screws properly to avoid stripping them. A magnetic screwdriver is useful to keep the screws from falling and getting lost.
  3. Turn Screws Correctly: Unscrew by turning the screws counterclockwise. Apply firm and steady pressure to prevent the screwdriver from slipping.
  4. Store Screws Safely: Put the screws in a small container or magnetic tray as you remove them. This keeps them from getting lost and makes reassembly easier.

Final Checks and Reassembly

final assembly and inspection

Before putting the antenna back on your Hyundai Veloster, do these checks. Look at the antenna base and where it connects to the car for any damage or rust. If there's damage, fix it now to avoid problems later.

Make sure you have all your tools and parts ready for putting things back together. Check the screws to make sure they're okay for use, as they're important for keeping the antenna secure.

When everything is good to go, carefully put the antenna back in its place. Make sure it's lined up right so there are no gaps or wrong fits that could cause issues. Tighten the screws by hand first, then a bit more with a screwdriver. Don't overdo it, as that could break something.

If your car needs it, reconnect any wires or cables to the antenna. Ensure these are tight and right, as they help the antenna work. After reassembling, give the antenna a light shake to check it's secure.

You've now finished putting your Hyundai Veloster's antenna back together, and it should work well again.

Conclusion

You did a great job taking off the antenna from your Hyundai Veloster. You'd the right tools and found, unhooked, and unscrewed the antenna easily.

Always check your work again to make sure you didn't miss anything and everything is back where it should be before you put things back together. Doing this job yourself not only saves you a trip to the car shop but also makes you feel good about being able to fix things on your car.

Drive safely and enjoy your car without the antenna!