Recent Posts

Servicing Fuel Injectors


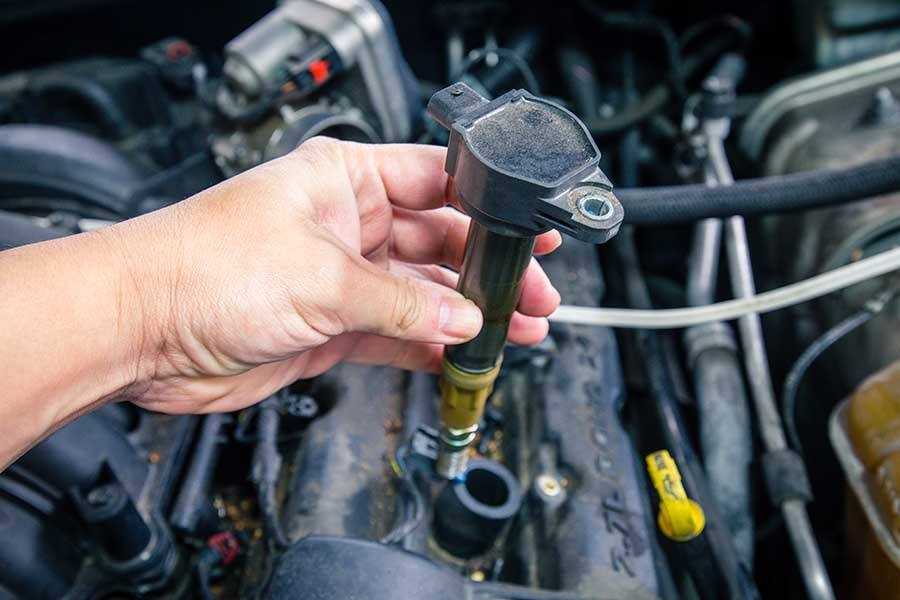
Servicing fuel injectors involves removing any o-rings and pintle caps from the injector, removing the core with a coil removal tool, pushing the injector nozzle into the valve stem, and wrapping tape around the straw for a secure fit. To clean fuel injectors, some experts recommend removing them from the engine to thoroughly remove any gunk.

However, fuel injection service can be done with the fuel injector still in the car, unless it needs to be replaced. Fuel injector service is necessary when signs such as decreased fuel efficiency and engine misfires occur. It is recommended to service injectors regularly to prevent buildup and maintain optimal performance.

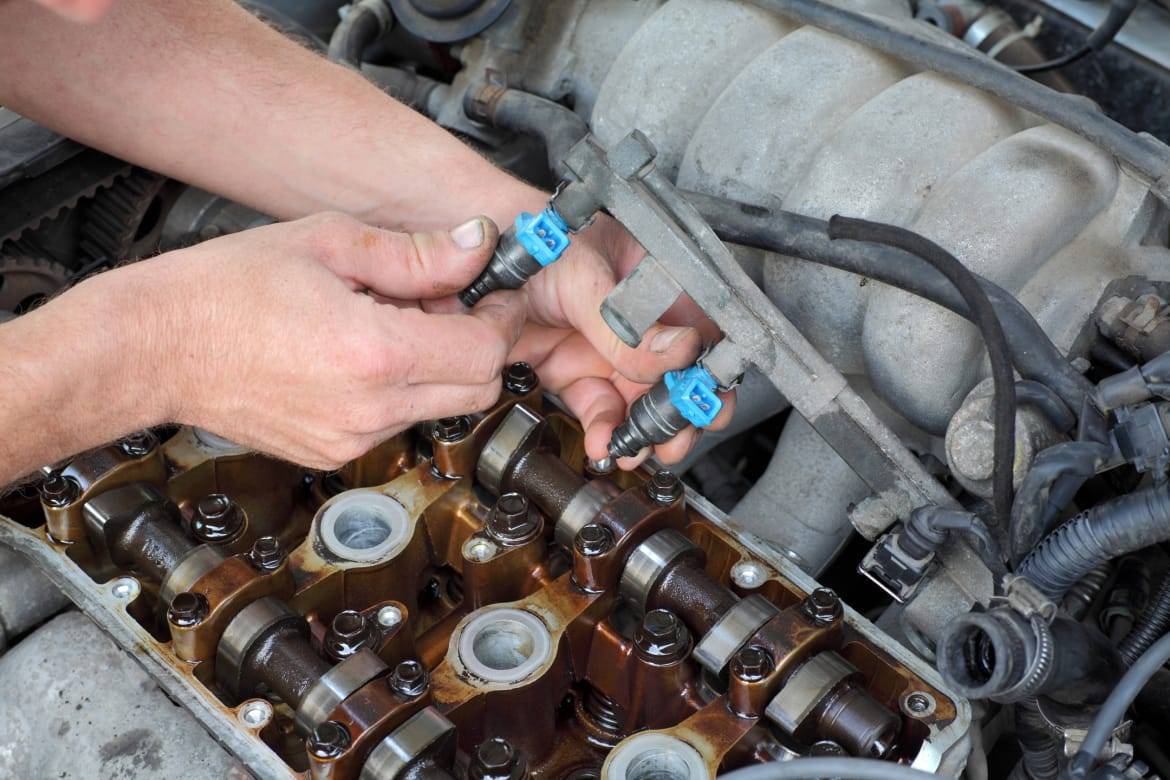
Fuel additives and cleaning kits are commonly used to maintain and clean fuel injectors.

Servicing Fuel Injectors

Credit: www.snakeeaterperformance.com

Benefits Of Servicing Fuel Injectors

Servicing fuel injectors can lead to improved fuel efficiency and enhanced engine performance. Regular maintenance of fuel injectors helps to ensure that the fuel is being delivered efficiently to the engine. Over time, fuel injectors can become clogged with dirt and debris, which can restrict the flow of fuel and decrease fuel efficiency. By servicing the fuel injectors, any built-up deposits can be removed, allowing for a more precise spray pattern and better fuel atomization. This leads to improved combustion and better engine performance. Additionally, servicing fuel injectors can also help to prevent issues such as rough idling, misfires, and decreased power. Overall, regular servicing of fuel injectors is important for optimizing fuel efficiency and ensuring the smooth operation of the engine

Servicing Fuel Injectors

Credit: store.vacmotorsports.com

Methods Of Servicing Fuel Injectors

Using A Cleaning Kit

If you want to service your fuel injectors, one method is to use a cleaning kit. These kits are readily available and often come with detailed instructions on how to use them. They usually contain a cleaning solvent that helps remove any deposits or build-up inside the fuel injectors. To use the kit, you’ll need to locate the fuel rail and remove the injectors from the engine. Once the injectors are accessible, you can connect the cleaning kit to the fuel rail and follow the instructions on how to clean the injectors. This method can help improve fuel flow and injector performance.

Using A Fuel Injector Cleaner

Another method of servicing fuel injectors is by using a fuel injector cleaner. These products are designed to be added directly to the fuel tank and work as a fuel additive. The cleaner contains detergents that help dissolve any deposits or build-up inside the injectors, allowing them to function properly. It’s important to choose a high-quality fuel injector cleaner and follow the recommended dosage for your specific vehicle. Regular use of a fuel injector cleaner can help maintain injector cleanliness and optimize engine performance.

Step-by-step Guide To Cleaning Fuel Injectors At Home

Remove any o-rings and pintle caps from the injector, remove the core with a cheap coil removal, push the injector nozzle in the valve stem, and wrap more tape around the straw. Follow this step-by-step guide to cleaning fuel injectors at home for efficient and cost-effective servicing.

Cleaning fuel injectors at home is a step-by-step process that involves removing o-rings and pintle caps, attaching a hose to the fuel injector, installing a liner, heating a shrink tube, and activating the fuel injector. To clean the fuel injectors, start by removing any o-rings and pintle caps from the injector. Then, attach a hose to the fuel injector and push the injector nozzle into the valve stem. Next, wrap more tape around the straw and install the liner. After that, heat the shrink tube and activate the fuel injector. Cleaning fuel injectors at home can help improve fuel efficiency and performance. It is important to follow the steps carefully and use the appropriate cleaning products to ensure proper cleaning and maintenance of the fuel injectors.

Best Fuel Injector Cleaners On The Market

Servicing Fuel Injectors

Fuel injector cleaning is an essential maintenance task to keep your vehicle running smoothly and efficiently. When it comes to the best fuel injector cleaners on the market, there are a few top choices that stand out.

Product Description
Lucas Oil Fuel Treatment Known for its effectiveness in cleaning fuel injectors and improving fuel efficiency.
STP Super Concentrated Fuel Injector Cleaner Highly concentrated formula that helps remove deposits and improve engine performance.
Chevron Techron Concentrate Plus Designed to clean fuel injectors, intake valves, and combustion chambers for optimal engine performance.

Regularly using a fuel injector cleaner can help prevent clogs, improve fuel atomization, and maintain optimal fuel flow. These top fuel injector cleaners are trusted by car enthusiasts and professionals alike. Keeping your fuel injectors clean can lead to better fuel economy, smoother acceleration, and decreased emissions, making it an important part of vehicle maintenance.

Servicing Fuel Injectors

Credit: www.cars.com

Frequently Asked Questions For Servicing Fuel Injectors

Can Fuel Injectors Be Serviced?

Yes, fuel injectors can be serviced. Fuel injection service can be done with the fuel injector still in the car, unless it needs to be replaced.

Is Fuel Injector Service Necessary?

Fuel injector service is necessary for maintaining the performance and efficiency of your vehicle. It helps to clean and unclog the injectors, ensuring proper fuel flow and combustion. Regular service can prevent issues like poor acceleration, rough idle, and decreased fuel economy.

How Often Should Injectors Be Serviced?

Fuel injectors should be serviced regularly, ideally every 30,000 to 60,000 miles. This will help maintain their performance and prevent issues such as clogging or reduced fuel efficiency. It is important to consult your vehicle’s manual or a trusted mechanic for the recommended service interval based on your specific make and model.

Conclusion

Servicing fuel injectors is a crucial step in maintaining the efficiency and performance of your vehicle. Whether it’s removing o-rings and pintle caps or cleaning dirty injectors, proper maintenance can enhance fuel efficiency and prevent costly repairs. While there are different methods to clean fuel injectors, it is recommended to consult a professional for the best results.

Regular maintenance and cleaning will ensure optimal fuel spray patterns and smooth engine performance.


Replacing Coil Packs


Replacing coil packs is a basic repair procedure that can be done at home with tools from your local AutoZone. However, it can be more complicated for vehicles with sideways engines.

The average cost to replace a coil pack varies depending on the make and model of the vehicle. Symptoms of a bad coil pack include guzzling gas, slow acceleration, spluttering and coughing noises, rough idling and vibrations, misfires and backfires, stalling, difficulty starting the car, and a check engine light.

The time it takes to replace a coil pack can vary, but it is usually a relatively quick process. It is not necessary to replace coil packs unless they fail or show signs of wear and tear.

Replacing Coil Packs

Replacing coil packs is an essential maintenance task for keeping your vehicle running smoothly. Knowing why and when to replace them is crucial to preventing potential issues. Bad coil packs can cause a variety of problems, including increased fuel consumption, sluggish performance, spluttering and banging noises, rough idling and vibrations, misfires and backfires, stalling, difficulty starting, and a lit check engine light.

The average cost to replace a coil pack varies depending on the make and model of your vehicle. It can range from $100 to $400, including labor costs.

If you’re proficient in automotive repairs, you can replace the coil packs at home using tools from your local AutoZone. However, the complexity of the task might be higher for vehicles with sideways engines. Online resources such as YouTube videos and guides from AutoZone provide step-by-step instructions on how to change ignition coils.

Overall, with the right tools and knowledge, replacing coil packs is a feasible task that can help maintain your vehicle’s performance and prevent potential issues.

Table:

Video Steps
AutoZone
  • Disconnect the Negative Battery Cable
  • Unhook the Battery
  • Installing the New Ignition Coil
  • Installation
  • Test Drive
CarParts.com
  • Locate the coils
  • Access the ignition coil
  • Remove the ignition coil
  • Clean around the spark plug
  • Install the new ignition coil + tightening torques
  • Put the air intake duct
FCP Euro
  • How to Access the Ignition Coils & Spark Plugs
  • How to Disconnect the Ignition Coil Connector
  • Removing the old Ignition Coil
  • Inspecting the Cylinder for Debris
  • How to Replace Spark Plugs
  • Installing the New Ignition Coils
  • Wrap-up
Replacing Coil Packs

Credit: carfromjapan.com

Why Replace Coil Packs

Replacing coil packs in your vehicle can have several benefits. Firstly, it can have a significant impact on the engine performance. Coil packs play a crucial role in delivering the required voltage to the spark plugs, ensuring efficient combustion. By replacing old or faulty coil packs, you can improve engine power, fuel efficiency, and overall vehicle performance.

Secondly, replacing coil packs is a form of preventive maintenance. Over time, coil packs can wear out or fail, leading to misfires, rough idling, and other engine issues. By replacing them before they fail completely, you can prevent more serious and costly engine problems down the line.

In conclusion, replacing coil packs not only improves engine performance but also helps in preventing potential engine issues. It is a relatively simple and affordable maintenance task that can have a positive impact on your vehicle’s performance and longevity.


Signs Of A Bad Coil Pack

Your car may display several signs of a bad coil pack:

  • Your car guzzles gas, affecting fuel efficiency.
  • Acceleration becomes slow, making it difficult to gain speed.
  • You may hear spluttering and banging noises from the engine.
  • A rough idle and vibrations can be felt while the car is stationary.
  • Misfires and backfires occur, causing a decrease in engine performance.
  • Stalling and difficulty starting the car becomes more frequent.
  • The check engine light illuminates, indicating a potential issue with the coil pack.

Replacing a coil pack is a simple repair procedure that can be done at home. However, it can be more complicated in certain vehicles, especially those with sideways engines. Average cost to replace a coil pack varies depending on the vehicle make and model.

Average Cost To Replace

Replacing Coil Packs

Average Cost to Replace: The average cost to replace an ignition coil can vary depending on several factors. first factor is the make and model of the vehicle. Luxury and high-performance vehicles typically have higher coil pack replacement costs compared to economy cars. Labor costs also play a role in the total expense. If you choose to hire a professional mechanic to replace the coil packs, you can expect to pay a higher price. However, if you’re knowledgeable and confident in your DIY skills, you can save money by doing the replacement yourself. Average price range for coil pack replacement can range from around $100 to $500. It is important to note that these costs are just estimates, and prices can vary based on location, local labor rates, and individual vehicle needs.

Factors Affecting Cost: Several factors can affect the cost of replacing coil packs. These include:

Vehicle Type: Each vehicle model may require different types of coil packs, which can affect the overall cost.
Labor Cost vs. DIY: Hiring a professional mechanic to replace the coil packs will involve labor costs, which can be higher compared to doing the replacement yourself.

By considering these factors and doing thorough research, you can get a better understanding of the average cost of replacing coil packs for your specific vehicle.

How To Replace Coil Packs

Replacing coil packs is a basic repair procedure that can be done at home with the right tools and equipment. Here’s a step-by-step guide on how to replace coil packs:

Tools And Equipment Needed

  • Socket set
  • Ratchet
  • Torque wrench
  • Spark plug socket
  • Flathead screwdriver
  • New coil packs

Disconnecting And Removing Old Coil Packs

  1. Start by disconnecting the negative battery cable to ensure safety.
  2. Locate the old coil packs, which are usually attached to the spark plugs.
  3. Using a socket set and ratchet, remove the bolts or screws securing the coil packs in place.
  4. Gently pull the old coil packs straight up to detach them from the spark plugs.

Installing New Coil Packs

  1. Clean around the spark plugs using a flathead screwdriver to remove any debris.
  2. Take the new coil packs and align them with the spark plugs.
  3. Push the new coil packs firmly onto the spark plugs until they are securely in place.
  4. Secure the new coil packs by tightening the bolts or screws with a torque wrench.

Testing And Verifying Functionality

  1. Reconnect the negative battery cable.
  2. Start the engine and listen for any abnormal noises or vibrations.
  3. If everything sounds and feels normal, the new coil packs have been successfully installed.

It’s important to note that while replacing coil packs is generally a straightforward process, some vehicles may have more complicated setups. If you’re unsure or have any doubts, it’s always recommended to consult a professional mechanic or refer to your vehicle’s manual for specific instructions.

Replacing Coil Packs

Credit: www.youtube.com

When To Replace Coil Packs

Replacing coil packs is a straightforward repair that can be done at home with tools from a local auto parts store. While it may be more complicated for some vehicles, it’s an essential step to address issues like poor fuel efficiency, sluggishness, rough idling, and misfires.

When to Replace Coil Packs
Signs That Coil Packs Need Replacement:
  • Your car guzzles gas
  • Your car feels slow
  • You hear spluttering, coughing, and banging noises
  • Your car idles roughly and vibrates
  • Your car misfires and backfires
  • Your car stalls
  • You struggle to start your car
  • The check engine light is on
Recommended Maintenance Schedule:
It is important to follow the recommended maintenance schedule for your specific vehicle model to prevent coil pack failure. Regularly inspecting the coil packs during routine maintenance can help detect any issues early on and prevent further damage to the ignition system.
Importance of Timely Replacement:
Timely replacement of coil packs is crucial to ensure optimal engine performance. Ignoring or delaying the replacement can lead to decreased fuel efficiency, reduced power output, rough idling, and potential damage to other engine components. It is recommended to consult a professional mechanic or refer to the vehicle manufacturer’s guidelines for the specific replacement interval for your car model.
Replacing Coil Packs

Credit: shop.advanceautoparts.com

Frequently Asked Questions Of Replacing Coil Packs

Are Coil Packs Easy To Change?

Yes, replacing coil packs is generally an easy procedure that can be done at home using tools from your local AutoZone. However, some newer vehicles with sideways engines may require additional steps for testing or changing the coil.

What Is The Average Cost To Replace A Coil Pack?

The average cost to replace a coil pack varies, but it ranges between $200 and $400. It is recommended to consult with a professional mechanic for an accurate quote. Replacing a coil pack is a basic repair procedure that can be done at home with the right tools.

What Are The Symptoms Of A Bad Coil Pack?

Symptoms of a bad coil pack include increased fuel consumption, sluggish acceleration, spluttering and banging noises, rough idling and vibrations, misfires and backfires, stalling, difficulty starting the car, and a check engine light.

Conclusion

Replacing coil packs is a crucial maintenance task for your vehicle’s ignition system. It ensures smooth engine performance and reduces the risk of misfires and breakdowns. While it may seem complicated for some vehicles, DIY enthusiasts can easily replace them at home with the right tools.

Remember, coil packs should be replaced when they show signs of wear and tear or fail. By replacing them, you can save on costly repairs and improve overall fuel efficiency. Don’t overlook the importance of regular coil pack maintenance for a reliable and efficient vehicle.

Hyundai Sonata Gls 2012


The Hyundai Sonata GLS 2012 is a reliable mid-size car with a six-speed manual transmission for the GLS trim and a six-speed automatic with SHIFTRONIC for other trims. It has a light steering feel and may require corrections in gusty crosswinds.

The ride quality is firmer in Sonata SE models, with slightly heavier steering and sharper steering response due to different power steering pump tuning and shorter, stiffer tire sidewalls. The Kelley Blue Book rates it at 4. 4/5, while Edmunds rates it at 3.

8/5 and Carfax rates it at 4. 4/5. Overall, it is a great car with value for money and a favorable consumer rating.

Hyundai Sonata Gls 2012

Credit: m.youtube.com

Hyundai Sonata Gls 2012

Credit: www.kbb.com

Frequently Asked Questions On Hyundai Sonata Gls 2012

Is 2012 Hyundai Sonata Gls A Good Car?

Yes, the 2012 Hyundai Sonata GLS is a good car. It has good reliability ratings and offers a comfortable ride. It is equipped with a six-speed automatic transmission and comes with a variety of standard features. The GLS trim has a starting price of $11,990.

What Is The Value Of A 2012 Hyundai Sonata Gls?

The value of a 2012 Hyundai Sonata GLS varies, but according to Kelley Blue Book, it starts at $11,990.

Are Hyundai Sonata Gls Reliable?

The Hyundai Sonata GLS is considered reliable with good steering response and ride quality. It comes with a six-speed manual transmission and standard features like Motor Driven Power Steering. The GLS model is known for its affordability, making it a great choice for many car buyers.

Conclusion

Overall, the Hyundai Sonata GLS 2012 is a reliable and well-rounded mid-size car. With its impressive fuel economy, powerful engine, and spacious interior, it offers a comfortable and enjoyable driving experience. The Sonata GLS has received positive ratings from trusted sources like Kelley Blue Book and Edmunds.

Whether you’re looking for a family car or a daily commuter, the Sonata GLS is definitely worth considering. It’s a reliable and affordable option that will meet your needs and exceed your expectations.


2006 Mercedes C230 Oil Capacity


The oil capacity for a 2006 Mercedes C230 is 8.5 quarts. When it comes to maintaining your Mercedes C230, knowing the correct oil capacity is crucial.

The 2006 Mercedes C230 has an oil capacity of 8. 5 quarts, which is important information for anyone performing an oil change. By ensuring you have the right amount of oil, you can keep your engine running smoothly and protect it from potential damage.

It’s always a good idea to consult your vehicle’s owner’s manual or consult with a professional to confirm the correct oil capacity for your specific model and year.

Understanding Oil Capacity In A 2006 Mercedes C230

Determining the correct oil capacity for a 2006 Mercedes C230 is important for maintaining the optimal performance of the engine. While there are various online resources and forums that can provide information on the recommended oil capacity, it is always recommended to consult the owner’s manual or contact a qualified mechanic for accurate details specific to your vehicle.

Understanding the oil capacity is crucial because using the wrong amount of oil can result in inadequate lubrication or potential damage to the engine. In addition, overfilling the engine with oil can cause excess pressure and may lead to leaks or engine malfunctions.

To determine the correct oil capacity, locate the oil level indicator on your 2006 Mercedes C230. This indicator will provide you with the recommended oil capacity for your vehicle. Additionally, you can refer to trusted automotive websites or contact the manufacturer directly for accurate information.

By ensuring the correct oil capacity is used during an oil change, you can help prolong the lifespan of your engine and maintain optimal performance levels.

Checking And Changing Oil In A 2006 Mercedes C230

Checking and Changing Oil in a 2006 Mercedes C230

To check the oil level in a 2006 Mercedes C230, follow these steps: 1. Park the vehicle on a level surface and turn off the engine. 2. Wait for a few minutes to allow the oil to settle. 3. Open the hood and locate the dipstick. 4. Pull out the dipstick, wipe it clean, and reinsert it fully. 5. Pull out the dipstick again and check the oil level. It should be between the minimum and maximum marks. To change the oil in a 2006 Mercedes C230, follow these steps: 1. Raise the vehicle using a jack and secure it with jack stands. 2. Locate the oil filter and drain plug under the vehicle. 3. Place an oil pan beneath the drain plug and remove the plug to drain the old oil. 4. Once the oil has drained completely, replace the drain plug. 5. Remove the old oil filter and replace it with a new one. 6. Pour the recommended amount of new oil into the engine through the oil filler cap. 7. Start the engine and check for any leaks. 8. Turn off the engine, wait for a few minutes, and check the oil level again. Overall, it is important to regularly check and change the oil in a 2006 Mercedes C230 to ensure optimal engine performance and longevity.

Recommended Oil For A 2006 Mercedes C230

When it comes to choosing the right oil for your 2006 Mercedes C230, it is important to consider the manufacturer’s recommendations. Mercedes-Benz recommends using synthetic oil with a minimum viscosity of 5W-40 for optimal performance and protection. This ensures that the oil is able to flow smoothly through the engine and provide lubrication to all the necessary components. Additionally, using the recommended oil will help maintain the engine’s warranty and prolong its lifespan.

There are several options available for engine oil, including Liqui Moly, Amsoil, and other reputable brands. These brands offer high-quality oils that meet or exceed the specifications set by Mercedes-Benz. When changing the oil, it is also important to replace the oil filter and check the oil level. The oil filter is located in the engine compartment, and the oil drain plug is typically located on the bottom of the engine.

In conclusion, choosing the right oil for your 2006 Mercedes C230 is essential for maintaining its performance and longevity. Follow the manufacturer’s recommendations and consider using reputable oil brands to ensure optimal engine health.

2006 Mercedes C230 Oil Capacity

Credit: m.youtube.com

Maintenance Tips For Optimal Oil Performance In A 2006 Mercedes C230

Regular oil checks and changes are essential for maintaining optimal oil performance in a 2006 Mercedes C230. To ensure the longevity and efficiency of your vehicle’s engine, it is important to monitor the oil level and quality on a regular basis. Check the oil level at least once a month or before long trips to prevent any potential damage.

In addition to regular oil checks, it is crucial to change the oil and filter according to the manufacturer’s recommendations. Mercedes-Benz recommends changing the oil every 10,000 miles or once a year, whichever comes first. Proper maintenance of the oil filter is also important to prevent contaminants from circulating in the engine.

Faqs About Oil Capacity In A 2006 Mercedes C230

What happens if you overfill the oil in a 2006 Mercedes C230? Overfilling the oil can lead to excessive pressure in the engine, which can cause leaks and even damage to the engine. It’s important to always use the recommended oil capacity for your specific vehicle. Using a different oil capacity than what is recommended by the manufacturer can also lead to issues with the engine and potentially void any warranties. It is recommended to check the oil level in your Mercedes C230 regularly, ideally every month or before long trips. This will ensure your engine is properly lubricated and running smoothly.

2006 Mercedes C230 Oil Capacity

Credit: m.youtube.com

2006 Mercedes C230 Oil Capacity

Credit: www.benzworld.org

Frequently Asked Questions For 2006 Mercedes C230 Oil Capacity

What Is The Engine Capacity Of A 2006 Mercedes-benz C230?

The engine capacity of a 2006 Mercedes-Benz C230 is 2. 5 liters.

How Much Oil Does A W203 C230 Kompressor Engine Hold?

The W203 C230 Kompressor engine holds approximately 8. 5 quarts of oil.

What Oil Does A 2007 C230 Take?

The 2007 C230 takes Liqui Moly oil. You can check the oil level, oil filter location, and perform an oil change to keep your engine running smoothly.

Conclusion

The oil capacity of a 2006 Mercedes C230 is an important factor to consider for proper maintenance. It is recommended to refer to the owner’s manual or contact a reliable mechanic to determine the exact oil capacity for this specific model.

Regularly checking and maintaining the oil level is crucial for optimal engine performance and longevity. Make sure to use the right type and grade of oil to ensure proper lubrication and protection. Keep your Mercedes running smoothly by paying attention to its oil capacity requirements.


2017 Hyundai Elantra Ignition Coil Recall


The 2017 Hyundai Elantra has been subject to an ignition coil recall. It is important to address this issue promptly to ensure the safety and performance of your vehicle.

We will provide you with all the necessary information about the recall and its implications, as well as the steps to take for resolution. Understanding the details of the recall will help you take the appropriate action to address the ignition coil issue in your 2017 Hyundai Elantra.

2017 Hyundai Elantra Ignition Coil Recall

Credit: m.youtube.com

Common Problems With The 2017 Hyundai Elantra

The 2017 Hyundai Elantra has been known to experience a few common problems. One of the most prevalent issues is ignition coil failure, which can lead to engine misfiring, engine stalling, and a hard to start engine. Another problem that some owners have encountered is engine/powertrain problems, which can affect the overall performance of the vehicle. Additionally, there have been reports of steering issues that can make it difficult to control the car.

The electrical system has also been a source of concern for some Elantra owners, with various electrical malfunctions reported. Problems with the brakes have also been reported, including issues with the brake booster. Finally, there have been rare reports of airbag problems, although this has not been as widespread as the other issues mentioned.

It is important to note that not all Elantras will experience these problems, and the severity can vary. Regular maintenance and taking the vehicle to a trusted mechanic for inspections can help address and prevent issues before they become major problems.

Maintenance Tips For Ignition Coils

How often do Ignition Coils need to be replaced?

Ignition coil replacement interval can vary depending on the make and model of your vehicle. However, it is generally recommended to replace ignition coils every 100,000 to 150,000 miles. Ignition coils are an essential part of the ignition system, responsible for providing the spark needed to ignite the fuel in your engine. Over time, these coils can wear out due to heat and high voltage, leading to engine misfiring, stalling, and hard starting problems.

What is Ignition Coil?

An ignition coil is a device that converts low voltage from the battery into high voltage needed to create an electric spark in the spark plugs. This spark ignites the fuel and air mixture in the engine, allowing it to run.

If your engine is misfiring, it could be a sign of a faulty ignition coil. Misfiring can cause rough idling, loss of power, and increased fuel consumption.

A failing ignition coil can also cause your engine to stall unexpectedly, leaving you stranded on the road.

Ignition coil problems can make it difficult to start your engine, especially when it is cold or has been sitting for a while.

Maintaining your ignition coils properly can help prolong their lifespan and prevent potential issues. Here are a few maintenance tips:

  • Regularly check and adjust the gap between the electrodes in the spark plugs.
  • Keep the ignition coils and spark plugs clean to prevent dirt and debris from affecting their performance.

Replacing faulty ignition coils as soon as you notice any signs of trouble is essential to prevent further damage to your engine. Regular maintenance and timely replacements can help keep your ignition system running smoothly and maintain optimal engine performance.

Hyundai Elantra Ignition Coil Recall

The 2017 Hyundai Elantra is currently experiencing an ignition coil recall, requiring owners to have the faulty coils replaced. This recall aims to address potential engine misfiring and stalling issues.

Recall Details:
The 2017 Hyundai Elantra is subject to an ignition coil recall. This recall affects the ignition coils, which are responsible for delivering power to the spark plugs. If the ignition coils fail, it can result in engine misfiring, stalling, and difficult engine starts. Some common symptoms of a failing ignition coil include engine misfires, engine stalling, and a hard-to-start engine. Regular maintenance, such as cleaning the coils and ensuring the proper gap between electrodes, can help prevent ignition coil failure. If your Hyundai Elantra is affected by the recall, it is recommended to contact a certified Hyundai dealership to schedule an appointment for the necessary repairs or replacements. The cost to replace an ignition coil in a Hyundai Elantra can vary, so it is best to consult with a professional for an accurate estimate.
2017 Hyundai Elantra Ignition Coil Recall

Credit: m.youtube.com

2017 Hyundai Elantra Ignition Coil Recall

Credit: www.hjlautoparts.com

Frequently Asked Questions Of 2017 Hyundai Elantra Ignition Coil Recall

Is There A Recall On 2017 Hyundai Elantra Engines?

Yes, there is a recall on 2017 Hyundai Elantra engines for “Misfire Logic” update.

Are There Any Recalls On A 2017 Hyundai?

Yes, there are some recalls on the 2017 Hyundai. These include issues with ignition coils, engine/powertrain problems, steering issues, electrical system, problems with brakes, and airbag problems. It is important to stay updated on any recalls and get them addressed promptly.

How Much Does It Cost To Replace A Coil In A Hyundai Elantra?

The cost to replace a coil in a Hyundai Elantra can vary, but on average, it typically ranges from $200 to $500. It’s important to consult with a trusted mechanic or dealership for an accurate estimate.

Conclusion

If you own a 2017 Hyundai Elantra, it’s essential to be aware of the recent ignition coil recall. Ignition coil failure can lead to various engine problems, including misfiring and stalling. While Hyundai doesn’t cover coil replacements, it’s crucial to address this issue promptly to ensure the safety and performance of your vehicle.

Stay informed and take necessary maintenance steps to prevent potential complications. Trust HJL Autoparts for reliable information and solutions for your Hyundai Elantra ignition coil concerns.


2003 Honda Element Oil Capacity


The 2003 Honda Element has an oil capacity of approximately 4.5 quarts. The 2003 Honda Element has a total oil capacity of approximately 4.5 quarts.

Importance Of Knowing Oil Capacity

The oil capacity of a 2003 Honda Element is an important factor to consider for optimum engine performance. Knowing the correct oil capacity helps prevent overfilling or underfilling the oil in the engine, which can have negative consequences.

Overfilling the oil can lead to foaming, increased pressure, and potential damage to engine seals and gaskets. It can also cause the oil to enter the combustion chamber, leading to excessive smoke and decreased engine efficiency.

On the other hand, underfilling the oil can result in insufficient lubrication, leading to increased friction and wear on engine components. This can lead to premature engine failure and costly repairs.

Incorrect oil capacity can also affect engine performance. A lack of sufficient oil can cause increased heat and friction, leading to decreased power, reduced fuel efficiency, and potential engine overheating.

Therefore, it is crucial to know the correct oil capacity for your Honda Element to ensure optimal engine performance, prolong the life of the engine, and avoid costly repairs.

2003 Honda Element Oil Capacity

Credit: m.youtube.com

Determining The Oil Capacity For A 2003 Honda Element

The oil capacity of a 2003 Honda Element can be determined by checking the owner’s manual or using online resources. The owner’s manual will provide the exact oil capacity recommendation for the vehicle. It is important to follow the manufacturer’s guidelines to ensure optimal performance and engine longevity.

Alternatively, the dipstick can be used to check the current oil level in the engine. The dipstick has markings indicating the minimum and maximum levels. By checking the dipstick, you can determine if the oil level is within the recommended range.

There are also online resources available that provide information on oil capacity for specific vehicle models. Websites such as Amsoil, AutoZone, and Element Owners Club offer information and discussions on oil capacity for the Honda Element. These resources can be helpful in determining the correct amount of oil to use during an oil change or top-up.


Factors Affecting Oil Capacity

When it comes to the oil capacity of a 2003 Honda Element, there are a few factors to consider. One of the factors is the engine size and type. Different engines may require different oil capacities. Another factor is the size of the oil pan. A larger oil pan may have a higher oil capacity. Lastly, the oil filter size can also affect the oil capacity. A larger oil filter may hold more oil. It’s important to consult the owner’s manual or contact a Honda dealer to determine the specific oil capacity for your Honda Element. Regular oil changes with the correct amount of oil are essential for maintaining the performance and longevity of your vehicle’s engine.

2003 Honda Element Oil Capacity

Credit: www.caranddriver.com

Step-by-step Guide To Changing Oil In A 2003 Honda Element

Gathering necessary tools and materials:

  • Oil filter wrench
  • Oil drain pan
  • Socket set
  • Funnel
  • Rags or towels
  • New oil filter
  • New oil

Removing the old oil:

To begin the oil change process, locate the oil drain plug underneath the vehicle. Use a socket set to loosen and remove the plug, allowing the old oil to drain into the oil drain pan.

Replacing the oil filter:

The oil filter is typically located near the oil drain plug. Use an oil filter wrench to loosen and remove the old oil filter. Replace it with a new oil filter, making sure to apply a thin layer of oil to the rubber gasket before installing.

Refilling with the correct amount of oil:

Consult the vehicle’s manual or online resources to determine the correct oil capacity for a 2003 Honda Element. Use a funnel to pour the new oil into the engine, making sure not to overfill.

Checking the oil level:

After refilling with oil, start the engine and let it run for a few minutes. Then, turn off the engine and wait a few moments for the oil to settle. Remove the dipstick, wipe it clean, reinsert it, and then remove it again to check the oil level. Add more oil if necessary to reach the proper level.

Recommended Oil Type For 2003 Honda Element

When it comes to the oil capacity of a 2003 Honda Element, it is important to use the recommended oil type. Understanding oil viscosity is crucial in choosing the right oil for your Honda Element. Synthetic and conventional oil are two options to consider. Synthetic oil offers better protection and performance in extreme conditions, while conventional oil is more affordable. It is important to note that Honda recommends using their own brand of oil and oil filters for optimal performance. The 2003 Honda Element has a oil capacity of X quarts. It is always a good idea to check the owner’s manual for the exact oil capacity and specifications for your specific vehicle model. Keeping your Honda Element’s oil clean and at the recommended level is essential for the longevity and performance of your vehicle.

2003 Honda Element Oil Capacity

Credit: www.ebay.com

Frequently Asked Questions On 2003 Honda Element Oil Capacity

How Many Quarts Of Oil Does A Honda Element Take?

A Honda Element takes approximately four quarts of oil.

What Oil Is Best For 2003 Honda Element?

The best oil for a 2003 Honda Element is the Original Equipment Honda Oil. Make sure to use an OEM Honda Oil Filter as well.

How Many Quarts Of Oil Does A 2003 Honda Take?

A 2003 Honda takes approximately 4. 5 quarts of oil.

Conclusion

To ensure optimal performance and longevity of your 2003 Honda Element, it is crucial to know the correct oil capacity. By adhering to the manufacturer’s specifications, you can prevent potential engine issues and maintain your vehicle’s efficiency. Whether you rely on online resources or seek advice from fellow Honda owners in online communities like Reddit, understanding the right oil quantity is essential for the smooth operation of your vehicle.

Stay informed, follow guidelines, and enjoy the benefits of a well-maintained Honda Element.