When it comes to buying a new vehicle, one of the important factors to consider is its weight. Knowing the weight of a car can provide insight into its performance and fuel efficiency. In this article, we will explore how much a Ford Explorer weighs and provide you with all the information you need.
Credit: www.hilbishford.com
What is the Weight of a Ford Explorer?
The weight of a Ford Explorer can vary depending on the model and configuration. On average, a Ford Explorer weighs around 6,160 pounds or approximately 2.79 metric tons. This weight includes the vehicle’s base curb weight, which refers to the weight of the car with standard equipment and a full tank of fuel.
If you are looking for specific weight information for different Ford Explorer models, here are some examples:
Model
Weight (lbs)
Explorer Limited
6,160
Explorer XLT
6,160
It’s worth noting that weight may vary slightly depending on additional features, optional packages, and modifications made to the vehicle.
Credit: www.jdemmerford.com
Why Does the Weight of a Ford Explorer Matter?
The weight of a car can impact its performance, fuel efficiency, and safety. A heavier car may provide more stability on the road, especially during adverse weather conditions. It can also have a positive effect on the vehicle’s braking capabilities.
However, it’s important to consider that a heavier car may have slightly lower fuel efficiency compared to a lighter one. More weight can require more energy to move the vehicle, resulting in increased fuel consumption.
Where Can I Find the Weight of a Ford Explorer?
If you are researching the weight of a specific Ford Explorer model, there are several reliable sources to consider:
Websites such as Autoblog, Ford, or Edmunds provide detailed specifications for various Ford Explorer models, including weight information.
Official Ford dealership websites such as Ford Explorer NC or Jack Demmer Ford often include weight details for their respective models.
Online forums like Explorer Forum or Jerry Insurance may have discussions or threads where fellow Ford Explorer owners share the weight of their vehicles.
By visiting these sources, you can find accurate and up-to-date information regarding the weight of a Ford Explorer model you are interested in.
Frequently Asked Questions Of How Much Does A Ford Explorer Weigh
What Is The Gross Weight Of A 2023 Ford Explorer?
The gross weight of a 2023 Ford Explorer is approximately 6,160 lbs.
How Heavy Is A 2017 Ford Explorer Xlt?
The 2017 Ford Explorer XLT has a weight of 6,160 lbs.
How Much Does A 2016 Ford Explorer Weight?
The 2016 Ford Explorer weighs approximately 6,160 lbs.
Conclusion
The weight of a Ford Explorer ranges from approximately 6,160 pounds or 2.79 metric tons, depending on the model and configuration. Understanding the weight of a vehicle is crucial for making informed decisions about performance, fuel efficiency, and safety.
When researching the weight of a Ford Explorer, be sure to consult reliable sources such as automotive websites, official dealership websites, and online forums. This way, you can obtain the most accurate and up-to-date information that will help you choose the right Ford Explorer model to suit your needs.
U1000 2002 Nissan Altima Sedan Meaning, Symptoms, Causes and How to Fix
If you’re diving into the world of used cars, the U1000 2002 Nissan Altima Sedan stands out as a gem worth exploring. Unlike newer, flashier models that might dent your wallet, this sedan offers reliability and comfort without the hefty price tag. It’s a vehicle that proves you don’t need to break the bank for quality on wheels.
From its smooth ride to its spacious interior, the 2002 Altima is a testament to Nissan’s commitment to value and performance. Let’s delve into what makes this car a smart choice for savvy buyers.
Decoding U1000 in 2002 Nissan Altima
CAN Basics
The Controller Area Network, or CAN, is vital for modern vehicles. It lets different parts of the car talk to each other. This network is crucial for everything from engine management to safety features.
For a 2002 Nissan Altima, the CAN plays a key role in its operation. Without it, many electronic components wouldn’t work together smoothly.
U1000 Code
When the U1000 code pops up, it means there’s a communication failure within the CAN. This issue can lead to various problems in the vehicle’s performance and functionality.
In the 2002 Nissan Altima, this code often points to issues with the wiring harness. The wiring harness connects different parts of the car’s electrical system. If it’s damaged, signals can’t travel properly through the CAN.
Impact on Altima
For owners of a 2002 Nissan Altima, encountering a U1000 code can be troubling. It may cause unpredictable behavior in vehicle operations. Features that rely on electronic control units could stop working correctly.
Addressing this problem often involves inspecting and repairing the wiring harness. Sometimes, it might require replacing parts of the bus system within the CAN.
Symptoms of U1000 Error
Dashboard Lights
Erratic dashboard warning lights are a common symptom of the U1000 error. Drivers might notice that these lights flash without reason. This can be confusing and worrying.
etimes, the lights may not turn on at all. This inconsistency is a key indicator of the U1000 code in action.
Starting Issues
Another major symptom is the vehicle’s failure to start. This issue can leave drivers stranded and frustrated. It’s important to recognize this as a potential sign of the U1000 error.
The car may attempt to crank but then fails to ignite. This problem points directly to communication issues within the vehicle’s system.
Electronic Glitches
Intermittent issues with electronic components are also symptoms. For instance, the radio or power windows may work sporadically.
These glitches often go unnoticed as signs of a deeper problem. Yet, they are crucial clues pointing towards the U1000 error.
Performance Oddities
Unusual behavior in vehicle performance might occur. These oddities are not directly linked to communication errors at first glance.
Drivers may experience unexpected changes in acceleration or fuel efficiency. These subtle signs should not be ignored as they hint at underlying issues like the U1000 code.
Causes Behind U1000 Code
Wiring Issues
Loose or corroded wiring and connectors often lead to trouble codes like U1000 in the 2002 Nissan Altima sedan. These electrical issues disrupt communication within the vehicle’s network. Mechanics usually start by inspecting these areas during diagnostics.
Corrosion can interfere with the signals. It makes it hard for different car parts to “talk” to each other. Loose connections have a similar effect. They cause intermittent failures that are hard to trace.
CAN Bus Damage
The Controller Area Network (CAN) bus acts as the main highway for data exchange in modern vehicles. Damage to this system can result from accidents or wear and tear over time. Such damage is a common culprit behind the diagnostic trouble code U1000.
Accidents might crush or sever the bus lines. Normal aging can also degrade its performance. Both scenarios lead to communication breakdowns, triggering the error code.
Faulty ECUs
Faulty Engine Control Units (ECUs) are another potential cause of U1000 errors. The ECU is the brain of the car, managing various functions based on sensor inputs. If it fails, it can misinterpret data or lose communication with other modules.
This miscommunication generates trouble codes like U1000. Replacing or repairing the ECU often resolves these issues but can be costly.
Diagnosing CAN Communication Issues
Diagnostic Tools
Technicians often turn to specialized diagnostic tools. These devices read and interpret CAN signals effectively. They pinpoint where the breakdown in communication occurs.
One tool sends a message through the network. It checks if the message reaches its destination. This method helps find issues in the network communication.
Visual Inspection
A thorough visual inspection is crucial. Look closely at wiring and connectors for signs of damage or wear.
It’s common to find problems with connector pins or a poor harness ground connection. These can disrupt communication signals. Sometimes, a visual check reveals these issues without advanced tools.
Technical Bulletins
Consulting technical service bulletins (TSBs) is wise. TSBs may list known issues with the 2002 Nissan Altima, including network problems.
Manufacturers issue TSBs when they identify recurring issues across many vehicles. These bulletins provide guidance on fixing known defects.
Repair Procedures for U1000
Wiring Repair
After diagnosing CAN communication issues, the first step involves repairing or replacing damaged wiring and connectors. Mechanics should carefully inspect the vehicle’s wiring harness. They look for any signs of wear, tear, or corrosion. If they find damage, they must either repair the wires or replace them entirely. This ensures clear communication between the car’s electronic systems.
Technicians use specialized tools to handle these delicate tasks. They know that even a small mistake can lead to bigger problems down the road.
ECU Reset
etimes, the problem lies within the Electronic Control Unit (ECU). After thorough diagnosis, if a faulty ECU is identified, it needs resetting or replacing. Resetting the ECU can sometimes resolve communication errors without needing a full replacement.
If replacement is necessary, technicians ensure they install a compatible ECU. They then proceed with careful programming to match the car’s specifications.
Reprogramming Components
The final step in repairing U1000 code issues involves reprogramming certain electronic components post-repair. This is crucial because replacing parts can change how they communicate with other vehicle systems.
Auto repair shops have the necessary software and tools for this task. They update or reprogram components like sensors and modules to ensure smooth operation.
Preventing U1000 in the Future
Regular Checks
Professionals often stress the importance of regular maintenance checks. These are vital for catching issues early.
For your 2002 Nissan Altima sedan, focusing on the electrical system can prevent the U1000 code from appearing. Experts suggest inspecting control modules and wiring regularly. They know these components can cause trouble if not maintained.
Protective Measures
Shielding your car’s wiring is another effective strategy.
Using conduit or electrical tape provides extra protection against damage. This simple step can save you from headaches caused by exposed wires. It keeps the communication between modules clear and uninterrupted.
Manufacturer Updates
Staying informed about updates is crucial.
Manufacturers sometimes release updates or recalls to address known issues, including electrical problems that might lead to a U1000 code. By keeping up with these, you ensure your vehicle has the latest fixes. This not only prevents future errors but also enhances overall performance.
Impact of U1000 on Vehicle Performance
Fuel Efficiency
The U1000 code can lead to communication failures within the vehicle’s network. This disrupts how efficiently it uses fuel. Drivers might notice their 2002 Nissan Altima sedan consuming more gas than usual. Erratic engine performance is another symptom, with the car struggling to maintain consistent power.
These issues not only affect your wallet but also contribute to increased emissions. It’s a sign that the vehicle isn’t operating at its best.
Safety Systems
Airbags are crucial for passenger safety in any car, including the 2002 Nissan Altima sedan. The U1000 code might cause these systems to become non-operational without warning. This represents a significant risk during an accident, as airbags may fail to deploy.
It’s essential for drivers to understand that this error can compromise their safety and that of their passengers. Immediate action should be taken to address this issue.
Vehicle Shutdowns
Unexpected vehicle shutdowns are perhaps the most alarming consequence of the U1000 code. They can occur while driving, leading to dangerous situations on busy roads or highways. Such incidents highlight the inconvenience and potential danger posed by this error code.
Drivers may find themselves stranded or in need of immediate roadside assistance, adding stress and potential cost to their day.
Cost Considerations for Fixing U1000
Diagnostic Fees
The first step in addressing the U1000 code involves diagnosis. This process can vary in cost. Generally, diagnostic fees range from $75 to $150. This fee covers the time and expertise required to pinpoint the issue.
Mechanics use specialized tools to read the car’s computer. They spend hours checking connections and wiring.
Labor Costs
After diagnosis, fixing the problem is next. Labor costs depend on the repair’s complexity. For simple fixes, labor might cost between $80 and $120 per hour. However, if the issue is complex, these costs can rise significantly.
Technicians may need several hours to resolve the issue. This increases the total charge.
Parts Costs
Parts costs add another layer of expense. A new wiring harness or ECU (Engine Control Unit) can be costly. Prices for these parts vary widely.
A wiring harness might cost anywhere from $300 to over $1,000. An ECU replacement is often more expensive, sometimes exceeding $1,500.
Multiple Systems
If multiple systems are affected, costs escalate quickly. Each system might require recalibration or replacement. This could push repair bills even higher.
Cars with extensive damage face steep expenses. It’s not just about replacing one part but several interconnected components.
Closing Thoughts
Navigating the U1000 code on your 2002 Nissan Altima doesn’t have to be a headache. We’ve walked you through what it means, the signs to watch for, and how to fix it. You know now how to prevent it and the costs involved. Keeping your ride smooth and avoiding this error is all about staying informed and proactive. Your car’s performance and your wallet will thank you.
Don’t let U1000 put a dent in your driving experience. Take action, use this guide, and keep your Nissan running like a dream. Got questions or need more tips? Dive deeper into our blog or reach out for expert advice. Together, let’s keep those wheels turning smoothly.
Frequently Asked Questions
What does the U1000 code mean for my 2002 Nissan Altima?
The U1000 code indicates a communication issue within your car’s Controller Area Network (CAN), affecting its ability to operate efficiently.
What are the common symptoms of a U1000 error in a 2002 Nissan Altima?
Symptoms include erratic dashboard light behavior, loss of power, or the engine failing to start.
Why does my 2002 Nissan Altima show a U1000 code?
This error often results from faulty wiring, bad connections, or failed control units disrupting communication across the vehicle’s network.
How can I diagnose CAN communication issues leading to a U1000 code?
Diagnosing involves checking the CAN bus wiring and connections for damage or faults and using specialized diagnostic tools to pinpoint disruptions.
What are the typical repair procedures for addressing a U1000 code in a 2002 Nissan Altima?
Repairs may involve replacing damaged wires, securing loose connections, or updating/replacing malfunctioning control modules.
How can I prevent future U1000 codes in my 2002 Nissan Altima?
Regular vehicle maintenance and prompt attention to any electrical system irregularities can help prevent future communication errors like U1000.
What are the cost considerations for fixing a U1000 issue in a 2002 Nissan Altima?
Costs vary widely based on the specific cause but expect diagnostics and repairs to potentially run from moderate to high due to the complexity of CAN systems.
Are you ready to embark on your next adventure with your Toyota vehicle? With the advanced navigation system, getting to your destination has never been easier. However, if you’re unsure about how to activate your Toyota navigation system, you’ve come to the right place. In this comprehensive guide, we’ll walk you through the steps to activate your Toyota navigation system and start enjoying the convenience of seamless navigation.
Step 1: Obtain your Activation Code
The first step in activating your Toyota navigation system is to obtain the activation code. You can typically find this code on the navigation system itself, or it may be provided to you by your Toyota dealer. If you’re unable to locate the activation code, don’t hesitate to reach out to your dealer for assistance. Once you have the code, you’re ready to proceed to the next step.
Step 2: Access the Navigation Menu
Start by turning on your Toyota vehicle and accessing the navigation menu on the touchscreen display. Navigate to the “Settings” or “Navigation” section to begin the activation process. Depending on your vehicle model, the specific steps to access the navigation menu may vary, so be sure to refer to your owner’s manual for detailed instructions.
Credit: m.youtube.com
Step 3: Enter the Activation Code
Once you’re in the navigation menu, look for an option to input the activation code. Select this option and carefully enter the activation code you obtained in Step 1. Take your time to ensure that the code is entered accurately to avoid any potential activation issues.
Step 4: Complete the Activation Process
After entering the activation code, follow the on-screen prompts to complete the activation process. This may involve agreeing to terms and conditions, confirming the activation, or any additional steps specific to your vehicle’s navigation system. Once you’ve successfully completed the process, your Toyota navigation system should be fully activated and ready for use.
Credit: www.jdpower.com
Step 5: Test the Navigation System
Now that your navigation system is activated, it’s time to put it to the test. Enter a destination using the touchscreen display or voice command system, and let the navigation system plot the route for you. Pay attention to the clarity of the directions, the accuracy of the maps, and the overall user experience to ensure that the activation was successful.
Additional Tips for Activation
In some cases, the activation process may require you to connect your vehicle to a Wi-Fi network for software updates or verification. Be sure to check for any available updates for your navigation system to ensure optimal performance. If you encounter any difficulties during the activation process, reach out to your Toyota dealer or customer support for assistance.
Final Thoughts
Activating your Toyota navigation system is a key step in maximizing the utility of your vehicle. By following the steps outlined in this guide, you can ensure that your navigation system is ready to provide you with accurate and convenient guidance on all your journeys. Enjoy the peace of mind and efficiency that comes with having a fully activated Toyota navigation system at your fingertips.
Frequently Asked Questions On How Do I Activate My Toyota Navigation System
How Do I Activate My Toyota Navigation System?
To activate your Toyota Navigation System, follow these steps: 1. Turn on your vehicle and ensure the navigation system is powered on. 2. Press the “Menu” button on the navigation screen. 3. Navigate to the “Settings” option and select it. 4. Look for the “Navigation” tab and click on it. 5. Choose the “Activate” option and enter the activation code provided by Toyota. 6. Press “OK” or “Activate” to complete the activation process.
Can I Activate My Toyota Navigation System Online?
Yes, you can activate your Toyota Navigation System online. Simply visit the Toyota owner’s portal on their official website, log into your account, and follow the prompts to activate your navigation system. You will need the activation code, which is supplied with the purchase of your vehicle.
What If I Lose My Toyota Navigation System’s Activation Code?
Losing your Toyota Navigation System’s activation code can be frustrating, but don’t worry. Contact your nearest Toyota dealership, provide them with your vehicle’s identification number (VIN), and they will be able to retrieve your activation code for you. It’s important to store this code in a safe place for future reference.
When considering a new vehicle purchase, it’s essential to understand the physical dimensions and weight of the car. In this article, we’ll delve into the specifics of the Toyota Sienna, a popular minivan, to provide you with a comprehensive understanding of its size and weight.
Credit: www.attrelltoyota.com
Dimensions and Weight
The Toyota Sienna is a family-friendly minivan that has earned recognition for its spacious interior and versatility. Let’s break down its dimensions and weight to give you a clear picture of its size and characteristics.
Weight
The weight of a vehicle can impact its performance, fuel efficiency, and handling. The Toyota Sienna has a curb weight ranging from 4,430 to 4,615 pounds, depending on the trim level and additional features.
Trim Level
Curb Weight (lbs)
L
4,430 – 4,430
LE
4,510 – 4,525
XLE
4,560 – 4,615
Limited
4,615 – 4,615
Width
The width of a vehicle determines its spatial presence on the road and its interior capacity. The Toyota Sienna boasts a width of 78.1 inches, providing ample space for passengers and cargo.
Height
Understanding the height of a vehicle is crucial for practicality and parking considerations. The Toyota Sienna stands at a height of 68.9 inches, ensuring that it can navigate under low clearance areas while maintaining an accommodating interior space.
Credit: www.jerrysmobility.com
Practical Applications
Knowing the weight, width, and height of a Toyota Sienna can aid in various decision-making processes. For instance, if you’re a family that frequently embarks on road trips, the spacious interior and ample width of the Sienna can ensure a comfortable and enjoyable journey.
Furthermore, understanding the vehicle’s dimensions can assist in planning for parking and storage arrangements. The moderate height of the Sienna makes it suitable for a range of parking structures, while its width allows for easy access and maneuverability.
Frequently Asked Questions Of How Heavy, Wide, And Tall Is A Toyota Sienna.
How Heavy Is A Toyota Sienna?
A Toyota Sienna generally weighs around 4,430 to 4,750 pounds, depending on the trim level and optional features.
How Wide Is A Toyota Sienna?
The width of a Toyota Sienna is approximately 78. 1 inches, providing ample space for passengers and cargo.
How Tall Is A Toyota Sienna?
The height of a Toyota Sienna varies between 68. 9 and 70. 7 inches, ensuring enough headroom for occupants and a comfortable ride.
Conclusion
Ultimately, comprehending the weight, width, and height of a vehicle such as the Toyota Sienna is essential for making an informed decision. Whether you prioritize interior space, fuel efficiency, or maneuverability, being aware of these dimensions empowers you to select a vehicle that aligns with your specific needs and preferences.
Remote start functionality has become increasingly popular among car owners for the convenience it offers. The ability to start your car from a distance, allowing it to warm up in cold weather or cool down in hot weather, can make a significant difference in your driving experience. If you own a Toyota vehicle, you may be wondering how to get remote start functionality on your Toyota app. In this article, we’ll explore the steps you need to take to get remote start on your Toyota app, so you can enjoy the added convenience and comfort it brings.
Step 1: Check Your Compatibility
Before you begin the process of getting remote start on your Toyota app, it’s important to determine if your vehicle is compatible with this feature. Toyota offers remote start capabilities on a range of its models, but it’s essential to verify if your specific vehicle is equipped to support remote start functionality through the Toyota app. You can check the owner’s manual or contact your local Toyota dealership to confirm if this feature is available for your vehicle.
Credit: www.passporttoyota.com
Step 2: Install the Toyota App
If your Toyota vehicle is compatible with remote start, the next step involves installing the Toyota app on your mobile device. The Toyota app is available for both iOS and Android platforms, and you can download it from the respective app stores. Once the app is installed, you’ll need to set up an account and register your vehicle within the app to access the remote start feature.
Step 3: Register Your Vehicle
After installing the Toyota app, you’ll need to register your vehicle within the app to enable remote start functionality. This process typically involves inputting your vehicle identification number (VIN) and following the app’s prompts to link your specific Toyota model to your account. Once your vehicle is successfully registered, you should be able to access the remote start feature within the app.
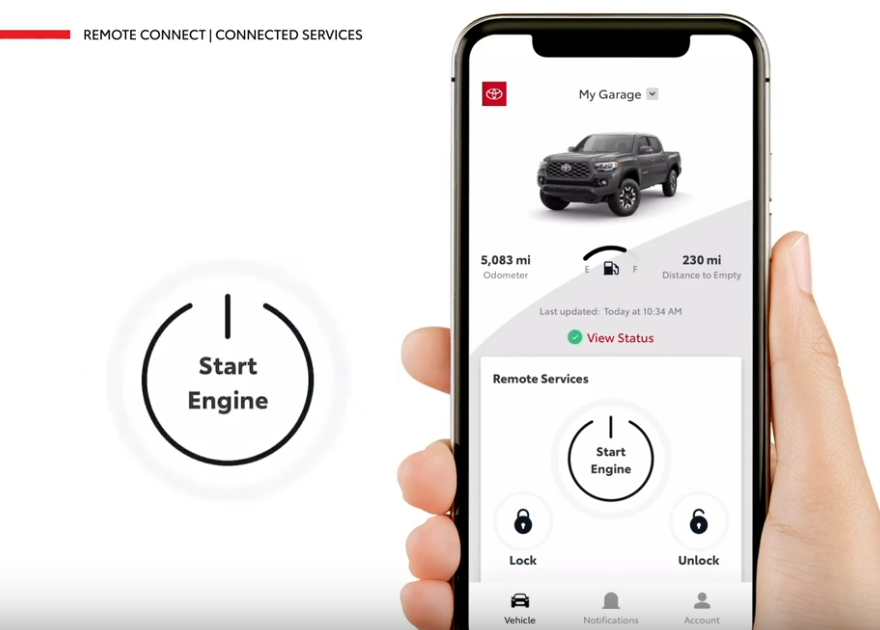
Step 4: Activate Remote Start
With the Toyota app installed and your vehicle registered, it’s time to activate the remote start functionality. Depending on your vehicle model and the app version, the process to activate remote start may vary slightly. However, it typically involves accessing the app, locating the remote start option, and following the on-screen instructions to start your vehicle remotely. Some apps may require a command confirmation or additional security measures to initiate the remote start.
Credit: www.toyotaofwestcounty.com
Step 5: Enjoy the Convenience
Once you’ve successfully activated the remote start on your Toyota app, you can now enjoy the convenience it brings to your daily life. Whether it’s warming up your car on a chilly morning or cooling it down on a hot afternoon, having the ability to remotely start your vehicle provides a level of comfort and practicality that can enhance your overall driving experience.
Additional Considerations
While getting remote start on your Toyota app can offer numerous benefits, it’s essential to consider a few additional factors. For instance, some Toyota models may require an additional hardware installation to enable remote start functionality. In such cases, it’s advisable to consult with a certified Toyota technician to ensure the proper installation and functionality of the remote start system.
Moreover, familiarizing yourself with the app’s features and understanding any associated subscription costs or service fees is crucial to making the most of the remote start feature. Keeping your app updated and adhering to any maintenance requirements for the remote start system can also contribute to its optimal performance and longevity.
Final Thoughts
In conclusion, accessing remote start on your Toyota app can add a new level of convenience to your driving routine. By following the steps outlined in this article and considering any additional requirements specific to your vehicle model, you can successfully equip your Toyota with the remote start feature and enjoy the practicality it offers.
Frequently Asked Questions Of How To Get Remote Start On Toyota App
How Can I Get Remote Start On My Toyota Vehicle?
To get remote start on your Toyota vehicle, you can download and install the Toyota App from the App Store or Google Play. Once installed, you can follow the app prompts to set up remote start functionality.
What Features Does The Toyota App Remote Start Offer?
The Toyota App remote start offers a range of features including the ability to start your vehicle remotely, lock and unlock doors, track your vehicle’s location, and even adjust the temperature inside the car before getting in.
Is The Toyota App Remote Start Compatible With All Toyota Models?
The Toyota App remote start is compatible with select Toyota models. It is important to check if your specific Toyota model is compatible by visiting the Toyota website or contacting your local Toyota dealership.
Dirty Air Filter Maintenance 101: Signs, Solutions, and Savings for Your Car’s Health
Proper air filter maintenance is crucial for optimal car performance and longevity. Replace your air filter every 12,000 to 15,000 miles to enhance engine efficiency and fuel economy. Signs of a dirty filter include decreased gas mileage, strange engine noises, and difficulty starting.
A clogged filter affects engine power and combustion, leading to poor performance and potential damage. Cleaning or replacing filters based on type is essential. Driving with a dirty filter impacts emissions, engine wear, and acceleration.
Consider DIY cleaning for cost savings, but professional services ensure thorough maintenance. Understanding the differences between cabin and engine filters is key. Secure your car’s health with regular air filter maintenance.
How often should I replace my cars air filter to avoid it getting too dirty?
Replace your car’s air filter every 12,000 to 15,000 miles, following your vehicle’s specific maintenance guide.
A clean air filter optimizes engine performance by ensuring an appropriate air-fuel mix, enhancing combustion and engine efficiency.
Delayed replacement can lead to decreased fuel economy, lower engine power, and potential engine damage.
Regular air filter maintenance is essential for vehicle longevity and optimal performance.
What are the signs of a dirty air filter in a vehicle?
A dirty air filter in a vehicle can manifest through various signs. These signs include:
A decrease in gas mileage
Unusual engine sounds
The illumination of the service engine light
Difficulty starting the vehicle
Experiencing challenges with acceleration or rough engine performance
Recognizing these indicators can help prompt timely air filter maintenance to ensure optimal vehicle performance.
1. Decrease in Gas Mileage
A dirty air filter reduces fuel efficiency by obstructing airflow to the engine, forcing it to use more fuel to maintain performance. This leads to frequent fuel refills.
To enhance fuel efficiency, inspect and replace the air filter if necessary.
2. Unusual Engine Sounds
Unusual engine sounds, including wheezing, whistling, coughing, sputtering, or backfiring, can indicate a clogged air filter.
This obstruction disrupts the optimal air-fuel mixture, leading to inefficient combustion and increased engine strain.
Thoroughly, inspecting and replacing a dirty air filter is crucial for maintaining engine efficiency and performance.
3. Service Engine Light
A dirty air filter can trigger the service engine light due to its impact on engine performance. Key indicators include:
Indicator
Detail
Impact
Decreased Fuel Efficiency
A clogged air filter restricts airflow, leading to higher fuel consumption.
Engine Operation
Engine Noise
An obstructed filter can cause the engine to run inefficiently, generating unusual sounds.
Mechanical Efficiency
Starting Issues
A dirty filter can impede the mix of air and fuel, causing engine misfires during ignition.
Improper engine function due to a dirty air filter can result in smoke emissions from unburned fuel or oil.
Emission Control
4. Difficulty Starting
A clogged air filter limits engine airflow, disrupting the air-fuel balance necessary for ignition. This condition can lead to extended engine cranking, unstable idling, or stalling upon startup.
For optimal engine performance and reliable starting, inspect and replace the air filter if contaminated.
5. Difficulty Accelerating or Running Rough
A dirty air filter restricts engine airflow, leading to a poor air-fuel mixture and resulting in sluggish acceleration and a rough idle. This condition hampers the combustion process, causing the engine to underperform and generate vibrations.
Replacing the air filter restores airflow, optimizes combustion, and enhances engine efficiency, preventing potential damage to the vehicle’s systems.
6. Smoke From the Exhaust
Exhaust smoke can indicate a clogged air filter, leading to engine inefficiencies by hampering airflow and disrupting the air-fuel mix. This situation can decrease vehicle performance and heighten emissions. Prompt air filter replacement is key to averting further engine damage and enhancing vehicle efficiency.
Regular air filter checks are essential for maintaining peak engine function and fuel efficiency. Observing exhaust smoke warrants an immediate air filter inspection and, if necessary, replacement to ensure your vehicle operates effectively.
Can a dirty air filter affect my cars performance, and if so, how?
Yes, a dirty air filter affect cars performance. A clogged air filter reduces engine efficiency by obstructing airflow, leading to increased fuel consumption and decreased power. Specifically, it causes a rich air-fuel mix, impairing combustion and resulting in sluggish acceleration and poor fuel economy.
In severe cases, it can lead to engine misfires, rough idling, and stalling. Regularly replacing the air filter is crucial for maintaining optimal engine performance and extending the vehicle’s lifespan.
What are the consequences of driving with a dirty air filter for an extended period?
Driving with a dirty air filter significantly impacts a vehicle’s efficiency and engine health. It decreases fuel economy by restricting airflow, essential for optimal combustion, leading to a rise in fuel consumption.
This condition exacerbates engine emissions, contributing to environmental pollution. Over time, the engine may suffer from increased wear due to inadequate air supply, potentially resulting in costly repairs for components like spark plugs and the oxygen sensor.
Acceleration diminishes, and the engine may exhibit rough idling or difficulty starting, signaling the need for immediate air filter maintenance to preserve vehicle performance and extend its service life.
How can I check if my air filter needs to be replaced or cleaned?
To determine if your air filter needs to be replaced or cleaned, visually inspect it for a dense accumulation of dirt or debris and check for any physical damage such as rips.
Also, be aware of symptoms like unusual odors, diminished fuel efficiency, odd engine noises, or a drop in engine power, indicating a compromised air filter.
These signs suggest it’s time for cleaning or a replacement to maintain your vehicle’s optimal performance.
Is it possible to clean a dirty air filter, or should it always be replaced?
It is possible to clean certain types of air filters, such as washable or reusable ones, following the manufacturer’s instructions. However, disposable air filters should always be replaced when they become dirty.
To maintain optimal engine performance, it is important to assess your car’s air filter type.
Disposable filters, once dirty, must be replaced. In contrast, reusable filters like foam or fabric can be cleaned following the manufacturer’s specific instructions, unless they’re too damaged or contaminated.
Ensure adherence to the correct cleaning process to prevent damage to the filter. Regular checks and proper upkeep are crucial for extending the lifespan of the air filter.
What types of air filters are most susceptible to getting dirty quickly?
Foam and fabric air filters are most susceptible to getting dirty. Due to their material composition, these air filters quickly accumulate dirt and debris, necessitating frequent maintenance. These types, particularly in environments with high dust or pollution levels, are more susceptible to rapid clogging.
The dense mesh structure of these filters, while effective at trapping fine particles, significantly impedes airflow when blocked, directly impacting engine efficiency and fuel consumption. Therefore, to ensure sustained engine performance, it’s crucial to regularly clean or replace foam and fabric air filters.
How does a dirty air filter impact fuel efficiency in vehicles?
A clogged air filter diminishes a vehicle’s fuel efficiency by obstructing airflow to the engine, causing it to consume more fuel. Specifically, the restricted airflow leads to incomplete combustion, forcing the engine to operate in a fuel-rich condition and exert more effort, thereby increasing fuel usage.
This situation not only elevates fuel consumption but also affects the engine’s oxygen intake, further degrading fuel mixture quality and overall efficiency.
Regular maintenance of the air filter is crucial for maintaining optimal engine performance and fuel economy.
Can a dirty air filter cause my car to fail an emissions test?
Yes, a dirty air filter can cause your car to fail an emissions test. It restricts airflow to the engine, leading to an improper air-fuel mixture, which can increase exhaust emissions and result in a failed test.
A clogged air filter restricts engine airflow, leading to an improper air-fuel mixture and increased emissions of hydrocarbons and carbon monoxide. This imbalance can cause a vehicle to exceed regulatory limits during an emissions test, resulting in failure.
Regular air filter maintenance is crucial for compliance with emissions standards.
What are the environmental impacts of driving with a dirty air filter?
Driving with a dirty air filter significantly raises emissions, including carbon monoxide and hydrocarbons, harming air quality and contributing to smog formation.
This exacerbates climate change by releasing more pollutants into the atmosphere, posing health risks to humans and ecosystems.
How does the environment I drive in affect how quickly my air filter gets dirty?
The environment significantly influences the rate at which your car’s air filter accumulates dirt.
Driving in conditions such as dusty or sandy environments, heavy traffic areas, and on unpaved roads leads to a rapid increase in debris and contaminants within the filter.
External factors like elevated pollen counts and high levels of air pollution expedite the filter’s dirtiness. The table below succinctly summarizes these effects:
Environmental Conditions
Impact on Air Filter
Dusty/Sandy Environments
Accelerated dirt accumulation
Heavy Traffic Zones
Increased debris buildup
Unpaved Roads
Enhanced contaminant capture
Elevated Pollen Counts
Increased clogging risk
High Air Pollution Levels
Faster filter contamination
Are there any DIY methods for cleaning a car air filter, or should a professional always do it?
Yes, there are DIY methods for cleaning a car air filter. Cleaning car air filter yourself is a viable option if you have the necessary basic tools and knowledge. This method can save money but requires time and careful attention to avoid damaging the filter. Key steps include:
Removing the filter: Locate and carefully remove the air filter from its housing.
Inspection: Check the filter for significant damage or wear. If it’s heavily soiled or damaged, replacement is recommended.
Cleaning: Gently tap the filter to remove loose dirt. If it’s a washable type, rinse it with water and a mild detergent, then let it dry completely before reinstallation.
Reinstallation: Once clean and dry, place the filter back into its housing, ensuring a proper fit.
However, DIY cleaning carries risks, such as using incorrect cleaning methods that could damage the filter or engine. Additionally, it might void the warranty of the air filter or related components.
Professional cleaning services, on the other hand, offer expertise and guarantee a thorough job, which is crucial for maintaining engine performance and longevity. They can also inspect the filter for any signs of wear or damage that might not be obvious to the untrained eye.
What is the difference between a cabin air filter and an engine air filter in terms of getting dirty?
Cabin air filters get dirty quicker than engine air filters due to the higher concentration of contaminants in the passenger compartment.
Cabin air filters, designed to purify the air entering a vehicle’s HVAC system, trap dust, pollen, and pollutants, leading to more frequent contamination, particularly in polluted or high-pollen areas.
Engine air filters safeguard the engine from debris like dirt and dust, but generally last longer before requiring replacement.
The difference in contamination rates stems from their distinct roles: cabin air filters for interior air quality, and engine air filters for engine protection.
How much does it typically cost to replace a dirty air filter?
Replacing a vehicle’s engine air filter typically costs between $10 to $20, depending on the vehicle’s make and model. This investment can lead to significant benefits, such as enhanced engine performance and improved fuel efficiency.
Here are critical aspects to consider when evaluating the importance of replacing a dirty air filter:
Fuel Efficiency: A clean air filter ensures optimal airflow to the engine, reducing fuel consumption and saving on gas expenses.
Engine Performance: A clogged air filter can lead to unusual engine noises due to inefficient operation.
Engine Health: A dirty air filter can trigger the check engine light, indicating potential debris interference.
Starting Issues: Insufficient airflow caused by a clogged filter may lead to difficulties in starting the vehicle.
Acceleration and Operation: Proper airflow is crucial for smooth acceleration and efficient engine running; a dirty filter can impair these functions.
Can a dirty air filter lead to other mechanical issues in a vehicle if not addressed?
Yes, a dirty air filter can lead to other mechanical issues in a vehicle if not addressed. It can cause reduced airflow to the engine, leading to decreased performance, increased fuel consumption, and potentially causing the engine to run rich.
Over time, this can result in fouled spark plugs, damaged oxygen sensors, and even catalytic converter failure. Additionally, excessive dirt and debris can harm internal engine components, leading to costly repairs.
Wrapping Up
Maintaining a clean air filter is vital for your vehicle’s performance and longevity. Signs of a clogged air filter include decreased fuel efficiency, unusual engine sounds, and reduced horsepower.
Regularly replacing or cleaning your air filter can prevent engine damage, optimize fuel consumption, and enhance overall driving quality. It’s essential to check your air filter periodically, as recommended by your vehicle’s manufacturer, to ensure your engine runs efficiently.