To turn off the Check Engine light on a Toyota Corolla, first diagnose the issue using an OBD-II scanner.
Address the problem identified, then reset the light by disconnecting the car battery for a few minutes or using the scanner.
Understanding the Check Engine Light
To turn off the Check Engine Light in your Toyota Corolla, first understand why it turns on. This light indicates a problem when it lights up or blinks on your dashboard. It's connected to the car's onboard diagnostics system (OBD-II), which checks the engine's performance and emissions.
Paying attention to this light is important because it warns you of potential engine issues, which can be minor or serious. Ignoring it can lead to more expensive repairs later.
The Check Engine Light is a warning, not a specific diagnosis. The OBD-II system in your Toyota Corolla can activate the light for many reasons, but it doesn't specify the problem. To identify the issue, you typically need a diagnostic scan tool to read the error codes from the car's computer.
Common Causes and Fixes
Understanding why the Check Engine Light comes on is key. Here are common reasons and solutions for a Toyota Corolla:
Oxygen Sensor Failure: This sensor checks how much oxygen hasn't burned in the exhaust. If it's not working, your car uses more fuel and pollutes more. Replace the oxygen sensor if it's faulty. You can do it yourself with the right tools or get help from a professional if unsure.
Loose or Faulty Gas Cap: A gas cap that's not tight or is broken can cause the Check Engine Light to turn on. The gas cap keeps the fuel system sealed and under the right pressure. Tighten it if it's loose. If it's broken, get a new one. It's cheap and easy to replace and can fix the light and make your car use fuel more efficiently.
Catalytic Converter Failure: This part reduces pollution by turning harmful gases into less harmful ones. If it stops working, it harms the environment, and your car won't run as well or use fuel efficiently. You need a professional to replace it. Not fixing it can lead to bigger issues, like failing an emissions test or worse performance and fuel use.
Fixing these issues quickly can help turn off the Check Engine Light and keep your Toyota Corolla running well.
DIY Diagnostic Tools
To fix the Check Engine Light on your Toyota Corolla by yourself, use a DIY tool called an OBD-II scanner. This tool connects to your car's diagnostics port and reads codes that show what's wrong. These scanners range from basic to advanced, but a simple one is usually enough for most Corolla owners. This saves money and avoids unnecessary mechanic visits for small issues.
To use it, find the OBD-II port under the dashboard near the steering wheel. Plug in the scanner, turn the car's ignition to 'On' without starting the engine, and follow the scanner's instructions to get the codes.
After getting the codes, search them online or in the manual to understand the problem. Some issues like loose gas caps or faulty sensors can be fixed by yourself. For complicated problems, it's better to see a professional.
Resetting the Light Step-by-Step
To reset the Check Engine Light on your Toyota Corolla, follow these steps:
Turn Off the Car
First, ensure your Corolla is off. This is important for the reset to work.
Find the Diagnostic Link Connector (DLC)
Look for the DLC under the driver's side dashboard, near the steering column. You don't need any tools for a manual reset.
Disconnect and Reconnect the Battery
With the car off, open the hood and find the battery. Use a wrench to remove the negative battery cable. Wait about 15 minutes for the car's computer to reset. Then, reconnect the negative battery cable. This should turn off the Check Engine Light. If the light comes back on, your car might still have a problem.
When to Seek Professional Help
If the Check Engine Light keeps coming on after you try to reset it, it means there's a serious problem with your Toyota Corolla that needs expert help. Ignoring it can cause bigger and more expensive issues later.
If the light doesn't go off after you follow the correct steps to reset it, or if it goes off but then comes back on, you need to contact a professional. This could mean there are big problems, like with the emission control systems or the engine.
If your car is making strange noises, uses more fuel than usual, stalls, or idles roughly along with the Check Engine Light, it's important to get it checked right away. These signs mean the problem is serious and could be unsafe.
If you just had your Corolla fixed and the Check Engine Light is still on, the repair mightn't have been done right, or there might be a new problem. You should go back to the mechanic or get a second opinion.
Conclusion
Fixing the check engine light on your Toyota Corolla isn't too hard. You can figure out why it's on and even fix it yourself with some tools. Just follow the steps to turn the light off.
But, if it seems too tricky, it's okay to ask a car expert for help. Whether it's an easy fix or something bigger, solving the problem helps keep your car running well.
So, don't ignore the light. Fix it and keep enjoying your drives.
How to Install Android Auto in Toyota Corolla 2020
Connect it to your car's system following specific setup instructions for seamless music, navigation, and messaging.
Check Compatibility
Make sure your 2020 Toyota Corolla works with Android Auto. Not all cars or systems have this feature. First, check your car's manual for Android Auto info. If lost, visit Toyota's website or contact a Toyota dealership for help. They can tell you if Android Auto is supported.
Also, check your Corolla's system software version for Android Auto compatibility. This is found in the infotainment system's settings under 'About' or 'System Information.' Compare this version to the latest on Toyota's website or ask Toyota directly. If needed, update the software with a USB drive or visit a dealership.
Download Android Auto
To get Android Auto on your smartphone for your 2020 Toyota Corolla, follow these steps:
Check your phone's compatibility: Your phone needs Android 6.0 (Marshmallow) or newer.
Use Wi-Fi: Connect your phone to Wi-Fi to download Android Auto without using mobile data.
Search in Google Play Store: Look for 'Android Auto' in Google Play Store. Make sure it's by Google LLC.
Download and Install: Press 'Install' to download and install Android Auto. After installation, you'll find it in your phone's app drawer.
Connect Your Smartphone
Install Android Auto on your smartphone to connect it to your Toyota Corolla 2020.
Turn on your Corolla's ignition to activate the car's electrical systems. Use a high-quality USB cable that supports data transfer for a stable connection.
Unlock your smartphone. If it's your first time, allow permissions for Android Auto to access phone features for notifications, music, and navigation.
Plug the USB cable into the Toyota Corolla 2020's USB port, found in the center console or dashboard area, then connect the other end to your smartphone. Your car should recognize the device and may automatically launch Android Auto. If not, select the Android Auto icon on your car's display.
The first connection may take time as the car and smartphone establish communication. Follow any prompts on your car's display or smartphone to confirm the connection.
Configure Android Auto
To set up Android Auto in your 2020 Toyota Corolla, follow these steps:
Choose Your Apps: On your car's display, open Android Auto and pick the apps you want on the home screen by tapping 'Customize'. This makes it easier to access your favorite apps while driving.
Turn On Notifications: In Android Auto's settings on your car's screen, find 'Notifications' and turn them on. This lets you hear important messages and alerts through your car's speakers or see them on the display.
Adjust Audio Settings: Go to Android Auto's main menu to change sound settings to your liking. Here, you can alter the bass, treble, and volume for music, navigation, and calls.
Activate Voice Commands: In the settings menu, choose 'Voice Commands' to enable voice control. This allows you to use Android Auto without your hands, making it safer to navigate, call, or text while driving.
Troubleshooting Tips
If you have problems with Android Auto in your 2020 Toyota Corolla, here are some quick fixes. These steps can help you fix issues and use your music, maps, and apps again.
If Android Auto won't start, update the Android Auto app on your smartphone. Then, try connecting again.
If the connection keeps dropping, use a high-quality USB cable that's in good condition. Changing the cable often fixes this.
For audio problems like crackling or no sound, restart your smartphone and your car's infotainment system. This can fix the connection and solve audio issues.
If the screen freezes or doesn't respond, clear Android Auto's cache and data on your smartphone. This can fix temporary glitches.
If maps aren't showing correctly, make sure your phone's GPS is on and working. If the problem continues, reinstall Android Auto.
Conclusion
You now know how to make Android Auto work in your 2020 Toyota Corolla.
First, make sure it will work with your car, then download the app, connect your phone, and set it up the way you like.
If you run into any problems, don't worry. The tips for fixing issues should help you sort them out.
Now, you can easily use your phone's apps and features safely while you drive.
To remote start the 2022 Toyota Corolla Cross, follow these steps:
Install and set up the Toyota app on your smartphone.
Once configured, you can activate the remote start feature through the app.
This ensures quick and convenient control over your vehicle's ignition.
Understanding Remote Start
Remote start lets you turn on your car's engine from far away using a key fob or a smartphone app. This is useful for making your car warm or cool before you get in, especially during very hot or cold weather.
If you have a Toyota Corolla Cross 2022, you can start your car while doing other things, like finishing your coffee or work. Starting your car before you drive can make it run better and last longer.
It's also safe because the car stays locked while running, and it will turn off if someone tries to steal it.
Setting Up the Toyota App
To start using the remote start feature on your 2022 Toyota Corolla Cross, follow these steps:
Download the Toyota app from the App Store or Google Play on your smartphone.
If you're new, create an account with your basic information and email verification. If you already have an account, just sign in.
Add your vehicle using its Vehicle Identification Number (VIN), which you can find on the dashboard or registration documents.
Get familiar with the app's various features, like service reminders and vehicle health reports.
Activating Remote Start
To use the remote start on your 2022 Toyota Corolla Cross, first make sure you have the Toyota app set up. Your car should be in a safe place and your phone should have a good signal. Open the Toyota app and tap the remote start button. Your car will start and you'll get a confirmation on your app. You can do this from anywhere if your phone and car have a good network connection.
When the engine starts, the car's air conditioning or heater will turn on to the last setting used, so the car's interior will be comfortable. The doors will stay locked for security until you open them.
Limitations and Considerations
Using the remote start on your 2022 Toyota Corolla Cross has its limitations and factors to consider. Here's what you need to know:
Distance Limits: Your remote start only works within a certain range. If you're too far away, it mightn't work.
Time Limits: The engine will only run for a limited time after being started remotely, then it shuts off automatically.
Fuel Level: The remote start won't work if your fuel level is too low. This prevents running out of fuel.
Weather: Extreme weather can impact how well the remote start works.
Knowing these limitations helps you use your remote start feature effectively.
Optimal Use Tips
To use your 2022 Toyota Corolla Cross's remote start effectively, follow these guidelines:
Always check the area around your vehicle before using remote start to ensure it's safe, especially to avoid starting the car in enclosed spaces where exhaust can build up.
For better signal reach, position yourself wisely when starting the car, especially in crowded areas or from a distance. Objects like buildings or other cars can weaken the signal.
Use remote start to adjust your car's temperature before getting in. Cool it down on hot days and warm it up on cold days. This not only makes your ride more comfortable but also helps the engine by allowing it to adjust gradually.
Be aware of the auto-shutoff feature that turns the car off after a set period. Plan your remote starts to avoid wasting fuel and to have your car ready when needed.
Maintain the remote start system by keeping the remote's battery fresh and updating the system's firmware as needed. This prevents problems and ensures the system works well.
Conclusion
You now know how to start your 2022 Toyota Corolla Cross from far away using the Toyota app. This is very handy because you can make your car warm or cool before you get in.
But, remember, you might need to pay for a subscription and there's a limit to how far away you can be to use this feature. Keep these things in mind to make the most of it.
Using this cool feature can make riding in your Corolla Cross nicer right from the start.
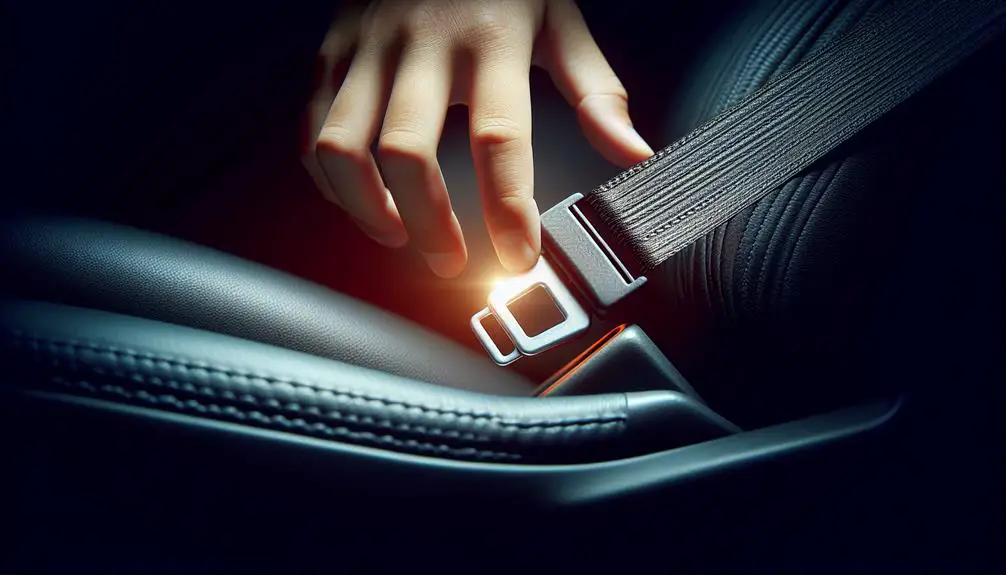
How to Turn off Seatbelt Alarm Toyota Corolla 2021
To silence the seatbelt alarm in a 2021 Toyota Corolla, locate the seatbelt connector under the driver's seat.
Then follow a specific sequence of actions such as turning the car on and off, and clicking the belt in and out a set number of times.
Always prioritize safety.
Understanding the Alarm System
To turn off the loud seatbelt alarm in your 2021 Toyota Corolla, you first need to know how it works. This safety system uses sensors to check if you or a passenger haven't fastened your seatbelts. If the car is moving and a seatbelt isn't buckled, it sets off a loud and sometimes visual reminder to buckle up for safety.
The Corolla's seatbelt alarm system is smart. It doesn't start right when you turn on the car. It waits a bit, giving you time to fasten your seatbelt before reminding you. This is why there might be a delay between turning on the car and hearing the alarm.
The alarm makes a series of beeps or chimes to get your attention and encourage you to fasten your seatbelt. While important for safety, sometimes you might want to turn it off temporarily.
The system can tell the difference between the front seats using weight sensors. These sensors decide whether to activate the alarm based on if there's a passenger. If you're driving alone, the alarm for the passenger seat won't go off unless something heavy is on it.
Understanding how this works is important if you want to make any changes to the system carefully.
Preparing to Disable the Alarm
Before you turn off the seatbelt alarm in your 2021 Toyota Corolla, make sure the car is parked safely where it won't block traffic.
You'll need a screwdriver and gloves to protect your hands from sharp parts or electrical components. Also, have the car manual nearby to guide you without damaging the car.
Know the layout of your car's interior to avoid damaging other parts. The goal is to disable the alarm without harming the seatbelt or other car functions.
Locating the Seatbelt Connector
To find the seatbelt connector in a 2021 Toyota Corolla, make sure the area is well-lit. Clear space and adjust your position if needed for a better view under the driver's seat. The connector is near the base of the seatbelt. It looks like wires going into a plastic housing and connects the seatbelt to the car's computer.
If it's hard to find, check the Corolla's manual for help. The manual can have diagrams or instructions to find the seatbelt connector. The position might be slightly different in each car model.
The connector might be hidden by fabric or other parts under the seat. Move these carefully to see better, but avoid disconnecting anything or forcing parts apart.
Disabling the Alarm Step-by-Step
To turn off the seatbelt alarm in your 2021 Toyota Corolla, follow these steps:
Turn On the Car: Start the engine while the car is in park to prevent it from moving.
Buckle and Unbuckle: Quickly buckle and unbuckle the driver's seatbelt three times within 10 seconds, leaving it unbuckled at the end.
Stop the Engine: Turn off your car's engine. This is important for the reset to work.
Do It Again: Without starting the car, quickly buckle and unbuckle the seatbelt three more times, ending with it unbuckled.
Restart the Car: Turn the engine on again. Listen for a beep or chime, which means the system is resetting. Buckle and unbuckle the seatbelt once more.
Check for Confirmation: The seatbelt warning light should flash a few times, indicating the alarm is now off.
Safety Considerations and Tips
Turning off the seatbelt alarm in your Toyota Corolla might seem like a good idea, but it's important to remember that seatbelts are crucial for safety. They help save lives every day. The alarm is there to remind you to wear your seatbelt, which can keep you and your passengers safe in a crash.
Seatbelts aren't just a car feature; they're a key safety tool. They lower the chance of dying or getting seriously hurt if there's a crash. If you ignore the seatbelt alarm, you're not just risking a ticket; you're risking your life and others' lives.
Here are key reasons to wear a seatbelt:
They spread the crash force across stronger parts of your body, reducing the risk of major injuries.
They prevent you from being thrown out of the car, which is often deadly.
Wearing a seatbelt is the law in many places, so you avoid fines and legal trouble.
You set a good example for others, which is important if you have young passengers.
Conclusion
You've learned how to turn off the seatbelt alarm in your 2021 Toyota Corolla. First, you understood the system, then you got ready for the job, found the seatbelt connector, and finally, turned off the alarm.
Remember, it's very important to always wear your seatbelt for safety. Keep this in mind and make sure you and anyone else in the car are safe when you're driving.
Stay safe and enjoy a quieter car ride!
How to Turn off Automatic Headlights Toyota Corolla
To turn off automatic headlights in a Toyota Corolla:
Locate the headlight switch on the vehicle's dashboard or steering column.
Turn it to the 'Off' or 'Manual' position.
Specific steps may vary by model and year.
Understanding Automatic Headlights
Automatic headlights turn on by themselves when it gets dark, making it easier and safer to drive your Toyota Corolla at night or in low light. These headlights have sensors that detect how much light is around. If it's getting dark, like at dusk or on a cloudy day, the sensors tell the car to turn on the headlights. This feature helps other drivers see your car better and improves your view of the road.
Sometimes, you might want to control the headlights yourself, like when the automatic system doesn't work as expected or you want to save battery while waiting in your car. It's important to know that your Toyota Corolla has this feature and understand how it works so you can use it the way you prefer.
Locating the Headlight Controls
To use the automatic headlights in your Toyota Corolla, look to the left side of the steering wheel for the controls. This placement is common in many cars, making it easy to adjust lights without looking away from the road.
Headlight Stalk: This lever, sticking out from the steering column, is the main control for your headlights. It's easy to reach with your left hand.
Indicator Icons: The stalk has symbols for different headlight settings. These symbols look like beams of light.
Dashboard Indicator: When you change your headlights, an icon on your dashboard will light up to show the adjustment.
Steering Column Area: Near the steering column, there might be more controls or buttons for the headlights, especially in models with extra features.
Adjusting the Headlight Settings
To change the settings of your Toyota Corolla's automatic headlights, turn the headlight stalk located on the left side of the steering wheel to your preferred option. The specific features available, like sensitivity and timing adjustments, depend on the model year of your Corolla.
For sensitivity adjustments, if your headlights turn on too early or too late, modify this by going to the vehicle's infotainment display. Select vehicle settings, then 'Lights' or 'Headlights' to change how soon your headlights respond to darkness.
For timing adjustments, if you want your headlights to remain on after turning off the engine, especially in dark places, find this option in the same 'Lights' or 'Headlights' section within vehicle settings. Here, you can set how long the headlights remain on, with options ranging from a few seconds to a couple of minutes.
Manual Override Techniques
To manually control the automatic headlights in your Toyota Corolla, follow these steps:
Locate the Headlight Switch: This is usually on the left of the steering column. It has settings for off, parking lights, and headlights.
Turn Off Automatic Mode: Move the switch to the off position to stop the automatic headlights. This lets you control them manually.
Activate Manual Mode: Some models have a manual mode. Turn the switch to this position to use headlights manually.
Change Settings as Needed: You can switch between off, parking lights, and headlights depending on what you need. Remember to manually turn on the headlights when it gets dark or when entering tunnels.
Maintaining Your Settings
To keep your Toyota Corolla's manual headlight settings, follow these steps:
Check your headlight settings every week to make sure they haven't reset.
If the settings reset, use the manual override steps to set them again.
Put a note or reminder in your car or on your phone to check the settings regularly.
If your settings keep resetting, talk to a Toyota technician for help.
This will help you maintain your preferred headlight settings easily.
Conclusion
Now you know how to change your Toyota Corolla's automatic headlights. It's all about using the right button and changing the settings the way you like.
You can turn them off manually or change their settings. Make sure to check your settings often to keep them just right.
Having your headlights set up just how you like makes driving safer and more fun.
2010 Toyota Corolla Trunk Release Not Working: Causes and How to Fix
Addressing the malfunctioning trunk release in a 2010 Toyota Corolla can range from minor inconveniences to significant hindrances. This issue can arise from various causes such as electrical or mechanical failures.
It is crucial to identify the root cause to implement the correct solution, whether it’s a DIY fix or requires professional assistance.
Knowing the underlying issues and potential remedies is essential to ensure the functionality and security of your vehicle.
What Causes the Trunk Release on a 2010 Toyota Corolla to Stop Working?
Several factors can lead to the malfunctioning of the trunk release in a 2010 Toyota Corolla, including electrical issues, mechanical failures, and wear and tear of components.
Comprehending these causes is important for diagnosing the problem accurately and finding an effective solution.
The trunk release system, a critical convenience feature, can be compromised by different issues, impacting the vehicle’s usability and security.
Here are four primary causes that can lead to the malfunctioning of the trunk release:
Electrical Issues: Faulty wiring or malfunctioning switches can disrupt the electrical signals necessary for the trunk release mechanism to operate.
Mechanical Failures: Broken or disconnected linkage between the release mechanism and the trunk latch can prevent the trunk from opening.
Wear and Tear of Components: Regular use over time can lead to the deterioration of mechanical parts, affecting their performance and reliability.
Faulty Trunk Lock Cylinder: Damage or wear to the trunk lock cylinder can hinder the ability to open the trunk manually with a key.
Comprehending these factors is vital for identifying the root cause of the problem and addressing it effectively.
How to Identify the Problem with Your 2010 Toyota Corolla Trunk Release
Identifying the root cause of a malfunctioning trunk release on a 2010 Toyota Corolla requires a systematic approach.
Starting with a step-by-step diagnosis can help determine whether the issue is electrical or mechanical in nature.
This process includes checking the key fob’s battery and grasping when a fuse problem may be to blame, providing a clear path towards resolution.
Step-by-step guide to diagnosing electrical vs. mechanical issues
Step 1: Check the trunk release button or lever for any resistance or unusual looseness to determine if the issue is mechanical.
Step 2: If the button or lever feels normal but the trunk doesn’t open, the problem might be electrical.
Step 3: Inspect the fuse related to the trunk release circuit for any signs of damage.
Step 4: If the fuse is intact, further investigate the wiring and electrical connections for potential issues.
Step 5: This systematic evaluation will help identify whether the problem with your 2010 Toyota Corolla trunk release is mechanical or electrical, guiding you towards an appropriate repair solution.
How to check your key fob’s battery?
Step 1: Identify the small slot or indentation on the side of your 2010 Toyota Corolla’s key fob.
Step 2: Use a flathead screwdriver to gently pry open the case of the key fob.
Step 3: Locate the small battery inside, usually a CR2032 or a similar coin cell. Take note of the battery type and voltage.
Step 4: Check if the battery appears corroded or drained.
Step 5: If the battery is in poor condition, replace it with a new one of the same type.
Step 6: Ensure to align the new battery correctly according to the +/- indicators inside the key fob.
When to know it’s a fuse problem?
To check if a fuse is causing your 2010 Toyota Corolla’s trunk release issue, follow these steps:
Locate the fuse related to the trunk release in the fuse box.
Remove and inspect the fuse for damage.
If it’s blown, replace it with one of the same amperage.
Further investigation may be needed if the problem persists.
DIY Fixes for a Non-Working 2010 Toyota Corolla Trunk Release
Addressing a non-functioning trunk release in a 2010 Toyota Corolla can often be managed through a series of DIY fixes. This involves procedures such as replacing the trunk release fuse, repairing or replacing the trunk latch mechanism, and troubleshooting any key fob related issues that might be interfering with the trunk’s operation.
Each step requires a methodical approach to ensure the trunk release is restored to full functionality efficiently.
How to replace the trunk release fuse?
Step 1: Locate the fuse box in your 2010 Toyota Corolla, typically found under the dashboard on the driver’s side or in the engine compartment.
Step 2: Refer to the owner’s manual to identify the specific fuse that controls the trunk release system.
Step 3: Use a fuse puller or a pair of needle-nose pliers to carefully remove the old fuse related to the trunk release.
Step 4:
Inspect the removed fuse for a broken filament, which indicates a blown fuse that needs replacement.
Step 5: Replace the blown fuse with a new one of the same amperage rating to ensure proper functionality of the trunk release system and prevent potential electrical issues.
Step 6: Test the trunk release system to confirm that it is now working properly.
Step 7: Close the fuse box and ensure it is securely fastened before closing the hood or the dashboard panel.
Congratulations! You have successfully replaced the trunk release fuse in your 2010 Toyota Corolla.
Replacing or repairing the trunk latch mechanism
If the trunk release of your 2010 Toyota Corolla is still not functioning properly after replacing the fuse, the next step involves inspecting and potentially repairing or replacing the trunk latch mechanism. This process can be approached as a do-it-yourself task by following these structured steps:
Remove the Trunk Lining: Carefully take off the trunk’s interior lining to access the latch mechanism.
Inspect the Latch: Look for visible signs of damage or wear. If the latch appears broken, replacement is necessary.
Lubricate the Mechanism: If the latch is not damaged, applying lubricant can sometimes restore functionality.
Test the Latch: After any repairs or replacement, reassemble and test the trunk release to ensure it operates smoothly.
Following these steps should help in resolving issues with a non-working trunk release.
Troubleshooting and fixing key fob problems
Step 1: If your key fob is not working, the first step is to check if the battery is dead. Replace the battery with a new one, ensuring it is inserted in the correct orientation.
Step 2: If the key fob still doesn’t work after changing the battery, consider signal interference as a possible issue. Move away from potential interference sources or try repositioning the key fob to see if that resolves the problem.
Step 3: In case there is no improvement, and you suspect internal damage, inspect the key fob for loose components or broken contacts. If you are unable to identify and fix the issue yourself, it may be necessary to seek professional repair services for the key fob.
When to Seek Professional Help for Your Trunk Release Issues
Seek professional help for your 2010 Toyota Corolla trunk release issues if you experience persistent malfunctions, unusual noises, or electrical problems.
Visit a trusted mechanic or dealership for diagnostics and repairs.
Be prepared for potential costs based on the specific issue, but prioritize safety and functionality.
Indicators that it’s time to call a professional
Knowing the signs that indicate professional help is needed can save you time and prevent further complications.
Persistent Mechanical Failure: If the trunk release continues to malfunction despite basic troubleshooting.
Electrical Issues: Signs of electrical problems, such as unresponsive buttons or faulty wiring.
Physical Damage: Visible damage to the trunk release mechanism or related components.
Security System Interference: If the car’s security system prevents the trunk from opening, indicating a complex issue.
Seeking expert assistance guarantees a thorough diagnosis and repair, restoring your vehicle’s functionality and your peace of mind.
What to expect when visiting a mechanic or dealership?
You can expect the service advisor to ask for a detailed description of the trunk release issue on your 2010 Toyota Corolla. They will likely perform a preliminary assessment to diagnose the problem, inspecting the trunk release mechanism and using diagnostic tools if needed. Communication is key, so the technician should keep you informed throughout the process, explaining the problem, required repairs, and next steps.
During your visit to a mechanic or dealership for trunk release issues on your 2010 Toyota Corolla, the service advisor will ask for a detailed description of the problem and perform a preliminary assessment.
The mechanic will inspect the trunk release mechanism, including the electrical system, fuses, cables, and latches, and may use diagnostic tools to pinpoint the cause of the malfunction.
Communication is essential, so expect the technician to keep you informed about the problem, necessary repairs, and the next steps.
Cost estimates for professional repair services
Cost estimates for professional repair services for trunk release issues on a 2010 Toyota Corolla:
Repairing a faulty trunk latch: $50 to $150
Addressing complex electrical issues like a malfunctioning actuator or wiring problems: $200 to $400
Obtain a detailed quote from your service provider, including labor and parts. Opting for a reputable mechanic or dealership can ensure quality repairs and potentially save money in the long run.
How to Prevent Future Trunk Release Problems in Your Toyota Corolla
To guarantee the longevity and reliability of the trunk release system in your Toyota Corolla, adopting a proactive maintenance strategy is paramount. This encompasses regular inspections and maintenance of both electrical and mechanical components, alongside mindful care of the key fob to prevent failure.
Implementing preventative measures to greatly reduce the likelihood of future trunk release problems.
Regular maintenance tips for electrical and mechanical components
Regular maintenance of both electrical and mechanical components is important in preventing future trunk release problems in your Toyota Corolla. Ensuring these systems are regularly checked and serviced can greatly reduce the likelihood of encountering sudden malfunctions. Here are four key maintenance tips:
Inspect Wiring Regularly: Check for any signs of wear, corrosion, or damage to the wiring harness connected to the trunk release system.
Lubricate Moving Parts: Apply appropriate lubricants to mechanical linkages and latches to guarantee smooth operation.
Test Trunk Release Mechanisms: Periodically check both the interior release lever and any electronic release systems for responsiveness.
Battery Maintenance: Make sure the vehicle’s battery is in good condition, as a weak battery can impact the electrical system’s performance, including the trunk release function.
Best practices for key fob care
Proper key fob maintenance not only extends its life but also prevents potential issues with signal transmission that could affect your vehicle’s functionality.
Here are key practices to follow:
Avoid Exposing to Extreme Temperatures: Heat and cold can damage the fob’s battery and circuitry.
Keep Dry and Clean: Moisture and dirt can interfere with the fob’s signals.
Replace the Battery Regularly: Weak batteries lead to signal failure.
Avoid Physical Damage: Dropping or stepping on the fob can break its internal components.
Adhering to these guidelines will help guarantee your key fob remains in good working condition, supporting the reliable operation of your vehicle’s trunk release system.
Preventative measures to avoid wear and tear
Here are four key steps to prevent future issues:
Regularly Clean the Trunk Release Area: Keep the trunk latch and release mechanism free from dirt and debris to prevent jamming.
Lubricate Moving Parts: Apply silicone-based lubricant to the trunk latch mechanism periodically to guarantee smooth operation.
Avoid Overloading the Trunk: Excessive weight can strain the trunk release mechanism, leading to premature wear.
Inspect Mechanism Annually: Have a professional check the trunk release system as part of your vehicle’s annual maintenance to catch and resolve any potential problems early.
FAQs About 2010 Toyota Corolla Trunk Release Problems
Why did my trunk release suddenly stop working?
The sudden failure of the trunk release in the 2010 Toyota Corolla can be due to a faulty trunk latch assembly. This malfunctioning trunk release cable or electrical issues like faulty wiring or a malfunctioning trunk release switch can disrupt the mechanism and prevent the trunk from opening.
These issues can disrupt the mechanism and prevent the trunk from opening.
Can a dead battery affect my trunk release?
Yes, a dead battery can affect your 2010 Toyota Corolla’s trunk release. The electric trunk release relies on the car’s electrical system, so if the battery is dead or weak, it may not provide enough power for the release to operate.
Ensure your battery is charged for proper functionality.
How much does it typically cost to fix a trunk release issue?
Fixing a trunk release issue in a 2010 Toyota Corolla can cost between $50 to $300, depending on the root cause.
Simple issues like a broken trunk release cable may cost $50 to $150, while electrical problems like a malfunctioning actuator can escalate the repair costs to $150 to $300.
Why is my trunk not opening?
Your 2010 Toyota Corolla’s trunk may not be opening due to mechanical failures like a stuck latch, broken lock, or damaged linkage.
It could also be an electrical issue caused by a blown fuse, faulty wiring, or a malfunctioning trunk release actuator.
Identifying the problem is key to resolving it promptly.
How do you open the trunk of a 2010 Toyota Corolla without the key?
To open the trunk of a 2010 Toyota Corolla without the key, you can use the inside release lever located on the floor or side of the driver’s seat.
Alternatively, fold down the rear seats to access the trunk or seek assistance from a locksmith if needed.
How do you unjam a trunk latch?
To unjam a trunk latch on a 2010 Toyota Corolla, follow these steps:
Clean any debris from the latch.
Use automotive lubricant on the mechanism.
Work the lubricant in by opening and closing the latch.
If the issue persists, seek help from a mechanic or Toyota service center for proper repair.
Why is trunk not closing?
The trunk may not close properly on a 2010 Toyota Corolla due to various reasons such as a misaligned latch, an obstructed path, or a faulty trunk lock.
To resolve the issue, it is important to check for alignment issues first, ensuring that the latch is properly aligned.
Next, remove any obstructions that may be preventing the trunk from closing fully.
Lastly, inspect the lock mechanism to see if there are any faults that need to be addressed.
Wrapping Up: 2010 Toyota Corolla Trunk Release Not Working
To summarize, the functionality of the trunk release in a 2010 Toyota Corolla is critical for accessibility and convenience. Different factors, including electrical malfunctions, mechanical failures, and wear and tear, can impede its operation.
Identifying the root cause is vital for applying the appropriate fix, whether through DIY methods or professional intervention. Preventative measures further guarantee the longevity of the trunk release system.
Addressing these issues promptly improves vehicle usability and maintains its value.