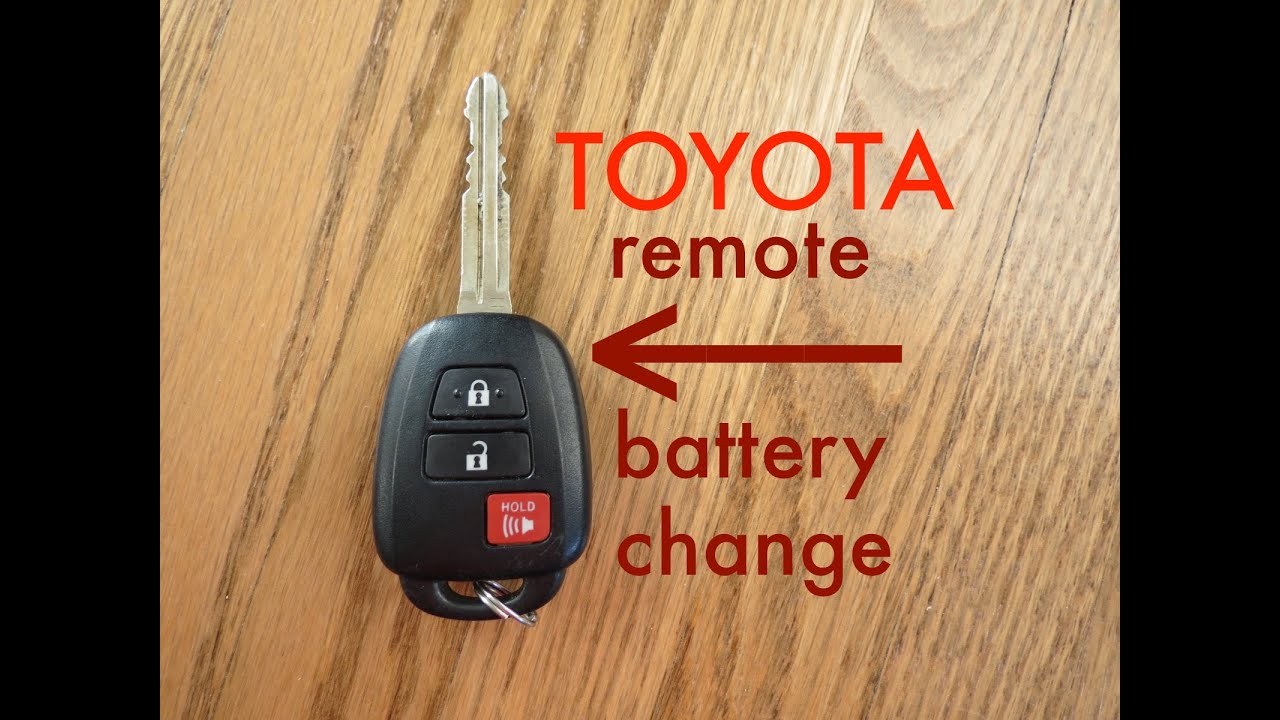
To replace the Toyota key battery, open the key fob using a small screwdriver or flat object, locate the metal key inside the fob, and press the small metal button at the top to release it. Once the metal key is out, you can access the battery compartment, remove the old battery, and replace it with a new one.
Credit: m.youtube.com
Steps To Replace Toyota Key Battery
Replacing the battery in your Toyota key is a simple and essential maintenance task that ensures your key fob continues to work effectively. Here are the steps to replace the key fob battery in your Toyota:
Locating The Metal Key
To begin, locate the small metal button at the top of the key fob. Pressing this button will release the metal key that is tucked away inside the fob. Use this key to access the interior of the key fob.
Opening The Key Fob
Next, find a small slot where the metal key was stored. Insert a flat object, such as a small screwdriver, into the slot and gently pry open the key fob. Be careful not to damage the casing during this process.
Removing The Old Battery
Once the key fob is opened, carefully lift out the circuit board to access the old battery. The battery is usually held in place with a small clip or housing. Use a tool to carefully remove the old battery from its compartment.
Installing The New Battery
After removing the old battery, insert the new battery into the designated space on the circuit board. Ensure the positive and negative ends of the battery align correctly with the markings inside the key fob. Once the new battery is in place, you can proceed to reassemble the key fob.
Closing The Key Fob
Finally, carefully reposition the circuit board back into the key fob, ensuring it sits securely in place. Gently press the two halves of the key fob together until they snap back into position. Ensure the key fob is sealed securely before use, and test the key to confirm the battery replacement was successful.
Credit: www.bankstreet-toyota.ca
Credit: www.reddit.com
Frequently Asked Questions Of How To Replace Toyota Key Battery
Can I Change The Battery In My Toyota Key?
Yes, you can change the battery in your Toyota key. Simply open the key, remove the old battery, and install a new one.
Where Can I Get A Toyota Key Battery Replaced?
To get a Toyota key battery replaced, you can visit a Toyota dealership or an automotive locksmith. They will have the necessary tools and expertise to replace the battery for you.
What Type Of Battery Does A Toyota Key Fob Use?
The Toyota key fob uses a small, round button cell battery.
Conclusion
Replacing the battery in your Toyota key fob is a simple process that can be done at home with only a few minutes of your time. By following the easy steps outlined in this guide, you can ensure that your key fob continues to work efficiently, providing you with the convenience and security you need.
Remember to replace the battery regularly to avoid any unexpected issues with your Toyota key fob.
Changing the cabin air filter in your Toyota RAV4 is an essential part of routine maintenance. The cabin air filter plays a crucial role in ensuring the air inside your vehicle is clean and safe to breathe. Regular replacement of the cabin air filter can help improve air quality and maintain the performance of your car’s heating and air conditioning systems. In this article, we’ll discuss how often you should change the cabin air filter in your Toyota RAV4.
What is a Cabin Air Filter?
A cabin air filter is a vital component of your vehicle’s ventilation system. It is designed to prevent dust, pollen, and other airborne particles from entering the car’s interior through the heating, ventilation, and air conditioning (HVAC) system. Over time, the cabin air filter becomes clogged with these contaminants, reducing its effectiveness and impacting the air quality inside the vehicle.
How Often Should You Change the Cabin Air Filter in Your Toyota RAV4?
It’s recommended to change the cabin air filter in your Toyota RAV4 approximately every 15,000 miles or once a year, whichever comes first. However, if you frequently drive in dusty or heavily polluted areas, you may need to replace the filter more often to ensure optimal performance. Checking the owner’s manual for specific recommendations is advisable, as it provides the manufacturer’s guidelines for your specific model.
Credit: www.elgintoyota.com
Credit: www.bommaritotoyota.net
Signs that Your Cabin Air Filter Needs Replacement
There are several indicators that your cabin air filter might be due for replacement. If you notice reduced airflow from the HVAC system, musty or unpleasant odors inside the car, or increased allergens like sneezing or coughing, it may be time to change the cabin air filter. Additionally, if you visually inspect the filter and notice it is dirty or clogged with debris, this is another clear sign that it needs to be replaced.
Benefits of Regular Cabin Air Filter Replacement
Regular replacement of the cabin air filter offers numerous benefits. It helps to maintain the efficiency of the HVAC system, ensuring optimal airflow and heating or cooling performance. By trapping airborne particles and contaminants, the filter also helps to improve the air quality inside the vehicle, creating a more comfortable and healthy driving environment for you and your passengers.
DIY vs. Professional Replacement
You can choose to replace the cabin air filter yourself if you’re comfortable performing basic maintenance tasks on your vehicle. Most cabin air filters are relatively easy to access and replace, requiring minimal tools and time. However, if you’re uncertain or prefer to have the work done by a professional, your local Toyota dealership or auto service center can perform the replacement during a routine maintenance visit.
Final Thoughts
Keeping up with regular cabin air filter replacement for your Toyota RAV4 is crucial to ensure clean, healthy air inside your vehicle. By following the manufacturer’s recommendations and paying attention to signs that the filter needs replacement, you can maintain optimal air quality and HVAC system performance. Whether you choose to replace the filter yourself or have it done professionally, prioritizing this maintenance task can contribute to a more enjoyable and comfortable driving experience.
Frequently Asked Questions For How Often To Change Cabin Air Filter Toyota Rav4
How Often Should I Change The Cabin Air Filter In Toyota Rav4?
We recommend changing the cabin air filter in your Toyota Rav4 every 12,000 to 15,000 miles or at least once a year. Regular replacement helps maintain clean air quality inside your vehicle.
What Are The Signs That The Cabin Air Filter Needs To Be Replaced In A Toyota Rav4?
If you notice reduced airflow into the cabin, unpleasant odors, or an increase in dust or allergens inside your Toyota Rav4, it’s time to replace the cabin air filter. Regular replacement ensures optimal air quality.
Can I Change The Cabin Air Filter In My Toyota Rav4 Myself?
Yes, changing the cabin air filter in a Toyota Rav4 is a simple task that you can do yourself. Refer to the vehicle’s owner manual for step-by-step instructions or watch online tutorials for guidance. Save time and money by doing it yourself.
“`
This article aims to inform Toyota RAV4 owners about the importance of changing the cabin air filter and provides guidance on how often to do so. It covers the purpose of the cabin air filter, how often it should be replaced, signs that indicate the need for replacement, benefits of regular replacement, and options for DIY or professional replacement. The HTML format includes headers, paragraphs, and emphasizes key points for better readability and SEO optimization.
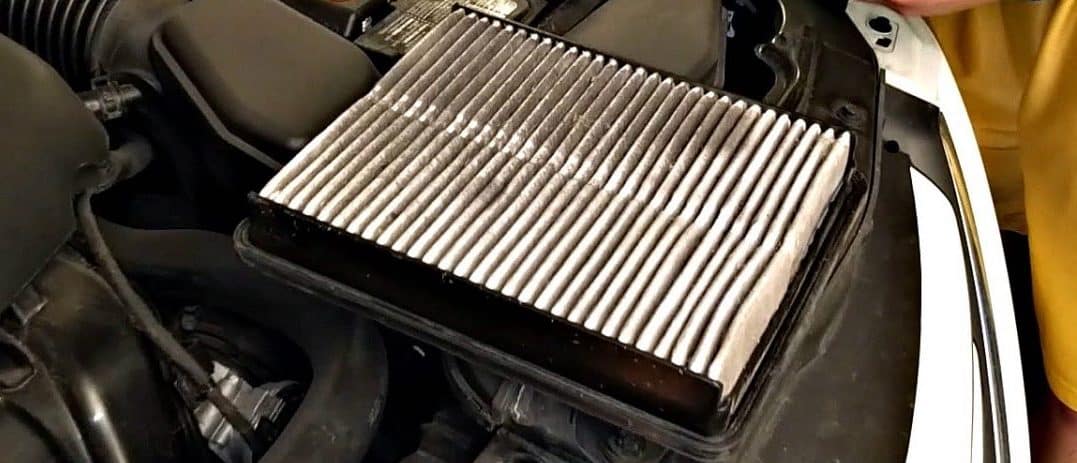
The engine air filter in a Toyota should be changed regularly.
Signs Of A Dirty Engine Air Filter
Over time, a dirty engine air filter can affect the performance of your Toyota. Signs of a dirty filter include reduced fuel efficiency, engine misfiring, and strange engine sounds. Regularly replacing your air filter can prolong engine life and prevent costly repairs.
Signs of a Dirty Engine Air Filter
Decreased Gas Mileage
One of the signs of a dirty engine air filter is a decrease in gas mileage. A dirty air filter can restrict the airflow, causing the engine to work harder and burn more fuel, ultimately resulting in decreased fuel efficiency. If you notice your vehicle’s fuel efficiency dropping, it may be time to check and replace the air filter.
Engine Light Is On
If the check engine light illuminates on your dashboard, it could be an indication of a dirty air filter. The computerized engine management system may detect the restricted airflow caused by a dirty filter, prompting it to signal a potential problem through the engine light.
Dirty Air Filter
Inspecting the air filter itself is a good way to determine if it needs to be replaced. If the filter appears dirty, clogged, or filled with debris, it is a clear sign that it needs immediate attention. A visual inspection can often reveal the condition of the air filter.
Jerking Movements When Accelerating
A dirty air filter can lead to irregular airflow to the engine, causing hesitation and jerking when accelerating. If you experience rough or jumpy movements when pressing on the accelerator, a dirty air filter might be the culprit.
Misfiring And Starting Issues
Misfiring or difficulty starting the engine can be symptomatic of a dirty air filter. A restricted airflow can disrupt the combustion process, leading to irregular engine firing and starting issues. Addressing the air filter may resolve these problems.
Strange Engine Sounds
An obstructed air filter can create unusual engine sounds. If you hear strange noises such as wheezing or whistling from the engine compartment, it may be a result of the filter impeding the necessary airflow to the engine.
Black Smoke Or Flames From The Exhaust Pipe
Black smoke or flames emitting from the exhaust pipe can also indicate a dirty air filter. A lack of proper air supply can lead to an excessively rich air-fuel mixture, resulting in the emission of dark exhaust fumes or even flames if the condition worsens.
Credit: www.frontiertoyota.com
Importance Of Regularly Replacing Air Filters
Regularly replacing the engine air filter in your Toyota is vital for ensuring optimal engine performance and longevity. Aim to change it every 12,000 to 15,000 miles, or as recommended in your vehicle’s manual. A clean air filter promotes better fuel efficiency, reduces engine wear, and prevents costly repairs.
Prolongs Engine Life
Regularly replacing your engine air filter is crucial for prolonging the life of your Toyota’s engine. Even a tiny particle, as small as a grain of salt, can find its way through a damaged air filter and cause significant damage to the internal engine parts, including cylinders and pistons. Repairing these parts can be extremely expensive and time-consuming. By changing your air filter on a regular basis, you can prevent such damage and ensure your engine keeps running smoothly.
Prevents Damage To Internal Engine Parts
A clean and functioning engine air filter prevents contaminants such as dirt, dust, and debris from entering the engine. When these particles accumulate in the engine, they can cause abrasion and corrosion, leading to potential damage to the internal engine parts. By regularly replacing the air filter, you can prevent these contaminants from wreaking havoc on your engine, ensuring it operates at its optimal performance and avoiding costly repairs in the long run.
Reduces Repair Costs
By maintaining a regular air filter replacement schedule, you can significantly reduce the risk of engine damage and the associated repair costs. When contaminants are allowed to enter the engine due to a dirty or clogged air filter, they can impact the engine’s performance and efficiency. This can lead to issues such as reduced fuel efficiency, misfiring, and jerking movements during acceleration. These problems not only affect your driving experience but can also result in costly repairs. By simply changing your air filter regularly, you can avoid these issues and keep your repair costs to a minimum.
How Often To Change Engine Air Filter
Regular maintenance is crucial for keeping your Toyota running smoothly and efficiently. One important maintenance task is changing the engine air filter. A clean air filter ensures that your engine is receiving the necessary amount of clean air for combustion, improving fuel efficiency and prolonging the life of your engine. In this article, we will discuss how often you should change the engine air filter in your Toyota.
Guidelines From Toyota
Toyota recommends following their specific guidelines when it comes to replacing the engine air filter. These guidelines can vary depending on the model and year of your Toyota vehicle, so it is essential to consult your owner’s manual or contact your local Toyota dealership for accurate information. Generally, Toyota suggests replacing the engine air filter every 30,000 to 45,000 miles or every 3 to 4 years, whichever comes first.
Depends On Dust And Dirt Exposure
The frequency of air filter changes can also depend on the level of dust and dirt exposure your Toyota experiences. If you frequently drive on unpaved or dusty roads, your engine air filter may become clogged more quickly, requiring more frequent replacements. Similarly, if you live in an area with high pollution or regularly encounter heavy traffic, it is advisable to check and replace your air filter more often.
Checking The Air Filter During Oil Changes
A convenient time to check the condition of your engine air filter is during your regular oil changes. Most oil change services include a basic inspection of the engine components, including the air filter. If the filter appears dirty or clogged, it is a good indication that it needs to be replaced. Additionally, if you notice a decrease in fuel efficiency or experience issues with acceleration, it is recommended to inspect and replace the air filter as needed.
Regularly changing the engine air filter is a simple yet important step in maintaining the performance and longevity of your Toyota. By following Toyota’s guidelines and considering your driving conditions, you can ensure that your engine receives clean air for optimal combustion. Remember to consult your owner’s manual or reach out to your local Toyota dealership for specific recommendations based on your vehicle model.
Credit: m.youtube.com
Toyota’s Recommended Air Filter Replacement Cost
When it comes to maintaining your Toyota’s engine, regular replacement of the air filter is vital for optimal performance. Not only does a clean air filter improve fuel efficiency and engine life, but it also helps to protect the engine from damaging particles. Toyota recommends changing the engine air filter every 30,000 to 45,000 miles, but this can vary based on driving conditions and environment. It’s important to adhere to these guidelines to ensure your Toyota functions at its best. Let’s take a look at the costs associated with air filter replacement for your Toyota.
Estimate From Repairpal.com
According to RepairPal.com, the estimated cost for replacing the air filter in a Toyota Corolla ranges from $44 to $85. This estimate includes the cost of the replacement filter and labor charges. Keep in mind that prices may vary based on your location and the specific model of your Toyota.
Price At Toyota Dealerships
At Toyota dealerships, the price for an air filter replacement can vary, but it typically falls within the range of $50 to $100. Additionally, opting for genuine OEM air filters from the dealership ensures compatibility and performance that meets Toyota’s stringent standards.
Tips For Changing Engine Air Filter
Learn how often to change the engine air filter in your Toyota with these helpful tips. Regularly replacing your air filter can improve fuel efficiency, prolong engine life, and prevent damage to internal engine parts. Keep your Toyota running smoothly by following a recommended maintenance schedule for your air filter.
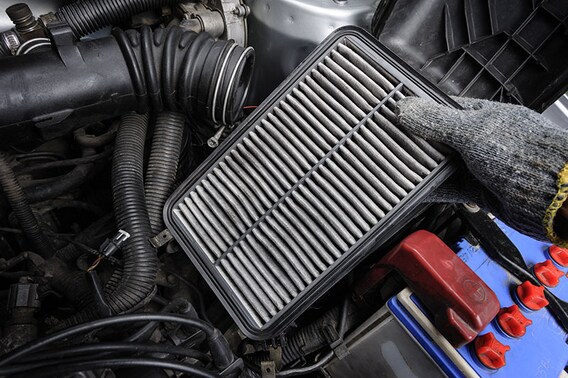
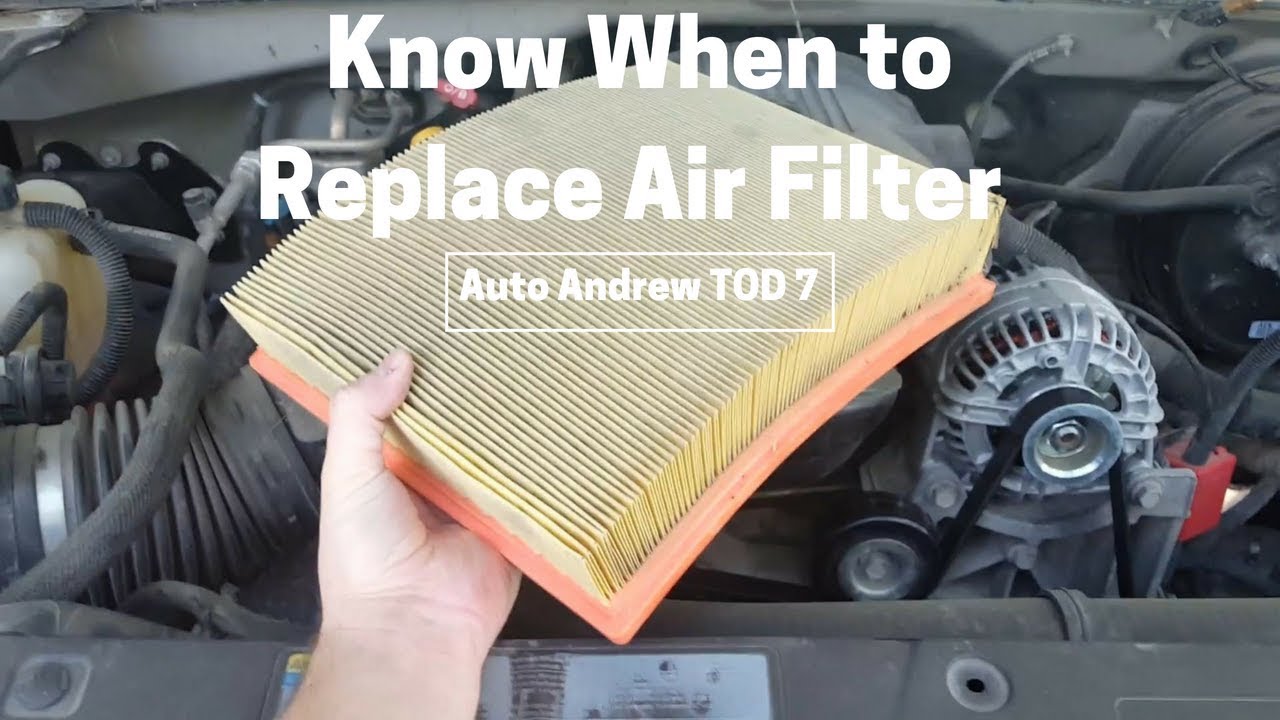
Locating The Air Filter
Before you can start changing the engine air filter on your Toyota, you need to locate it. The air filter is typically located in a rectangular or square-shaped box, known as the air box or air filter housing, under the hood of your car. It is often placed near the top of the engine compartment for easy access. To find the air filter, look for a plastic cover or housing with clips or screws holding it in place.
Removing The Old Filter
Once you have located the air filter, it’s time to remove the old one. Start by unlatching or unscrewing the clips or screws that secure the air box cover. Carefully lift the cover off to reveal the engine air filter inside. Take note of the orientation of the old filter before removing it to ensure proper installation of the new one. Gently lift the old filter out of the air box, making sure not to drop any debris into the engine compartment.
Installing The New Filter
Now that you have removed the old filter, it’s time to install the new one. Take the new engine air filter and position it correctly in the air box, matching the orientation of the old filter. Ensure that the new filter fits snugly and securely in place. Once the filter is properly positioned, replace the air box cover and securely latch or screw it back into place. Give it a gentle tug to ensure it is tightly sealed.
Proper Disposal Of The Old Filter
Proper disposal of the old engine air filter is essential to prevent environmental harm. It is recommended to place the old filter in a sealed plastic bag to contain any dirt or debris. You can then dispose of it in accordance with your local regulations for waste disposal. Some auto parts stores and repair shops may also offer recycling programs for used filters.
Credit: www.elgintoyota.com
Frequently Asked Questions For How Often To Change Engine Air Filter Toyota
How Long Do Engine Air Filters Last?
Engine air filters typically last around 12,000 to 15,000 miles or one year, but it depends on the amount of dust and dirt the filter is exposed to. Regularly checking the air filter during oil changes and replacing it when it appears dirty is the best way to ensure optimal engine performance.
How Do I Know When My Engine Air Filter Needs To Be Replaced?
The engine air filter should be replaced if you notice reduced fuel efficiency, the engine light is on, the filter is dirty, jerking movements when accelerating, misfiring, strange engine sounds, or black smoke from the exhaust pipe. Regular replacement prolongs engine life and avoids costly repairs.
Does Changing Engine Air Filter Make A Difference?
Regularly replacing the engine air filter can make a difference in prolonging engine life. A damaged air filter can allow small particles to enter the engine and cause damage to internal parts, leading to expensive repairs. Replacing the air filter helps prevent this and is important for engine health.
Conclusion
Changing your Toyota’s engine air filter at regular intervals is crucial for maintaining optimal engine performance and fuel efficiency. By monitoring the signs of a dirty or clogged air filter and adhering to the manufacturer’s recommendations, you can ensure longevity for your vehicle’s internal components.
Keeping your air filter clean also reduces the risk of potentially expensive repairs, making it a cost-effective maintenance practice for your Toyota.
If you’ve ever found yourself driving in the dark and struggling to see your dashboard lights in your Toyota Sienna, don’t worry – you’re not alone. With a few simple steps, you’ll learn how to turn on the dashboard lights in your Toyota Sienna, ensuring a safer and more comfortable driving experience.
Follow these easy steps to turn on the dashboard lights in your Toyota Sienna:
Step 1: Locate the Headlight Switch
First, locate the headlight switch. This is usually located on the left-hand side of the steering wheel, close to the driver’s door. It should have a few different settings for the headlights – including off, parking lights, and headlights.
Credit: m.youtube.com
Credit: www.reddit.com
Step 2: Turn on the Headlights
Once you’ve located the headlight switch, turn it to the “on” position. You should hear a click, and the headlights should turn on. This will also activate the dashboard lights so that you can see your speedometer, fuel gauge, and other important indicators on the dashboard.
Step 3: Adjust the Brightness
If you find that the dashboard lights are too dim or too bright, you can adjust the brightness using the dimmer switch. This is usually located near the headlight switch and can be turned up or down to your preference. Make sure to adjust it to a level that is comfortable for you while driving at night.
Step 4: Check the Dimmer Control
If your dashboard lights still aren’t turning on, check the dimmer control to ensure it is not turned all the way down. Sometimes, this control can be mistakenly adjusted, causing the dashboard lights to appear dim or switched off. Simply turning it up can solve the problem.
Step 5: Inspect the Fuses
If all else fails and your dashboard lights are still not turning on, it’s time to inspect the fuses. The fuse box is usually located under the dashboard or in the engine compartment. Check the owner’s manual to locate the specific fuse that controls the dashboard lights and inspect it for any signs of damage. If the fuse is blown, replace it with a new one of the same amperage.
Step 6: Seek Professional Help
If you’ve gone through all the steps and your dashboard lights are still not turning on, it’s best to seek assistance from a professional mechanic or an authorized Toyota service center. They will be able to diagnose and fix any electrical issues that may be causing the problem.
By following these easy steps, you can quickly and easily turn on the dashboard lights in your Toyota Sienna, ensuring a clear view of your instrument panel and a safer driving experience, especially in low-light conditions. Remember to always drive carefully and ensure that all your vehicle’s lights are functioning properly before hitting the road!
Frequently Asked Questions On How To Turn On Dashboard Lights Toyota Sienna
How Do I Turn On The Dashboard Lights In My Toyota Sienna?
To turn on the dashboard lights in your Toyota Sienna, locate the headlight switch near the steering wheel and rotate it clockwise.
Why Aren’t My Dashboard Lights Turning On In My Toyota Sienna?
If your dashboard lights aren’t turning on in your Toyota Sienna, first check the dimmer switch located near the headlight switch. Ensure it is not turned all the way down.
What Should I Do If The Dashboard Lights Are Flickering In My Toyota Sienna?
If the dashboard lights in your Toyota Sienna are flickering, it could indicate a problem with the electrical system. It is recommended to have it checked by a professional technician to identify and resolve any issues.
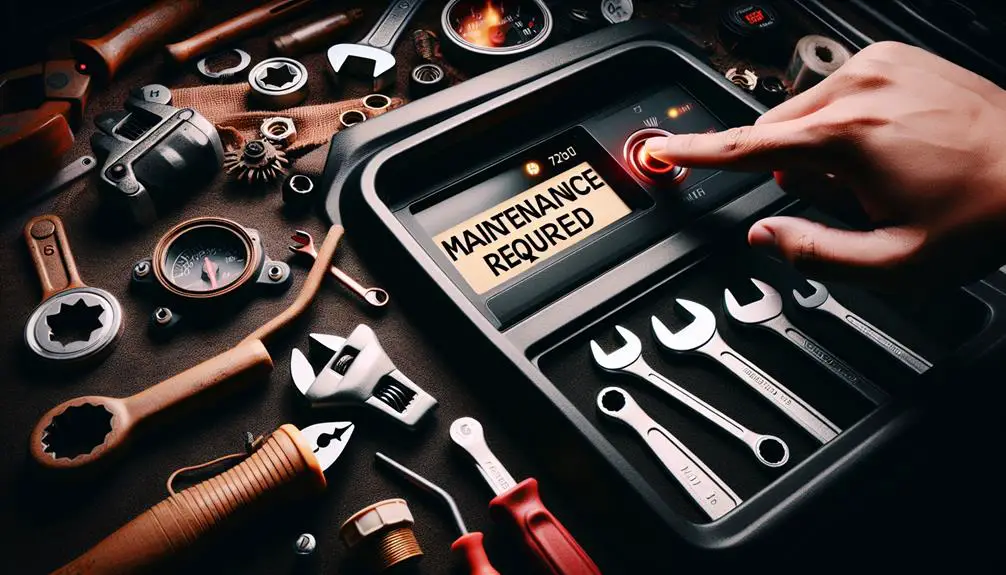
How to Reset Maintenance Required on Toyota Corolla
To reset the maintenance required light on your Toyota Corolla:
Turn the ignition to ‘On’.
Hold the odometer button.
Turn the ignition to ‘Off’, then back to ‘On’.
Wait for the light to blink and go out.
Remember, addressing the underlying maintenance issue is crucial.
Understanding the Maintenance Light
The maintenance light in a Toyota Corolla reminds you to get routine service to maintain the car’s performance. It indicates that the car needs scheduled maintenance like oil changes and tire rotations based on the car’s mileage or time since the last service. Ignoring this light can cause the car to perform poorly and lead to bigger mechanical problems.
When the light turns on, it usually means it’s time to check the car’s fluids, change the oil and filter, and inspect brakes, tires, and other important parts. The needed services depend on the car’s age, mileage, and usage.
It’s important to understand that the maintenance light is a helpful reminder to keep your car running well. Responding to this light helps keep your Toyota Corolla reliable.
Preparing to Reset the Light
Before resetting the maintenance light on your Toyota Corolla, do these steps:
Park your car on a flat surface in a safe spot. Turn off the engine and take out the keys to stay safe.
You only need a few things to reset the light:
Paper or a notebook and a pen for notes.
The car’s manual for specific instructions.
Get to know your dashboard, especially the odometer and buttons you’ll use. This makes the process faster and easier.
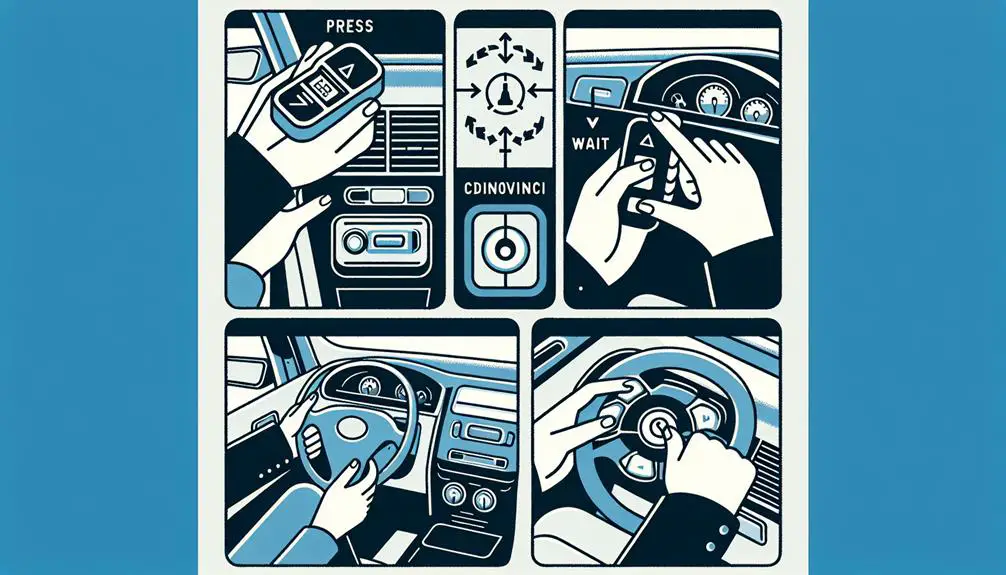
Step-by-Step Reset Process
To reset the maintenance light on your Toyota Corolla, follow these steps:
Make sure your car isn’t moving and turn off the engine.
Locate the odometer button on the dashboard and press and hold it.
While holding the odometer button, turn the key to the ‘On’ position but don’t start the car.
Watch for the maintenance light to start flashing, which means the reset process is working.
When the light starts flashing, let go of the odometer button.
Turn the key to the ‘Off’ position, then start your car as you normally would. The maintenance light should be reset.
By doing this, you:
Avoid needing professional help, saving time.
Take care of your vehicle’s maintenance yourself.
Clear any maintenance reminders from your dashboard.
Learn a new skill that helps keep your car running well.
Feel good knowing your Toyota Corolla is maintained.
Resetting the maintenance light is easy and helps keep your car in good condition.
Troubleshooting Common Issues
Resetting the maintenance light on a Toyota Corolla sometimes has issues. Here’s how to fix common problems:
Light Flashes Then Stays On: If the light flashes when starting the engine and stays on, the reset mightn’t be complete. Turn off the car and try the reset again. Make sure to hold the odometer button until the light blinks and turns off.
Can’t Start Reset Mode: If you can’t start the reset, make sure the car is completely off first. Begin with the key in the ‘Off’ position, then follow the reset steps carefully, especially when turning the key to ‘On’ without starting the engine.
Light Turns On After Reset: If the light comes back on after resetting, your car might need actual maintenance or there could be a computer issue. It’s best to see a mechanic to find and fix the problem.
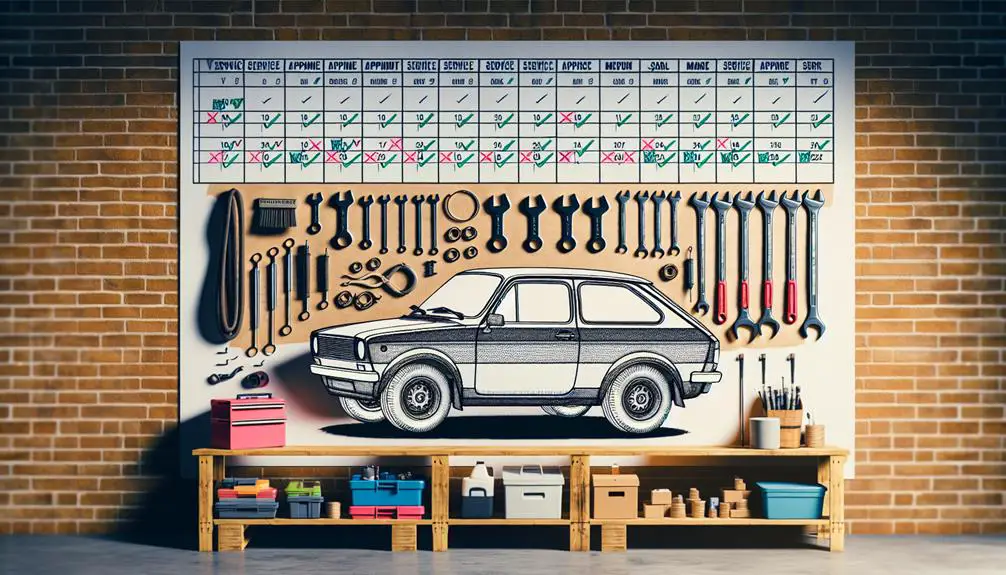
Preventive Measures for the Future
To prevent future issues with your Toyota Corolla’s maintenance light, follow a regular maintenance schedule. This helps your car run smoothly, prevents unexpected problems, and makes it last longer. It also keeps the maintenance light off, saving you time and stress.
First, regularly change your oil. Your Corolla needs clean oil to work well. Usually, change the oil every 5,000 to 7,500 miles, but check your owner’s manual for exact times. Always change the oil filter with the oil to remove dirt from the oil.
Then, check your tire pressure and make sure your wheels are aligned. Wrong tire pressure can cause your tires to wear out unevenly and affect how your car drives. Checking and adjusting tire pressure helps your car perform better and use less fuel. Aligning your wheels helps avoid tire wear and steering problems.
Conclusion
You’ve now reset the maintenance light on your Toyota Corolla. This light reminds you to take good care of your car. If it comes back or if you have trouble resetting it, it’s a good idea to ask a professional for help.
To avoid problems, always follow your car’s maintenance plan. This way, your Corolla will work well, and you won’t have to reset the light too often. Remember, driving safely is important!
A Toyota Camry can last for hundreds of thousands of miles. The longevity of a Toyota Camry depends on factors such as regular maintenance, driving habits, and road conditions.
With proper care, a Toyota Camry can easily reach over 200,000 miles and beyond.
Credit: www.quora.com
Factors Affecting Toyota Camry Longevity
Factors Affecting Toyota Camry Longevity
Toyota Camry, known for its reliability, can last for a great number of miles if well-maintained. Several factors influence the longevity of a Toyota Camry, ranging from the check engine light and affordability to engine type and known issues with specific models. Let’s delve into these factors that determine how long your Toyota Camry can last.
Check Engine Light
The presence of the check engine light can indicate potential technical or mechanical issues within the vehicle. Regularly addressing this warning light by promptly diagnosing and repairing any problems it points to can significantly extend the life of your Toyota Camry.
Affordability
Regular maintenance, timely repairs, and using genuine parts are vital to the longevity of a Toyota Camry. As an affordable vehicle to maintain and repair, owners who adhere to a consistent maintenance schedule will likely experience a longer-lasting vehicle.
Smaller Engine Lifespan
Smaller engines tend to have a shorter lifespan than larger engines. It’s essential to take this into consideration and plan for more frequent maintenance and potential repairs when driving a Toyota Camry with a smaller engine.
Camry Vs. Taurus Reliability
When comparing the reliability of the Toyota Camry to other models like the Ford Taurus, the Camry stands out as a more long-lasting and dependable option. Its track record for longevity and minimal maintenance requirements make it a top choice for many drivers.
Generations Of The Camry
Recent generations of the Toyota Camry have shown improvements in durability, technology, and overall longevity. Newer models often benefit from enhanced engineering and design, contributing to a longer lifespan compared to older generations.
Camry Oil Burning Problem
Some Toyota Camry models are known for oil burning issues. Regularly monitoring oil levels and promptly addressing any oil-related issues can prolong the overall lifespan of the vehicle.
Is A Camry Hybrid Worth It?
Camry Hybrid models offer improved fuel efficiency and reduced emissions. The hybrid engine technology provides a longer lifespan, making it a worthwhile investment for those seeking a more environmentally friendly and long-lasting vehicle.
Should You Buy A Used Camry?
Purchasing a used Camry can be a smart decision when the vehicle has been well-maintained. Performing a thorough inspection and ensuring proper maintenance records are available can help you make an informed decision on the longevity of a used Camry.
Credit: www.toyotaoflouisville.com
Real-life Examples
The Toyota Camry is known for its longevity, with many owners reporting 200,000 to 300,000 miles on the odometer without major issues. Real-life examples demonstrate that regular maintenance and proper care can extend the life of a Toyota Camry beyond 300,000 miles, making it a reliable and durable vehicle.
High Mileage Toyota Camry Fully Sorted In A Few Minutes
Real-life examples speak volumes when it comes to determining the longevity of a Toyota Camry. Owners from all over have shared their experiences with their trusty Camrys, showcasing just how far these vehicles can go. Let’s take a look at some high mileage Camrys that have been fully sorted to understand their incredible resilience.
Year/Model
Mileage
Owner Testimonial
2004 Toyota Camry LE
320,000 miles
“My 2004 Camry just keeps going! With regular maintenance and some minor repairs over the years, it still runs smoothly on the highways and saves me on gas. This car has truly exceeded my expectations.”
2011 Toyota Camry XLE
280,000 miles
“I never thought my Camry would last this long, but here it is, still going strong. The engine and transmission have been rock-solid, and I’ve only had to replace wear-and-tear parts. It’s reliable and comfortable, making it the perfect companion for my daily commutes.”
2007 Toyota Camry Hybrid
250,000 miles
“My Camry Hybrid has been a dream. Not only does it sip on fuel, but it has proven its durability over the years. I’ve driven it cross-country multiple times without any major issues. It doesn’t feel like a high-mileage car at all!”
These real-life examples illustrate the incredible longevity of Toyota Camrys. Despite accumulating hundreds of thousands of miles, these vehicles have managed to go the distance. With proper maintenance and occasional repairs, owning a high mileage Camry can still provide a reliable and enjoyable driving experience.
Expert Opinions
Experts agree that a Toyota Camry can last for hundreds of thousands of miles with regular maintenance. These reliable vehicles have been known to go the distance without major issues, making them a wise investment for long-term durability.
How Long Do Toyota Camrys Last? – Toyota Of Clermont
When it comes to the longevity of Toyota Camrys, the expert opinions are unanimous – these vehicles are built to last. Toyota Camrys have gained a reputation for their durability, reliability, and ability to rack up high mileage. Let’s dive into what the experts have to say about the lifespan of Toyota Camrys.
How Long Do Toyota Camry Engines Last?
Toyota Camry engines are known for their longevity, and owners can expect them to last for many years. On average, a Toyota Camry engine can last between 200,000 to 300,000 miles if properly maintained. Regular oil changes, timely tune-ups, and diligent maintenance can significantly extend the life of the engine. Toyota vehicles are designed with high-quality components and excellent engineering, ensuring that the engines can withstand the test of time.
How Long Do Toyota Camrys Last? – Elgin Toyota
If you’re wondering how long a Toyota Camry can last, look no further than the experts at Elgin Toyota. They attest that with proper care and maintenance, a Toyota Camry has the potential to reach well over 200,000 miles and continue running smoothly. In fact, many Toyota Camry owners have reported their vehicles lasting well beyond the 300,000-mile mark without major issues. This is a testament to the exceptional build quality and reliability of Toyota Camrys.
It’s important to note that the longevity of any vehicle depends on several factors, including driving habits, maintenance routine, and environmental conditions. However, Toyota Camrys are known for their longevity and have a track record of being durable and dependable cars that can go the distance.
If you’re considering buying a used Toyota Camry, it’s crucial to look for one with a well-documented maintenance history and low mileage. This will give you the best chance of owning a Toyota Camry that will last for years to come. With proper care, a Toyota Camry can be a reliable companion for hundreds of thousands of miles.
In conclusion, Toyota Camrys are built to last and have proven themselves as vehicles that can go the distance. With regular maintenance and responsible driving, owners can expect their Toyota Camry engines to last well into the 200,000 to 300,000-mile range. If you’re in the market for a used car and value longevity, a Toyota Camry is an excellent choice.
Credit: www.savannahtoyota.com
Frequently Asked Questions Of How Many Miles Can A Toyota Camry Last
Can A Toyota Camry Last 500 000 Miles?
A Toyota Camry has the potential to last up to 500,000 miles, providing it is properly maintained.
What Is Considered High Mileage For A Toyota Camry?
A Toyota Camry is considered high mileage at around 200,000 miles. With proper maintenance, it can last even longer.
Can A Toyota Camry Go 300000 Miles?
A Toyota Camry can last up to 300,000 miles with proper maintenance and care.
Conclusion
The Toyota Camry has a reputation for longevity, with many owners reporting over 200,000 miles. With regular maintenance and care, the Camry can last for many years, providing reliable transportation and a great value for its owners. Its strong track record for durability makes it a top choice for many car buyers.