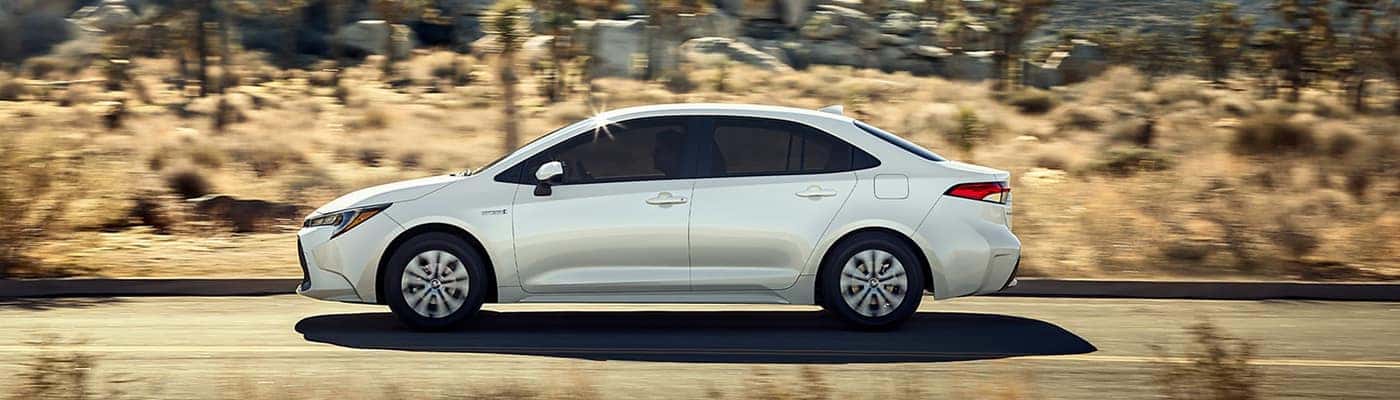
When it comes to longevity, the Toyota Corolla is known for its exceptional durability and reliability. Many car enthusiasts and owners have often wondered, “How many miles can a Toyota Corolla last?” In this article, we will explore the lifespan of a Toyota Corolla and the factors that contribute to its long-lasting performance.
Corolla Mileage Study
According to a study conducted by CarsThatLast, the average lifespan of a Toyota Corolla is around 200,000 miles. However, with proper maintenance and care, some Corollas have been known to last well over 300,000 miles.
Additional Statistics
While mileage can vary depending on various factors, including driving habits and climate conditions, it’s important to note that newer Corolla models tend to have better longevity compared to older ones. The advancements in technology and engineering have allowed for improvements in overall durability and performance.
How Long Will a Corolla Last?
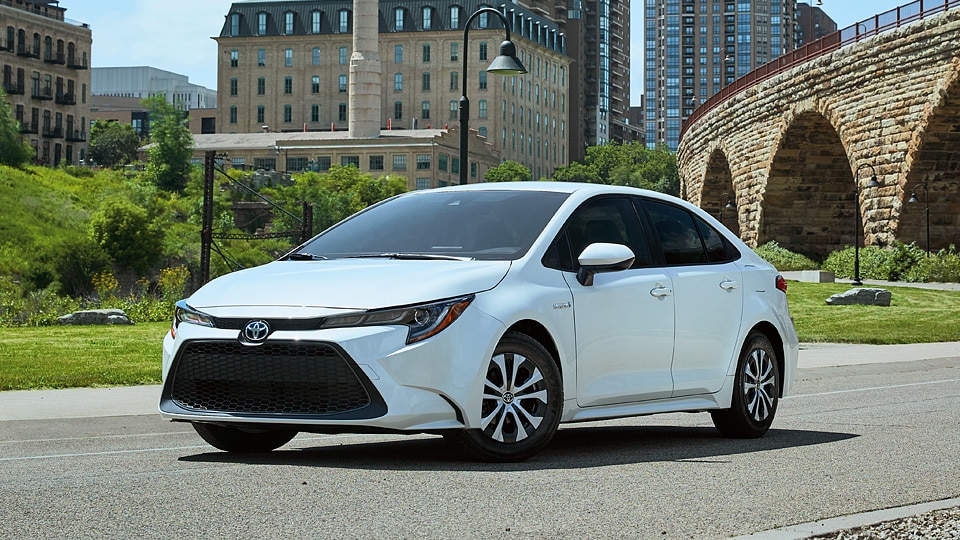
A well-maintained Toyota Corolla can last for many years and miles. Routine maintenance, such as regular oil changes, tire rotations, and timely repairs, can significantly extend the life of your vehicle. It is also important to follow the manufacturer’s recommended maintenance schedule and use genuine parts to ensure optimal performance.
Corolla Pros and Cons
The Toyota Corolla has gained popularity over the years due to its fuel efficiency, affordable price tag, and low cost of ownership. However, like any other vehicle, it does have its drawbacks. The Corolla is not known for its performance and can be considered underpowered compared to some of its competitors.
The Corolla S
For those seeking a sportier driving experience, the Corolla S model offers additional features and a more aggressive design. It is equipped with a sport-tuned suspension and other enhancements to enhance the overall driving dynamics.
Credit: www.earlstewarttoyota.com
Safety Features
The Toyota Corolla is also equipped with a range of safety features to ensure the well-being of its occupants. These include advanced airbag systems, anti-lock brakes, stability control, and tire pressure monitoring systems. Some newer models also come with advanced driver-assistance systems such as lane departure warning and adaptive cruise control.
Corolla Models to Avoid
While the Toyota Corolla is generally a reliable vehicle, there are a few model years that have had some reported issues. It is recommended to avoid the 2004 and 2011 Corolla models, as they have been known to have significant problems with their transmission and engine.
Corolla vs. Sentra
When comparing the Toyota Corolla to its competitor, the Nissan Sentra, both vehicles offer similar reliability and longevity. However, the Corolla has a slight edge in terms of overall durability and resale value.
Credit: www.kingstoyota.com
In Conclusion
The Toyota Corolla has a well-established reputation for being a long-lived, dependable vehicle. With proper care and maintenance, it can easily last over 200,000 miles and beyond. It is important to remember that each individual car’s lifespan can vary, and it ultimately depends on how well it has been maintained. By following the recommended maintenance schedule and using genuine parts, you can extend the life of your Toyota Corolla and enjoy many miles of trouble-free driving.
Frequently Asked Questions Of How Many Miles Can A Toyota Corolla Last
How Many Miles Is Too Much For A Toyota Corolla?
A Toyota Corolla can last for many miles without any issues. On average, a well-maintained Corolla can last up to 200,000 to 300,000 miles. However, with proper care and regular maintenance, it is not uncommon for a Corolla to exceed 300,000 miles and still run smoothly.
Can A Toyota Corolla Last 500k Miles?
A Toyota Corolla has the potential to last up to 500,000 miles. With proper maintenance and care, the longevity of a Toyota Corolla is impressive. So, if you’re looking for a long-lasting vehicle, the Toyota Corolla is a reliable choice.
Can A Corolla Last 20 Years?
Yes, a Toyota Corolla can last up to 20 years with proper maintenance and care. Regular servicing is crucial for longevity.
Volkswagen Atlas Electrical Problems: Common Issues and Solutions
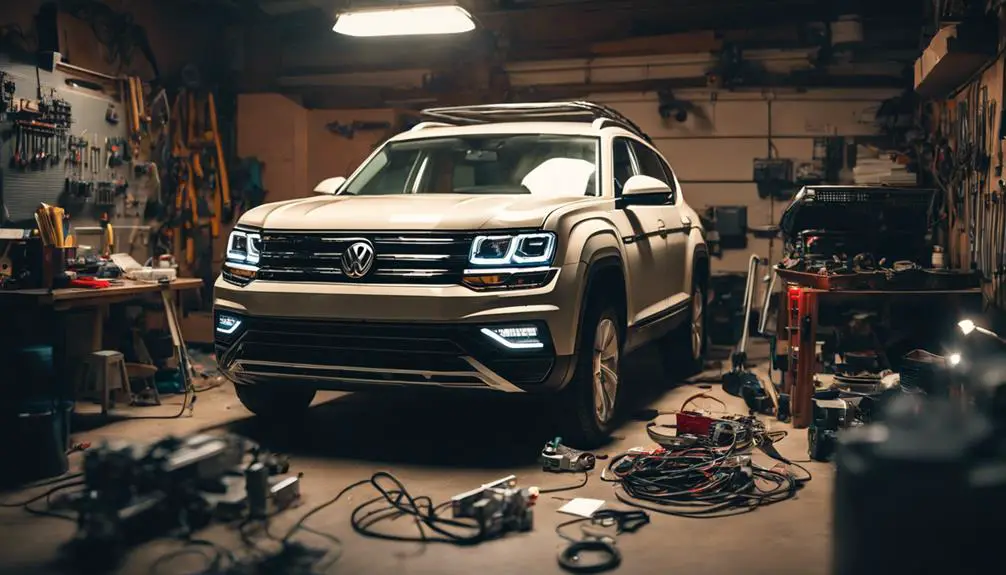
The Volkswagen Atlas has been plagued by various electrical system problems, including malfunctioning batteries, faulty wiring harnesses, and infotainment system glitches. Issues with the electrical system can cause transmission failure, airbag deployment problems, and unexpected braking. Malfunctioning lights, faulty wipers, and rapid battery drain are common issues. While a DIY-savvy owner can address some problems, more complex issues require specialized tools and expertise.
What are the most common electrical problems in the Volkswagen Atlas?
The most common electrical problems in the Volkswagen Atlas include malfunctioning batteries, electrical system failures, and transmission failures.
These issues have been reported across various model years, with the 2018 model being particularly prone to these problems.
Malfunctioning batteries have been a significant issue, with owners reporting premature battery drain, dead batteries, and issues with the alternator not charging properly. Some owners have had to replace their batteries multiple times within a short period, and others have encountered problems with the vehicle’s start/stop system draining the battery.
Electrical system failures have also been reported, causing transmission failure and other significant issues. A faulty wiring harness has been identified as the cause of various electrical issues, including airbag deployment problems and unexpected braking.
This issue has led to recalls and lawsuits, with owners reporting sudden braking, airbag failure, and windows opening and closing without warning, making the vehicles unsafe to drive.
Volkswagen has issued recalls and technical tips to address these problems, but many owners report ongoing issues and dissatisfaction with the solutions provided.
The Volkswagen Atlas is a mid-size SUV that was first introduced in 2017, and since then, it has been plagued by electrical issues.
Interestingly, the Volkswagen Atlas has a towing capacity of up to 5,000 pounds, but electrical issues can greatly impact its overall performance.
Potential buyers and current owners need to be aware of these common electrical problems in the Volkswagen Atlas and consider taking legal action or participating in recalls to address these concerns.
Why does my Volkswagen Atlas’s infotainment system keep freezing?
The Volkswagen Atlas’s infotainment system is prone to freezing, which can be a frustrating and distracting experience while driving. This issue can occur at any time, whether the vehicle is in motion or stationary, causing inconvenience and disruption to the driver’s experience.
The infotainment system freezing can manifest in various ways, such as the screen becoming unresponsive, frozen on a particular screen, or failing to load essential features like navigation or audio controls. Sometimes, the system may reboot repeatedly, leading to further frustration.
The root cause of this issue is often attributed to software glitches, outdated firmware, or faulty hardware components. For instance, a faulty capacitive touchscreen or a malfunctioning navigation module can cause the infotainment system to freeze.
Owners can try restarting the infotainment system or the entire vehicle to mitigate this issue. In some cases, updating the software or firmware may resolve the problem. However, if the issue persists, visiting an authorized Volkswagen dealership or a reputable repair shop may be necessary for further diagnosis and repair.
Interestingly, the Volkswagen Atlas is named after the Atlas Mountains in Morocco, which is a testament to the company’s attention to detail and commitment to creating functional and aesthetically pleasing vehicles.
It is essential to address this issue promptly, as a malfunctioning infotainment system can be a significant distraction while driving, compromising safety on the road.
Why won’t my Volkswagen Atlas start? Is it an electrical problem?
Why won’t my Volkswagen Atlas start? It may be an electrical problem.
Frustration and uncertainty often accompany a Volkswagen Atlas that refuses to start, leaving owners wondering if an electrical issue is to blame.
A malfunctioning battery, alternator problems, and faulty electrical systems are some of the electrical issues that can prevent the vehicle from starting.
Reports from owners have highlighted instances where their Atlas vehicles have experienced dead batteries, issues with the alternator not charging properly, and other electrical malfunctions.
Some owners have had to replace their batteries multiple times within a short period, while others have encountered problems with the vehicle’s start/stop system.
The electrical system is also linked to transmission failure and other significant issues.
It is essential to diagnose the root cause of the problem to determine if it is an electrical issue.
Sometimes, a faulty battery sensor or a malfunctioning battery management system may be the culprit.
Volkswagen has issued recalls and technical tips in response to these problems, but many owners continue to report ongoing issues.
If your Volkswagen Atlas refuses to start, it is crucial to have it inspected by a qualified technician to identify and address any underlying electrical problems.
What’s causing my Volkswagen Atlas’s lights to malfunction?
Electrical system problems are the primary cause of malfunctioning lights in your Volkswagen Atlas.
Malfunctioning lights in your Volkswagen Atlas can be a frustrating and potentially hazardous issue, often stemming from electrical system problems that have plagued various model years.
The Atlas’s electrical system issues can lead to faulty headlights, taillights, or brake lights, which can significantly impair visibility and safety on the road.
Symptom
Possible Cause
Solution
Dim or flickering headlights
Faulty headlight module or wiring issue
Inspect and replace faulty wiring or module
Failure of brake lights or turn signals
Corrosion or water damage in the lighting circuit
Clean and dry the affected area, replace damaged components
Intermittent or complete loss of all lights
Electrical system malfunction or faulty fuse
Inspect and replace faulty fuses, diagnose electrical system issues
Unusual or erratic light behavior
Software or computer module issue
Update software or replace faulty computer module
Complete loss of lighting system
Main electrical system failure
Consult a professional mechanic or dealership for diagnosis and repair
Some common correlated entities involved in Volkswagen Atlas’s lighting system include headlights, taillights, brake lights, electrical systems, computer modules, and fuses.
Interestingly, did you know that the Volkswagen Atlas is named after the Atlas Mountains in Morocco?
Sometimes, the malfunctioning lights may be a symptom of a larger electrical system problem. If you’re experiencing issues with your Atlas’s lights, it’s essential to address the problem promptly to ensure your safety on the road.
Consult your owner’s manual or contact a professional mechanic for assistance in diagnosing and repairing the issue.
How do I fix my Volkswagen Atlas’s faulty wipers?
Fixing your Volkswagen Atlas’s faulty wipers requires thoroughly understanding the underlying causes.
The wiper system is a critical component of your vehicle’s safety features, and malfunctioning wipers can significantly impair your driving visibility.
Common issues with the wiper system include slow or intermittent operation, failure to turn off, or complete failure to function.
To diagnose the problem, start by checking the wiper blades for signs of wear or damage. Replace them if necessary. Next, inspect the wiper motor and electrical connections for signs of corrosion or wear.
If the issue persists, consult your owner’s manual or a repair manual for guidance on troubleshooting the wiper system’s electrical components. Check the fuse box to ensure the wiper fuse is intact and not blown.
If the problem lies with the wiper motor or other electrical components, it may be necessary to replace them. In some cases, a faulty wiper module or wiring harness may be the root cause of the issue.
The wiper system is an essential component of your vehicle’s safety features, and malfunctioning wipers can significantly impair your visibility while driving, which can be hazardous, especially during rain or snow.
The Volkswagen Atlas is a mid-size SUV produced by the German manufacturer Volkswagen, and it is essential to address wiper system malfunctions promptly to ensure your safety on the road.
If you are not comfortable troubleshooting and repairing the issue yourself, consult a qualified mechanic or a Volkswagen dealership for assistance.
Interestingly, the first windshield wiper was invented by Mary Anderson in 1903, and it has since become an essential component of every vehicle.
Why is my Volkswagen Atlas’s battery draining quickly?
Rapid battery drain in the Volkswagen Atlas is often linked to electrical system failures and malfunctioning components, which can leave owners stranded with a dead battery.
A faulty alternator, malfunctioning start/stop system, and electrical system malfunctions are common culprits behind rapid battery drain in the Volkswagen Atlas. In some cases, owners have reported replacing their batteries multiple times within a short period, only to experience the same issue again. This can be frustrating and inconvenient, especially for those who rely on their vehicle for daily commutes.
The electrical system in the Atlas is complex, and pinpointing the root cause of the battery drain can be challenging. However, some common signs of electrical system malfunction include dim or flickering headlights, slow engine crank, and difficulty starting the engine. If left unaddressed, these issues can lead to more severe problems, such as transmission failure and airbag deployment issues.
It is essential for owners to address rapid battery drain promptly to avoid being stranded with a dead battery. In some cases, a simple battery replacement may not be enough, and a more comprehensive electrical system diagnosis may be necessary to identify and repair underlying issues.
Volkswagen has issued recalls and technical tips to address some of these problems, but owners should remain vigilant and proactive in monitoring their vehicle’s electrical system to prevent rapid battery drain.
Fun fact: The Volkswagen Atlas is named after the Atlas Mountains in Morocco, and it’s one of the most popular mid-size SUVs in the market.
Can I fix electrical problems in my Volkswagen Atlas myself?
It’s not recommended to fix electrical problems in your Volkswagen Atlas yourself unless you have extensive knowledge of electrical systems and are confident in your diagnostic and repair skills.
While some electrical problems may seem simple, they can often be symptoms of a more complex issue, and attempting to fix them without proper expertise can lead to further damage or even render the vehicle unsafe to drive.
Simple issues, such as loose battery terminals or faulty fuses, can be addressed by a DIY-savvy owner with basic tools and knowledge.
However, more complex problems, such as wiring harness issues or malfunctioning electrical components, often require specialized tools and expertise to diagnose and repair accurately.
Issues related to airbag deployment, braking, and transmission failure should not be attempted to be fixed by an amateur, as they can have serious safety implications.
Tampering with complex electrical systems can lead to further damage, resulting in costly repairs or even rendering the vehicle unsafe to drive.
In the Volkswagen Atlas, the electrical system is a complex network of components, including the engine control module, transmission control module, and anti-lock braking system (ABS) module.
The wiring harness, which connects these components, is a critical part of the electrical system and requires specialized tools and expertise to diagnose and repair.
In fact, did you know that the average modern vehicle has over 50 computers and 100 million lines of code?
It is recommended to seek the assistance of a qualified mechanic or a Volkswagen dealership for electrical problems to ensure the issue is diagnosed and repaired accurately and safely.
Conclusion
The Volkswagen Atlas has been plagued by a range of electrical problems, including malfunctioning batteries, electrical system failures, and safety feature malfunctions.
These issues have led to owner dissatisfaction, recalls, and lawsuits.
Addressing these problems is crucial to ensure driver safety and satisfaction.
Volkswagen must take comprehensive measures to rectify these electrical issues, and owners should be aware of potential problems and take proactive steps to maintain their vehicles.
How to Turn off Tire Pressure Light Toyota Corolla
To turn off the tire pressure light on your Toyota Corolla:
Locate the reset button under the steering wheel.
Press and hold it until the light blinks three times, then release.
Drive for a few minutes to recalibrate the system.
Check Tire Pressure
Check the tire pressure before addressing the tire pressure light. Ensure all tires are at the recommended PSI, typically between 30 and 35 PSI for a Toyota Corolla. This step is important because it helps identify if the light is on due to a simple pressure issue or something more complex. Proper tire pressure is crucial for smooth driving, fuel efficiency, and tire life.
To accurately check tire pressure, do it when the tires are cold, which means the car hasn't been driven for at least three hours. Use a reliable tire pressure gauge and press it onto each tire's valve stem. If the pressure is below the recommended PSI, it's probably why the tire pressure light is on.
Adjust Tire Pressure
To adjust the tire pressure of your Toyota Corolla when it's below the recommended PSI, follow these steps. First, find the recommended tire pressure in the owner's manual or on a sticker inside the driver's side door.
Use a tire pressure gauge and an air compressor to check and inflate the tires. Remove the cap from the tire's valve stem, press the gauge onto the valve to read the pressure, and use the compressor to add air if needed. Check the pressure as you add air to avoid overfilling.
Do this for all tires to ensure even handling and wear. This process helps maintain tire health, vehicle performance, and safety.
Locate Reset Button
To turn off the tire pressure light on your Toyota Corolla after adjusting the tire pressure, you need to find and press the reset button. This button is usually located beneath the steering wheel, on the lower-right side. It's a small button, often marked 'SET' or with a tire pressure icon.
Here's where you can find the reset button in different models:
For 2006-2013 models, it's under the dashboard near the steering column.
For 2014-2019 models, it's on the left side of the instrument panel.
For 2020 and newer models, it's beneath the steering wheel on the right side.
For Hybrid models, it's near the driver's side door on the lower panel.
For models before 2006, check the owner's manual.
Perform System Reset
To reset the tire pressure light on your Toyota Corolla, follow these steps:
Turn the Key to 'On': First, make sure your car is parked safely. Then, turn the key to the 'On' position without starting the car. This activates the electrical systems, including the TPMS.
Press the Reset Button: Find the TPMS reset button. Press and hold it until the tire pressure light blinks three times, indicating the reset is starting.
Wait for the Blink: After pressing the reset button, wait for the tire pressure light to blink. This confirms the reset is happening.
Drive the Car: Start the car and drive for at least 10 minutes at 15 mph or faster. This lets the system recalibrate and accurately measure the tire pressure.
These steps will reset your Toyota Corolla's TPMS, turn off the tire pressure light, and help keep your car safe and efficient. It's important to keep your tires at the correct pressure for the best performance and safety.
Monitor Warning Light
After resetting the tire pressure light on your Toyota Corolla, watch for it to come on again. This light is part of a system that tells you if your tire pressure is too low or too high, affecting safety and how well your car drives.
If the light turns on again and stays on, it means there's an issue, like tires being too low on air. Low tire pressure can cause tire damage, make your car use more fuel, and impact how it moves and stops.
First, use a tire pressure gauge to check the pressure in all tires. They should match the pressure levels recommended in the owner's manual or on a sticker inside the driver's side door. If adjusting the pressure doesn't turn the light off, there might be a bigger problem, like a broken sensor or a tire leak.
Don't ignore the warning light. Safely drive to a car service center or contact a Toyota dealer. A professional can find and solve the problem, making sure your car is safe. The tire pressure monitoring system is meant to help keep your car in good shape, so always take its warnings seriously.
Conclusion
First, make sure your Toyota Corolla's tires have the right amount of air.
Then, find and press the reset button to tell the car you checked the tires.
Watch the warning light. If it goes off, you did it right. If the light stays on, there might be a bigger problem and you should ask a mechanic for help.
Keeping the right air in your tires is important because it makes your car safer and it will use less gas.
Finding the right distributor for your product involves several key steps:
Understanding your market's distribution channels.
Identifying potential distributors who share your brand's values and goals.
Evaluating their compatibility with your business.
Initiating contact.
Negotiating mutually beneficial terms.
Understanding Distribution Channels
Before you can secure a distributor, it's essential to grasp the different distribution channels and how they align with your product's market strategy. Recognizing the significance of online marketplaces and current retail trends is vital in positioning your product effectively. You've got to think about where your target audience shops and how they prefer to purchase products.
Online marketplaces, for instance, offer vast exposure and accessibility, making them an indispensable channel for reaching a wider audience. They're not just about convenience; they're about meeting customers where they're already spending their time.
Additionally, staying abreast of retail trends can guide you in selecting the most appropriate distribution channels. Consumer behavior is continuously evolving, and what worked yesterday mightn't cut it today. You need to be strategic and adaptable, choosing channels that not only reach your target market but also align with their purchasing habits.
This means considering both online and offline avenues, evaluating their potential impact on your product's visibility and sales. Aligning your product with the right distribution channels isn't just about making it available; it's about making it visible and desirable to your target market.
Identifying Potential Distributors
Having comprehended the significance of distribution channels, it's now time to focus on pinpointing the right distributors who can propel your product into the market effectively. The initial step in this strategic expedition is conducting thorough market research. You're not just looking for any distributor; you're on the hunt for partners who grasp your niche and have the network to push your product to the forefront.
Plunge deep into market analysis. Identify trends, demand patterns, and consumer preferences. This approach guarantees you're not shooting in the dark but targeting distributors aligned with your market's needs.
Don't overlook competitor analysis. It's a goldmine of insights. Who are your competitors working with? What distribution strategies are they employing? This isn't about copying but grasping the landscape and identifying gaps your product can fill. Maybe there's a high-performing distributor overlooked by your competitors, ripe for partnership.
Evaluating Distributor Compatibility
Once you've identified potential distributors, it's significant to assess their compatibility with your business's vision and operational dynamics. This step is pivotal; you'll need to conduct thorough market research and competitive analysis to guarantee a perfect fit. Here are three key strategies to help you evaluate distributor compatibility effectively:
Conduct Detailed Market Research: Understand the markets your potential distributors operate in. Are these markets aligned with where you see your product or service thriving? Market research not only informs you about the distributor's strengths but highlights potential growth opportunities for your business.
Perform a Competitive Analysis: Look into how your potential distributors handle competition. Are they strategic in their approach, and do they've a successful track record of dealing with competitive pressures? This analysis will give you insights into their resilience and adaptability, significant traits for your distributor to have.
Assess Operational Dynamics: It's crucial to make sure that the operational dynamics of the distributor align with your business's processes and values. Can they scale up as your business grows? Do their logistical capabilities and technological infrastructure meet your needs?
Initiating Contact and Negotiations
After thoroughly evaluating distributor compatibility, it's time to initiate contact and begin negotiations, setting the stage for a fruitful partnership. Don't shy away from cold calling; it's a direct approach that can yield immediate results. Before you pick up the phone, arm yourself with a clear, compelling pitch that highlights what sets your product apart and how it aligns with the distributor's portfolio.
Remember, the goal of your initial contact isn't just to introduce your product but to also gauge the distributor's interest and gather information on their terms and conditions. This information is critical for tailoring your negotiation tactics.
When negotiations start, be clear about what you're offering and what you're asking for in return. It's vital to be flexible but also to know your bottom line. Use the information you've gathered to navigate the conversation strategically. For example, if you know the distributor is looking for innovative products, emphasize your product's unique features and market potential.
Negotiation is an art that requires patience, persistence, and a keen understanding of human psychology. Be prepared to make concessions, but always with the aim of creating a win-win situation. Your ability to negotiate effectively can set the foundation for a long-term, mutually beneficial partnership.
Finalizing Agreements and Partnerships
With negotiations underway, it's time to focus on finalizing agreements and solidifying partnerships that will drive your business forward. This critical phase demands a strategic approach, ensuring both parties are aligned and committed to mutual success.
To navigate this process effectively, consider the following steps:
Understand Legal Considerations: Ensure you're fully aware of the legal implications of your partnership. This involves drafting clear contracts that outline each party's responsibilities, rights, and obligations. Don't shy away from seeking legal advice to safeguard your interests and ensure compliance with relevant laws and regulations.
Negotiate Partnership Incentives: Incentives can be a game-changer in securing a distributor's commitment. Propose benefits such as exclusive territories, performance bonuses, or marketing support to make the partnership more appealing. It's all about creating a win-win situation where both parties see the value in investing their efforts and resources.
Seal the Deal with Transparency and Trust: As you finalize the agreement, prioritize open communication. Be clear about your expectations and encourage your distributor to share theirs. Building a foundation of trust and transparency is crucial for a long-lasting and fruitful partnership.
Conclusion
Now you've got the roadmap to secure a distributor. Understand your channels, pinpoint the right partners, and assess their fit. It's critical.
Immerse yourself in initiating contact with confidence and tackle negotiations head-on. Remember, closing the deal is just the beginning. This partnership can catapult your product to new heights.
So, don't hesitate. Implement these strategies, forge strong relationships, and watch your business thrive. It's in your hands—make it happen.
When it comes to choosing a pickup truck, towing capacity is an important factor to consider. In this article, we will explore the towing capabilities of the Toyota Tacoma and provide you with all the information you need to know.
Towing Capacity of the Toyota Tacoma
The Toyota Tacoma is well-known for its impressive towing capabilities. With a properly equipped Tacoma, you can tow up to 4,465 pounds. This means that you can easily tow a variety of trailers, boats, and other recreational vehicles without any issues.
The Tacoma comes with different trim levels, each offering varying towing capacities. The base model of the Tacoma has a towing capacity of 3,500 pounds, while higher trim levels can tow up to 4,465 pounds. It’s essential to check the specifications of the specific model you are interested in to ensure it meets your towing needs.
Credit: www.cars.com
Credit: www.genemessertoyota.com
Tacoma Towing Package
If you’re planning on utilizing the full towing capacity of the Tacoma, it’s recommended to opt for the available Tacoma Tow Package. This package includes a Class IV towing hitch receiver, engine and transmission oil coolers, a power steering cooler, a heavy-duty battery, and a 130-amp alternator. With this package, you can confidently tow heavy loads with ease.
Tacoma Payload Capacity
In addition to towing capacity, payload capacity is another crucial consideration when it comes to hauling cargo. The Toyota Tacoma offers a respectable payload capacity, with the ability to handle up to 1,440 pounds of payload, depending on the model and configuration.
Tips for Towing with the Toyota Tacoma
When towing with your Toyota Tacoma, there are a few essential tips to keep in mind to ensure a safe and successful towing experience:
Always check the owner’s manual for the specific towing guidelines and limitations of your Tacoma model.
Make sure to properly distribute the weight of the load and secure it using appropriate tie-downs and straps.
Utilize trailer brakes if towing a trailer that exceeds 1,000 pounds.
Take extra caution when accelerating, braking, and turning, as towing significantly affects vehicle handling.
Regularly inspect and maintain your Tacoma’s tires, brakes, and suspension to ensure optimal towing performance.
By following these tips and ensuring that you’re within the specified towing capacity, you can enjoy a safe and hassle-free towing experience with your Toyota Tacoma.
In Summary
The Toyota Tacoma offers impressive towing capabilities, with a maximum towing capacity of 4,465 pounds. By opting for the Tacoma Tow Package and following proper towing guidelines, you can confidently tow heavy loads without compromising safety. Make sure to choose the Tacoma model that best suits your towing needs, and always consult the owner’s manual for specific towing information.
Frequently Asked Questions Of How Much Can A Toyota Tacoma Tow
Can A Tacoma Really Tow 6500 Lbs?
Yes, a Tacoma can tow up to 6,500 lbs. With its powerful engine and towing capabilities, the Toyota Tacoma is well-equipped to handle heavy loads. Whether you need to tow a trailer or haul equipment, the Tacoma’s towing capacity makes it a reliable choice.
Can A Toyota Tacoma Pull A 5000 Lb Trailer?
Yes, a Toyota Tacoma can tow a 5000 lb trailer. The towing capacity of a Toyota Tacoma varies depending on the model and configuration, but it is capable of towing up to 5000 lbs when properly equipped.
How Much Can A Tacoma Realistically Tow?
The Toyota Tacoma can realistically tow up to 6,400 pounds, making it a strong choice for towing.
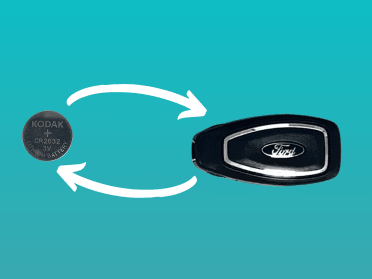
How to Change Battery in Ford Key Fob? Changing the battery in your Ford key fob is a simple process that can be done at home.
step 1: Gather the materials
step 2: Insert the new battery
step 3: Test the key fob
Whether you have a Ford Focus, Fiesta, or any other Ford model, the steps are generally the same.
In this article, we will guide you through the process of changing the battery in your Ford key fob.
Step 1: Gather the Materials
Before you begin, make sure you have the following materials:
New battery (refer to your Ford model’s manual to determine the correct battery type)
Screwdriver
Step 2: Insert the New Battery
Now it’s time to insert the new battery into your Ford key fob:
Take the new battery and ensure it is the correct type for your Ford key fob.
Insert the new battery into the battery compartment, making sure the positive (+) and negative (-) ends are aligned correctly.
Close the battery compartment by gently pushing it back into place.
Step 3: Test the Key Fob
Once you’ve inserted the new battery, it’s important to test the key fob to ensure it is working properly:
Stand close to your Ford vehicle.
Press the buttons on the key fob to verify that it locks and unlocks the doors.
If the key fob is working correctly, you’ve successfully changed the battery. If not, double-check that the battery is inserted correctly.
FAQ
What Battery Is In A Ford Key Fob?
The battery in a Ford key fob can vary depending on the model, but commonly it uses a CR2032 coin cell battery. You can easily replace the battery yourself by opening the key fob and swapping the old battery with a new one.
Make sure to use the correct battery type for your specific key fob model.
Can I Replace The Key Fob Battery Myself?
Yes, you can replace the key fob battery yourself. To do this, use a screwdriver to gently open the key’s side and remove the cover to reveal the battery. Make sure to replace it with the correct battery type. For detailed instructions, you can refer to videos available online.
What Happens If My Ford Key Battery Dies?
If your Ford key battery dies, don’t worry! There’s a hidden key inside the key fob that can be used to open the door. Once inside, you’ll find a mechanical key slot, either on the steering column or in the center console.
Just insert the dead key fob as a key, and you’ll be able to start the engine with the push of a button. No need to panic or get stranded!
Wrapping Up
Changing the battery in your Ford key fob is a simple and quick process that you can do yourself. By following these steps, you can ensure that your key fob continues to work properly and avoid any inconvenience of a dead battery. Remember to reference your Ford model’s manual for the correct battery type to use.
For more information or any specific instructions related to your Ford model, it is recommended to consult the official Ford website or refer to your vehicle’s user manual.