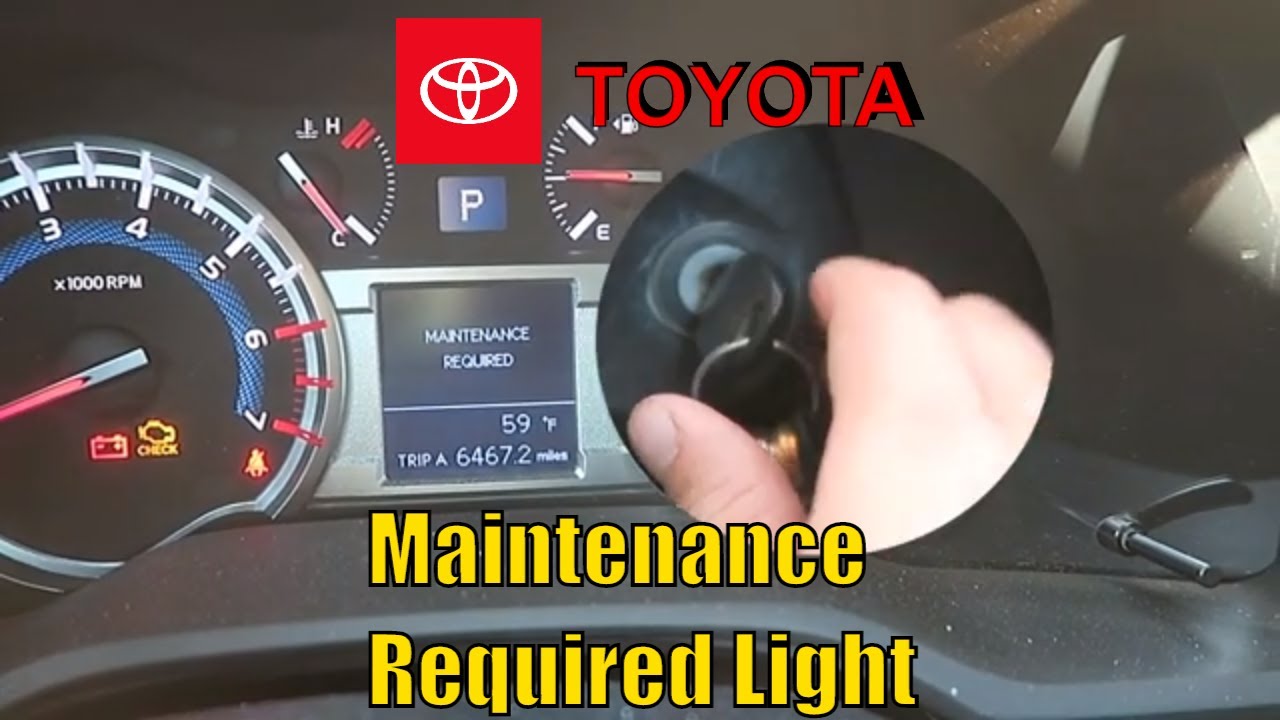
To reset the maintenance light on a 2016 Toyota 4Runner, start the car and press the “disp” button on the dashboard. Then, scroll to the “maintenance required” screen and hold the “disp” button until the light resets.
This process should take less than a minute and will clear the maintenance light on your Toyota 4Runner. Owning a reliable and durable vehicle like the 2016 Toyota 4Runner guarantees performance and longevity. However, regular maintenance is essential to ensure its optimal functioning.
To reset the maintenance light on your 2016 Toyota 4Runner, follow a straightforward procedure that will help you keep track of the vehicle’s upkeep. Understanding how to reset the maintenance light not only keeps your car running smoothly but also saves you from unnecessary dealership visits. Knowing how to perform this simple task gives you the confidence to maintain your 4Runner on your own, ensuring its longevity and durability for years to come.
Credit: m.youtube.com
Credit: www.jdpower.com
Frequently Asked Questions On How To Reset Maintenance Light On Toyota 4runner 2016
How Do I Reset The Maintenance Light On My Toyota 4runner 2016?
To reset the maintenance light on your Toyota 4Runner 2016, follow these simple steps: 1. Insert your key into the ignition and turn it to the “ON” position. 2. Find the odometer button and press it until you see the total mileage displayed. 3. Turn the key to the “OFF” position, then turn it back to the “ON” position while holding down the trip meter button. 4. Continue holding the trip meter button until the maintenance light starts flashing and then goes out. Your maintenance light is now reset!
Why Is My Maintenance Light On In My Toyota 4runner 2016?
The maintenance light in your Toyota 4Runner 2016 is an indicator that it’s time for regular vehicle maintenance. This light will remind you to perform oil changes, tire rotations, or any other scheduled services recommended by the manufacturer. Ignoring this light can lead to potential damage or decreased performance, so it’s important to address it promptly.
Can I Reset The Maintenance Light On My Toyota 4runner 2016 Without Going To A Dealership?
Yes, you can easily reset the maintenance light on your Toyota 4Runner 2016 without visiting a dealership. Simply follow the steps mentioned in the first question to reset the light yourself. It’s a quick and simple process that will save you time and money.
Conclusion
Resetting the maintenance light on your Toyota 4Runner 2016 is crucial for vehicle longevity. By following these simple steps, you can easily take control of this important aspect of your car maintenance routine. Keeping up with regular maintenance will keep your vehicle running smoothly for years to come.
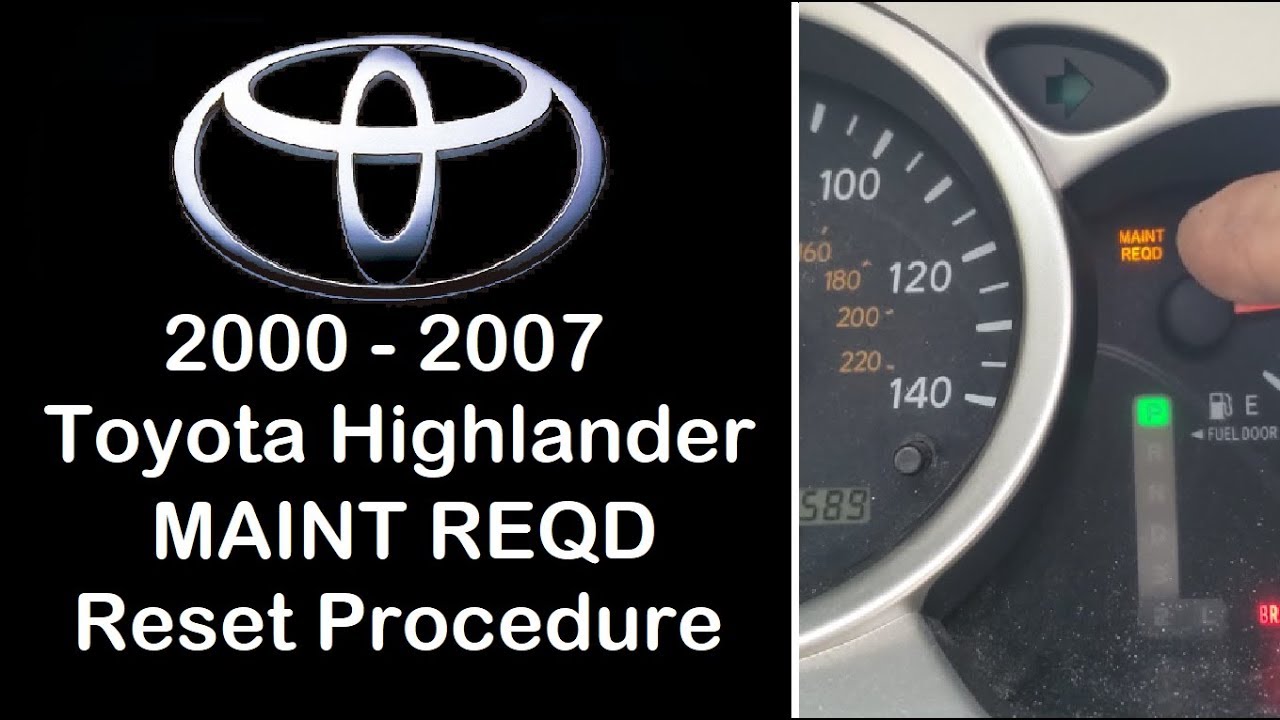
How to Turn off Maintenance Required Light Toyota Highlander
To turn off the maintenance required light on a Toyota Highlander, start by turning off the engine. Next, press and hold the trip meter reset button, then turn the key to the “on” position while continuing to hold the button.
After about 5 seconds, the light should go off, indicating that the reset is complete. Now you can release the button. This procedure should work for most Toyota Highlander models. The maintenance required light in your Toyota Highlander serves as a reminder to perform routine maintenance on your vehicle.
While it is essential to address any necessary maintenance, the light can be reset after the required maintenance has been completed. Understanding how to reset this light is crucial for both safety and optimal vehicle performance. In this guide, we will explore the steps to turn off the maintenance required light on a Toyota Highlander.
Credit: www.youtube.com
Why Is The Maintenance Required Light On
Toyota Highlander’s Maintenance Required Light is on to indicate it’s time for servicing the vehicle. It serves as a reminder for regular maintenance to keep your vehicle in top condition.
Common Reasons For Maintenance Required Light
Delayed oil change due to neglect.
Issues with oil pressure or level.
Malfunctioning sensors sending false signals.
The Maintenance Required Light on your Toyota Highlander could be illuminated for various reasons, such as delayed oil changes, issues with oil pressure or level, and malfunctioning sensors providing inaccurate signals.
Steps To Turn Off Maintenance Required Light
When the maintenance required light comes on in your Toyota Highlander, it’s essential to take the necessary steps to turn it off. If you’re looking to save on maintenance costs, and you want to learn how to turn off the maintenance required light yourself, we’ve got you covered. In this guide, we’ll walk you through the steps to turn off the maintenance required light in your Toyota Highlander using an OBD-II scanner. By following these simple steps, you can reset the light and ensure that your vehicle is in top condition.
Step 1: Make Sure The Vehicle Is Parked
Before you begin, make sure the vehicle is parked in a safe and level area. Turn off the engine and engage the parking brake to ensure the vehicle is secure.
Step 2: Locate The Obd-ii Port
Next, you need to locate the OBD-II port in your Toyota Highlander. The OBD-II port is usually located under the dashboard on the driver’s side of the vehicle. It may be concealed by a cover, which can be easily removed to access the port.
Step 3: Connect The Obd-ii Scanner
Once you’ve found the OBD-II port, connect the OBD-II scanner to the port. The OBD-II scanner is a device that allows you to communicate with your vehicle’s onboard computer. Follow the instructions provided with your OBD-II scanner to connect it to the port securely.
Step 4: Clear The Maintenance Required Light
After successfully connecting the OBD-II scanner, you can now clear the maintenance required light. Use the scanner to access the vehicle’s diagnostic menu, and look for the option to clear the maintenance required light or reset the maintenance reminder. Follow the on-screen instructions to complete the process, and once the light is cleared, disconnect the OBD-II scanner from the port.
Alternative Methods To Reset Maintenance Required Light
How to Turn off Maintenance Required Light Toyota Highlander
When it comes to resetting the maintenance required light on your Toyota Highlander, there are alternative methods that you can utilize. These methods can be handy if the conventional approach doesn’t work for you. Let’s take a look at two alternative methods to reset the maintenance required light.
Method 1: Disconnect The Battery
One alternative method is to disconnect the car’s battery. This can effectively reset the maintenance required light. Here’s what you can do:
Park your Toyota Highlander in a safe location and turn off the ignition.
Open the hood and locate the car’s battery.
Carefully disconnect the negative terminal of the battery using a wrench.
Leave the battery disconnected for approximately 10-15 minutes to ensure essential systems reset.
Reconnect the negative terminal of the battery and start your Highlander to see if the maintenance required light is reset.
Method 2: Use A Paperclip Or Wire
If you prefer a different approach, you can utilize a paperclip or wire to reset the maintenance required light. Here’s how you can do it:
Ensure the ignition is turned off and the key is removed from the ignition switch.
Locate the OBD-II port under the steering column.
Take a paperclip or wire and short the Tc and E1 terminals on the OBD-II connector. This should be done for approximately 5-10 seconds.
Remove the paperclip or wire and check if the maintenance required light is reset by turning on the ignition.
Credit: www.brentbrowntoyota.com
Preventing The Maintenance Required Light From Coming On
One of the most frustrating experiences for car owners is when the Maintenance Required Light unexpectedly illuminates on the dashboard of their Toyota Highlander. However, by following a few simple tips and staying proactive with maintenance, you can prevent this from happening.
Follow Regular Maintenance Schedule
Regular maintenance according to your vehicle’s manual is crucial to prevent issues that trigger the Maintenance Required Light. Ensure timely oil changes, filter replacements, and scheduled services.
Check For Any Issues
Regularly inspect your Toyota Highlander for any signs of trouble such as leaks, odd noises, or warning lights. Addressing issues promptly can prevent them from escalating and triggering the Maintenance Required Light.
Credit: www.redmccombstoyota.com
Frequently Asked Questions On How To Turn Off Maintenance Required Light Toyota Highlander
How Do I Turn Off The Maintenance Required Light On My Toyota Highlander?
To turn off the maintenance required light on your Toyota Highlander, you can follow these simple steps.
Why Is My Toyota Highlander’s Maintenance Required Light On?
The maintenance required light on your Toyota Highlander is designed to remind you to perform routine maintenance tasks.
Can I Turn Off The Maintenance Required Light Without Going To A Dealership?
Yes, you can turn off the maintenance required light on your Toyota Highlander without going to a dealership by following a few simple steps.
Conclusion
In just a few simple steps, you can easily turn off the Maintenance Required Light on your Toyota Highlander. By following these instructions, you can save time and money on unnecessary trips to the mechanic. Keep your car running smoothly with this quick fix.
To shut off the maintenance light on a Toyota Tacoma, turn the key to “off,” then press and hold the trip meter reset button while turning the key to the “on” position. The maintenance light will flash and then turn off when the reset is complete.
When it comes to owning a vehicle, staying on top of maintenance is crucial for optimal performance and longevity. The same applies to the Toyota Tacoma, a popular midsize pickup truck known for its reliability and rugged design. However, after performing maintenance or getting an oil change, the maintenance light may stay on, indicating that a reset is needed.
Fortunately, resetting this light is a simple process that can be done without the need for professional assistance. We will discuss how to shut off the maintenance light on a Toyota Tacoma, allowing you to keep your truck in top condition.
Credit: carbuzz.com
Why Is The Maintenance Light On?
The maintenance light on your Toyota Tacoma can signal various issues that need attention.
Common Reasons For The Maintenance Light To Be On
Time for Routine Maintenance: Scheduled oil change or tire rotation may trigger the light.
Engine Problems: Issues with sensors, filters, or fluid levels can activate the light.
Battery Concerns: Low battery voltage can lead to the maintenance light coming on.
Importance Of Addressing The Issue
Prevent Further Damage: Ignoring the maintenance light can lead to more severe car problems.
Ensure Safety: Timely maintenance keeps your vehicle running smoothly and safely.
Prolong Vehicle Lifespan: Regular maintenance extends the life of your Toyota Tacoma.
Credit: www.jdpower.com
Preparing To Shut Off The Maintenance Light
Before you can shut off the maintenance light on your Toyota Tacoma, it’s essential to prepare properly for the process. This involves gathering the required tools and identifying the location of the maintenance light reset button. By following these steps, you can ensure a smooth and efficient reset of the maintenance light.
Gathering Required Tools
It’s important to gather the necessary tools before starting the maintenance light shut-off process. The tools you will need may include a small screwdriver or a specific reset button tool, depending on your Toyota Tacoma model. Having the right tools on hand will make the process much simpler and avoid any potential frustration.
Identifying The Location Of The Maintenance Light Reset Button
Locating the maintenance light reset button is crucial for successfully shutting off the maintenance light on your Toyota Tacoma. The reset button is typically located near the odometer or on the instrument panel. Refer to your vehicle’s manual for the exact location or perform a quick online search to find the specific location for your Tacoma model.
Resetting The Maintenance Light
Resetting the Maintenance Light on Toyota Tacoma
If the maintenance light on your Toyota Tacoma is constantly reminding you of a service that you’ve already taken care of, it’s time to reset it. Here’s how you can easily reset the maintenance light to get rid of that persisting reminder.
Step-by-step Instructions For Resetting The Maintenance Light
Follow these simple steps to reset the maintenance light on your Toyota Tacoma:
Turn the ignition switch to the “On” position without starting the engine.
Locate and press the odometer reset button until the trip meter displays “Odo”.
Turn the ignition off.
Press and hold the odometer reset button while turning the ignition back to the “On” position.
Continue holding the button until the maintenance light turns off and the trip meter displays “000000”.
Release the button and start the engine to ensure the maintenance light has been reset.
Alternative Methods If The Reset Button Is Not Present
If your Toyota Tacoma model does not have an odometer reset button, you can use an alternative method to reset the maintenance light. Follow these steps:
Turn the ignition switch to the “On” position without starting the engine.
Open and close the driver’s door 3 times.
Press and release the brake pedal 2 times.
Close the driver’s door and ensure it is closed.
Turn the ignition switch to the “Lock” position.
Turn the ignition switch back to the “On” position and the maintenance light should be reset.
Credit: m.youtube.com
Confirming The Light Has Been Reset
Confirming the Light Reset on Toyota Tacoma
After successfully shutting off the maintenance light on your Toyota Tacoma, it is essential to confirm that the reset was effective. By following the steps below, you can ensure that the maintenance light has been reset and your vehicle is running smoothly.
Checking The Dashboard For Confirmation
Once you have reset the maintenance light, the next step is to check your dashboard for a confirmation message.
Look for any warning lights on the dashboard that indicate the reset was successful.
Ensure the maintenance light is no longer illuminated, signaling that the reset was effective.
Verifying With A Test Drive
To further confirm that the maintenance light has been successfully reset on your Toyota Tacoma, take your vehicle for a test drive.
Pay attention to any unusual noises or vibrations during the test drive.
Check if the maintenance light remains off throughout the drive, indicating the reset was successful.
Tips And Precautions
When it comes to properly maintaining your Toyota Tacoma, one important task is to reset the maintenance light when it illuminates on your dashboard. This light serves to remind you that your vehicle is due for routine maintenance, such as an oil change or tire rotation. However, many Tacoma owners may find themselves unfamiliar with this process or unaware of the precautions necessary to avoid damaging their vehicle in the reset process. To help you navigate this task with ease and confidence, here are some valuable tips and precautions to keep in mind.
Additional Tips For Properly Maintaining Your Toyota Tacoma
To ensure the optimal performance and longevity of your Toyota Tacoma, it’s important to go beyond simply resetting the maintenance light. Here are a few additional tips to help you maintain your Tacoma effectively:
Regularly check your tire pressure and inspect the tread depth. Proper tire maintenance not only improves safety but also ensures better fuel efficiency.
Keep an eye on your vehicle’s fluids, including engine oil, coolant, brake fluid, and transmission fluid. Maintaining proper levels of these fluids can prevent costly damage and improve overall performance.
Follow the manufacturer’s recommended maintenance schedule. This includes regular oil changes, filter replacements, and other routine check-ups.
Inspect and replace worn-out or damaged parts as soon as possible. Ignoring signs of wear can lead to more significant and costly repairs down the line.
Keep your Tacoma clean, both inside and out. Regular washing and detailing can help protect the vehicle’s paint finish and prevent rust or corrosion.
Precautions To Avoid Damaging The Vehicle During The Reset Process
Resetting the maintenance light on your Toyota Tacoma requires some precautions to avoid unintentional damage to your vehicle. Here are some precautions you should always keep in mind:
Before attempting to reset the maintenance light, ensure that the key is out of the ignition and the engine is turned off.
Make sure you are using the correct procedure for your specific Toyota Tacoma model and year. Refer to your owner’s manual or consult a reliable source to find the appropriate steps.
Be gentle when operating the buttons or switches required for the reset process. Applying excessive force or using the wrong tools can lead to damage or malfunction.
Double-check that you have followed the proper steps exactly as instructed. Skipping any part of the process or performing it incorrectly could result in an unsuccessful reset.
If you’re unsure or uncomfortable with the reset process, consider consulting a professional technician or contacting your local Toyota dealership for assistance.
By following these additional tips for maintaining your Toyota Tacoma and taking the necessary precautions during the reset process, you can keep your vehicle running smoothly for years to come. Whether you’re an experienced Tacoma owner or a new driver, these valuable insights will help you navigate this important maintenance task with confidence. Remember, regular maintenance is key to ensuring your Tacoma’s longevity and performance, so don’t overlook the importance of resetting that maintenance light!
Frequently Asked Questions For How To Shut Off Maintenance Light Toyota Tacoma
How Do You Shut Off The Maintenance Light On A Toyota Tacoma?
To shut off the maintenance light on a Toyota Tacoma, simply turn on the ignition without starting the engine and press and hold the trip meter reset button until the light goes off.
Why Is The Maintenance Light On In My Toyota Tacoma?
The maintenance light in your Toyota Tacoma is on to remind you that scheduled maintenance is due. It is important to address the maintenance needs to keep your vehicle running smoothly and avoid potential problems.
When Should I Reset The Maintenance Light On My Toyota Tacoma?
You should reset the maintenance light on your Toyota Tacoma after you have completed the scheduled maintenance. This ensures that the light accurately reflects the next required maintenance interval and helps you stay on top of vehicle maintenance.
Conclusion
Keep your Toyota Tacoma running smoothly by addressing the maintenance light promptly. Following these simple steps will help you reset the light hassle-free. Regular maintenance is key to ensuring optimal performance and longevity for your vehicle. Don’t ignore the warnings – stay proactive and drive with peace of mind.
How to Reset Maintenance Light on 2015 Toyota Highlander
To reset the maintenance light on a 2015 Toyota Highlander, turn the ignition to “On,” press the trip meter button until “Trip A” is displayed, turn the ignition off, and then press and hold the trip meter button while turning the ignition back to “On.” Once “000000” appears on the trip meter display, the maintenance light will be reset. Owning a 2015 Toyota Highlander means staying on top of maintenance requirements to ensure optimal performance and longevity.
One crucial aspect of this is resetting the maintenance light after completing a service. This guide will walk you through the simple steps to reset the maintenance light on your 2015 Toyota Highlander, ensuring that you can easily take care of this essential task without the need for a trip to the mechanic.
By following this easy process, you’ll be able to reset the maintenance light at your convenience, keeping your vehicle in top condition.
Credit: oilreset.com
Step-by-step Guide To Reset Maintenance Light On A 2015 Toyota Highlander
To reset the maintenance light on a 2015 Toyota Highlander, begin by turning the ignition to the “On” position. Next, press the trip meter reset button until the maintenance light blinks, then release. Finally, turn off the ignition and start the vehicle to ensure the light has been reset.
Step 1: Prepare For The Reset
Before resetting the maintenance light, make sure your Toyota Highlander is parked in a safe and well-lit area.
Ensure the ignition is turned off before proceeding.
Gather your vehicle’s user manual for guidance.
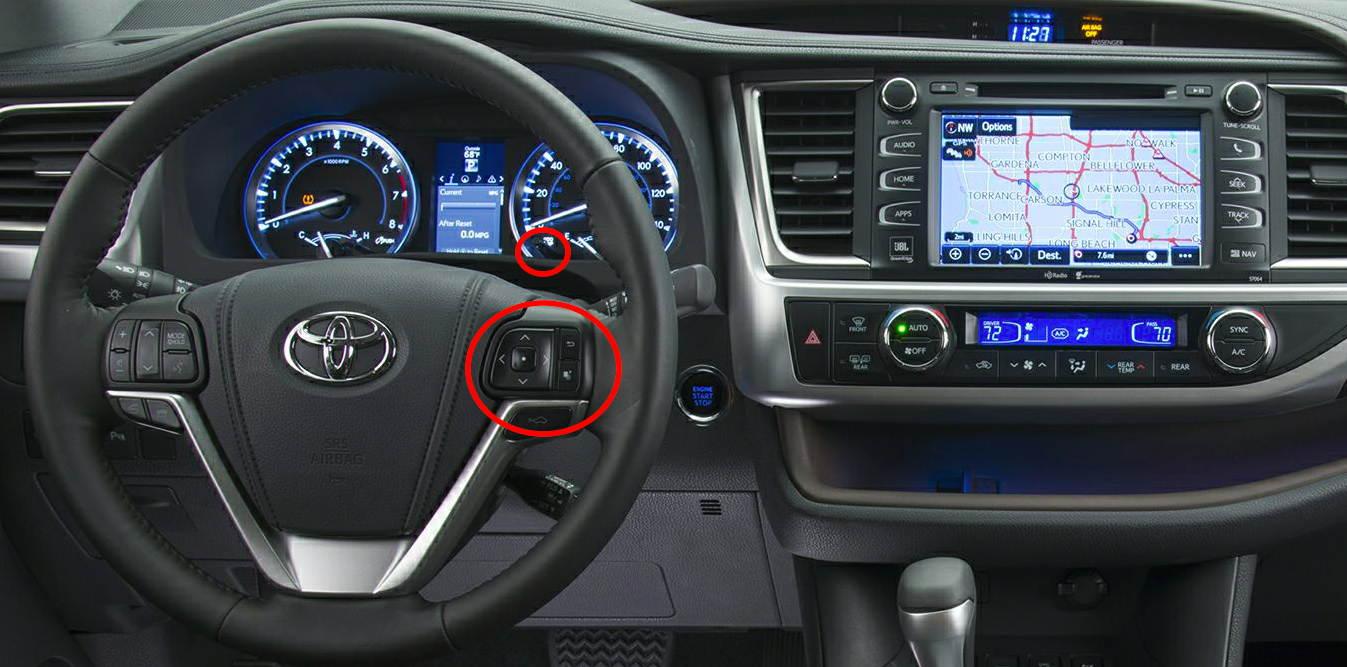
Step 2: Access The Maintenance Light Settings
To access the maintenance light settings, follow these steps:
Insert and turn the key to the “On” position without starting the engine.
Locate the trip/reset button on the dashboard and press it until you see the odometer reading.
Step 3: Reset The Maintenance Light
To reset the maintenance light, proceed as follows:
Keep pressing and holding the trip/reset button until the odometer reading resets.
Release the button and turn off the ignition.
Start the vehicle to ensure the maintenance light is successfully reset.
Credit: oilreset.com
Other Tips And Considerations
When it comes to resetting the maintenance light on your 2015 Toyota Highlander, there are a few other tips and considerations that can be helpful. Here are some additional steps and factors to keep in mind.
Tip 1: Consult The Owner’s Manual
Before attempting to reset the maintenance light on your Toyota Highlander, it is essential to consult the owner’s manual. The manual provides specific instructions tailored to your vehicle’s make and model. It will offer step-by-step guidance on how to reset the maintenance light, ensuring you follow the correct procedure for your car.
Tip 2: Use A Diagnostic Tool (optional)
If you encounter difficulty resetting the maintenance light manually, using a diagnostic tool can be an alternative. This tool allows you to access the vehicle’s onboard computer system and reset the maintenance light electronically. While not mandatory, a diagnostic tool can simplify the process and provide a reliable solution if manual reset methods prove challenging.
Credit: m.youtube.com
Frequently Asked Questions For How To Reset Maintenance Light On 2015 Toyota Highlander
How Do I Reset The Maintenance Light On My 2015 Toyota Highlander?
To reset the maintenance light on your 2015 Toyota Highlander, follow these simple steps: 1. Insert the key into the ignition and turn it to the “on” position without starting the engine. 2. Press and hold the Trip/Odometer button until the display shows “Trip A”. 3. Turn the key back to the “off” position and then release the Trip/Odometer button. 4. Start the engine and verify that the maintenance light has been successfully reset.
What Does The Maintenance Light On A 2015 Toyota Highlander Mean?
The maintenance light on a 2015 Toyota Highlander indicates that the vehicle is due for scheduled maintenance. This could include oil changes, tire rotations, or other routine services recommended by the manufacturer. It is important to address this light promptly to ensure the longevity and performance of your vehicle.
How Often Should I Reset The Maintenance Light On My 2015 Toyota Highlander?
You should reset the maintenance light on your 2015 Toyota Highlander every time you have completed the recommended maintenance services. By following the manufacturer’s schedule, you can keep your vehicle running smoothly and prevent any potential issues in the future.
It is important to consult your owner’s manual or contact a qualified technician for the specific maintenance intervals for your vehicle.
Conclusion
Resetting the maintenance light on your 2015 Toyota Highlander is simple. Following these steps can save time and money. Regular maintenance is key to a car’s longevity. Keeping up with these tasks will ensure your vehicle continues to run smoothly.
The Toyota Highlander Hybrid is a popular choice for eco-conscious drivers who want the practicality of an SUV with the fuel efficiency of a hybrid vehicle. But have you ever wondered how the Toyota Highlander Hybrid actually works? In this article, we’ll take a closer look under the hood to understand the technology behind this innovative vehicle.
Hybrid Powertrain
At the heart of the Toyota Highlander Hybrid is its advanced hybrid powertrain, which combines a gasoline engine with one or more electric motors.
This setup allows the vehicle to seamlessly switch between the gasoline engine, electric motor, or a combination of both, depending on driving conditions and power demands. The result is improved fuel efficiency and reduced emissions, making it an attractive option for environmentally conscious drivers.
Regenerative Braking
One of the key features of the Toyota Highlander Hybrid is its regenerative braking system. When the driver applies the brakes, the electric motors work in reverse to generate electricity, which is then stored in the vehicle’s high-voltage battery.
This captured energy can be used to power the electric motors, reducing the reliance on the gasoline engine and further improving fuel economy.
Electric Power Assist
During low-speed driving or when cruising, the Toyota Highlander Hybrid can operate solely on electric power, thanks to its electric power assist. This not only reduces fuel consumption and emissions but also provides a quieter and smoother driving experience.
The vehicle’s sophisticated electronics manage the seamless transition between the gasoline engine and electric motor, delivering optimal efficiency without sacrificing performance.
Engine Efficiency
The gasoline engine in the Toyota Highlander Hybrid is also designed for maximum efficiency. It incorporates technologies such as variable valve timing and an Atkinson cycle to optimize fuel combustion and power delivery.
This means that the engine can operate at its most efficient state for a greater portion of the driving cycle, further contributing to the vehicle’s impressive fuel economy.
Multi-Information Display
Drivers of the Toyota Highlander Hybrid have access to real-time information about the vehicle’s hybrid system through the Multi-Information Display.
This advanced display provides details on energy flow, power distribution, and battery charging, empowering drivers to understand and optimize their driving habits for maximum fuel efficiency.
FAQ
How Does The Toyota Highlander Hybrid Work?
The Toyota Highlander Hybrid combines a gasoline engine and electric motors to provide power. When driving, the vehicle automatically switches between the two power sources for increased fuel efficiency.
What Makes The Toyota Highlander Hybrid Environmentally Friendly?
The Toyota Highlander Hybrid is eco-friendly because it uses less gasoline than traditional vehicles. The hybrid technology allows for lower emissions and reduces the overall carbon footprint.
How Does The Toyota Highlander Hybrid Achieve Better Fuel Efficiency?
The Toyota Highlander Hybrid achieves better fuel efficiency through its innovative hybrid system. This system optimizes the use of the gasoline engine and electric motors, resulting in reduced energy waste and improved MPG (miles per gallon).
Conclusion
In conclusion, the Toyota Highlander Hybrid combines advanced hybrid technology with practical SUV utility to deliver an efficient and eco-friendly driving experience. By seamlessly integrating the gasoline engine, electric motors, and sophisticated control systems, the Highlander Hybrid sets a high standard for fuel efficiency and environmental responsibility in the SUV segment.
Toyota Highlander is a popular crossover SUV that offers great performance on all kinds of terrain. However, there may be times when you need to turn off the all-wheel drive (AWD) function in your Highlander. Whether you’re driving on dry pavement or trying to maximize fuel efficiency, knowing how to turn off AWD can be useful. In this article, we will discuss the steps to turn off AWD on a Toyota Highlander.
Why Turn off AWD?
There are several reasons why you might want to turn off the AWD system in your Toyota Highlander. Some of these reasons include:
Improving fuel economy:
Driving on dry pavement:
Reducing wear and tear:
Maximizing performance:
Reducing maintenance costs:
Steps to Turn off AWD on Toyota Highlander
Turning off the AWD system on a Toyota Highlander is a relatively simple process. Here are the steps you can follow:
Locate the AWD lock switch:
Press the AWD lock switch:
Check the dashboard indicator:
Step 1: Locate The Awd Lock Switch
The AWD lock switch is usually located on the dashboard or on the center console of the Toyota Highlander. It is typically labeled with the letters “AWD LOCK” or “4WD LOCK.”
Step 2: Press The Awd Lock Switch
Once you’ve located the AWD lock switch, press it to disengage the AWD system. This will allow you to operate the vehicle in two-wheel drive mode, thus turning off the AWD function.
Step 3: Check The Dashboard Indicator
After pressing the AWD lock switch, check the dashboard indicator to ensure that the AWD system has been turned off. The indicator may display a message such as “AWD OFF” or “2WD MODE” to confirm that the AWD system is no longer engaged.
When to Turn off AWD
Now that you know how to turn off AWD on your Toyota Highlander, it’s important to understand when it’s appropriate to do so. Here are some situations in which you may want to turn off the AWD function:
Driving on dry, paved roads where extra traction is not required.
Maximizing fuel efficiency by reducing the load on the drivetrain.
Operating the vehicle in conditions that do not warrant the use of AWD, such as highway driving in good weather.
FAQ
How Can I Turn Off The Awd On My Toyota Highlander?
To turn off the AWD on your Toyota Highlander, simply locate the AWD button on the dashboard and press it. This will disable the all-wheel drive function, allowing you to drive in two-wheel drive mode for improved fuel efficiency.
Benefits Of Turning Off Awd On Toyota Highlander?
Turning off the AWD on your Toyota Highlander can provide several benefits. Firstly, it can increase your fuel efficiency by reducing the power sent to all four wheels. Additionally, driving in two-wheel drive mode can provide a smoother and more comfortable ride, especially in normal driving conditions.
Lastly, it can help prolong the life of your tires by reducing wear and tear.
When Should I Consider Turning Off The Awd On My Toyota Highlander?
You may consider turning off the AWD on your Toyota Highlander in certain situations. For example, if you are driving on dry, paved roads with good traction, switching to two-wheel drive mode can improve fuel efficiency and reduce unnecessary wear on the drivetrain.
However, it’s important to note that AWD should be activated when driving in challenging conditions such as snow, ice, or off-road terrains for better traction and control.
Conclusion
Turning off the AWD system on your Toyota Highlander can be a simple way to optimize the vehicle’s performance and efficiency in certain driving conditions. By following the steps outlined in this article and understanding when it’s appropriate to turn off AWD, you can make the most of your Highlander’s capabilities. Always remember to consult your vehicle’s manual for specific guidance on AWD operation and to drive safely and responsibly in all conditions.