Connecting your iPhone to your Toyota Highlander allows you to access your music, make hands-free calls, and use navigation apps directly through the car’s audio system. It’s a convenient feature that enhances your driving experience. In this guide, we’ll walk you through the steps to connect your iPhone to a Toyota Highlander.
Credit: m.youtube.com
Step 1: Prepare Your iPhone and Toyota Highlander
Before you start the connection process, make sure your iPhone has Bluetooth enabled and is unlocked. Next, ensure that your Toyota Highlander’s multimedia system is powered on and in the Bluetooth pairing mode. You can usually access the Bluetooth settings on the car’s infotainment screen.
Step 2: Pairing Your iPhone with the Car
Once both your iPhone and Toyota Highlander are ready, it’s time to pair them. Follow these steps:
On your iPhone, go to “Settings” and select “Bluetooth.”
Turn on Bluetooth if it’s not already on.
In the list of available devices, find and select your Toyota Highlander’s Bluetooth name. It may appear as “Toyota” followed by a series of numbers.
Confirm the pairing on both your iPhone and the car’s multimedia system.
Step 3: Access Bluetooth Audio and Calls
Once your iPhone is successfully paired with the Toyota Highlander, you can start using the Bluetooth features. Here’s how to access them:
For playing music:
Open your preferred music app on your iPhone.
Choose a song or playlist to play.
Audio from your iPhone will now stream through your car’s speakers.
For receiving and making calls:
When a call comes in, you’ll see the caller ID on your car’s display and hear the ring through the speakers.
To make a call, access your phonebook or use Siri voice commands through the car’s built-in system.
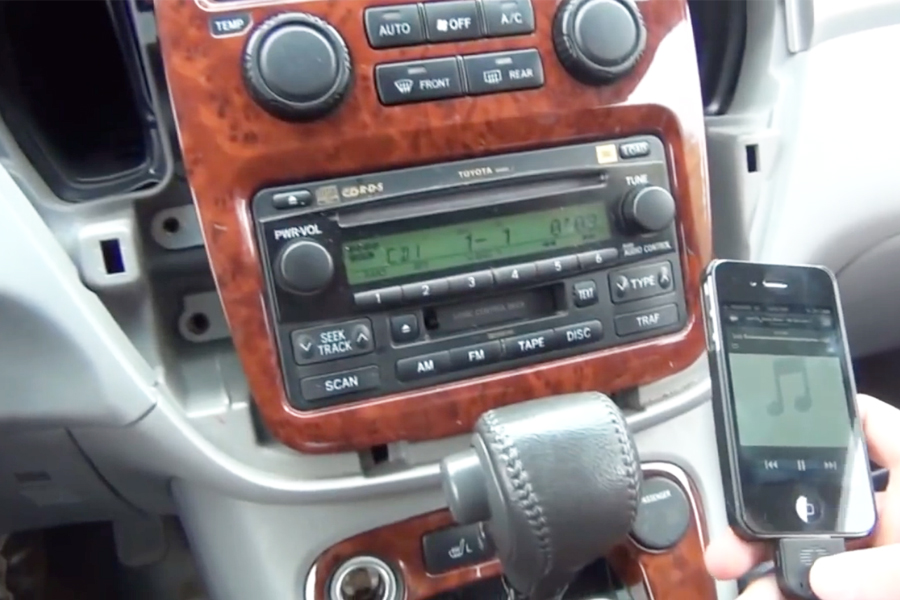
Step 4: Using Apple CarPlay (Optional)
If your Toyota Highlander is equipped with Apple CarPlay, you can take advantage of this feature to integrate your iPhone’s apps and functions with the car’s multimedia system. Follow these steps to use Apple CarPlay:
Connect your iPhone to the car’s USB port using the appropriate cable.
On the car’s infotainment screen, select the Apple CarPlay icon.
You can now access your iPhone’s apps, maps, and messages through the car’s display.
Step 5: Troubleshooting
If you encounter any issues during the connection process, here are some troubleshooting tips:
Ensure that your iPhone and Toyota Highlander are within close proximity during the pairing process.
If the initial pairing attempt fails, try turning off Bluetooth on both devices and then re-enable it to start the pairing process again.
For connectivity problems, you can also try restarting your iPhone and rebooting the car’s multimedia system.
FAQ
How Can I Connect My Iphone To Toyota Highlander?
To connect your iPhone to a Toyota Highlander, simply go to the Settings on your iPhone, select Bluetooth, and pair it with your Toyota Highlander’s system. Make sure the Bluetooth on your iPhone and your Highlander is turned on for a seamless connection.
What Features Can I Access After Connecting My Iphone To Toyota Highlander?
After connecting your iPhone to your Toyota Highlander, you can enjoy various features such as hands-free calling, wireless music streaming, access to your phone’s contacts, and even using voice commands to control certain functions of your iPhone through the car’s infotainment system.
Is It Possible To Connect Multiple Iphones To My Toyota Highlander?
Yes, you can connect multiple iPhones to your Toyota Highlander. Simply follow the same pairing process for each iPhone and make sure that only one iPhone is actively connected at a time to prevent any interference or inconvenience while using the car’s connectivity features.
Conclusion
Connecting your iPhone to your Toyota Highlander is a simple process that opens up a host of convenient features while you’re on the road. Whether you’re listening to your favorite music, making hands-free calls, or using navigation apps, the seamless integration between your iPhone and the car’s audio system enhances your driving experience.
By following the steps outlined in this guide, you can easily pair your iPhone with your Toyota Highlander and enjoy all the benefits of having your smartphone connected to your vehicle.
Read the most complete and detailed Toyota Sienna Warning Lights guide.
The Toyota Sienna dashboard features various warning lights designed to alert the driver about specific issues, ranging from engine and electrical system malfunctions to tire pressure and airbag system statuses.
Common indicators include the Master Warning Light, signaling multiple potential issues, and the VSC OFF light, highlighting vehicle stability control deactivation or malfunctions.
Overview of Toyota Sienna Dashboard
The Toyota Sienna’s dashboard features an array of warning lights and indicators, designed for safety and awareness. Speed, fuel level, engine status, among other critical information, are displayed clearly.
The layout prioritizes ergonomics, placing controls within easy reach. Advanced technology integrates with straightforward interfaces, making the dashboard both sophisticated and practical, ensuring driver and passenger safety.
Common Toyota Sienna Warning Lights and Their Meanings
Understanding the common warning lights on your Toyota Sienna’s dashboard is crucial for maintaining vehicle health and ensuring driving safety.
We will cover their causes, necessary steps for troubleshooting and resetting, and discuss their implications for driving safety.
1. Master Warning Light
The Master Warning Light in Toyota Sienna signals various issues, from minor to critical, requiring immediate attention. It indicates the vehicle’s system has detected a problem, which could be related to the engine, transmission, electrical system, or maintenance needs.
To address the Master Warning Light, drivers should first check the vehicle’s owner manual for guidance. A professional diagnostic is essential to pinpoint and fix the root cause. Simply resetting the light without resolving the issue could lead to more serious problems. For safety, inspect the vehicle with a certified technician immediately to mitigate any driving risks.
2. VSC OFF indicator
The VSC OFF light in a Toyota Sienna indicates the Vehicle Stability Control (VSC) is deactivated or malfunctioning. The VSC aids in controlling the vehicle during difficult driving conditions by managing traction.
This light can signal a simple deactivation or serious issues like sensor failures. First, check if the VSC was turned off accidentally. If the light persists, seek a professional diagnostic.
Driving with the VSC OFF can heighten the risk of accidents, especially on slippery roads or during sudden maneuvers. Fixing this promptly ensures safety.
3. Chargin system warning light
The charging system warning light on a Toyota Sienna signals a problem with the vehicle’s electrical charging system, potentially leading to battery failure or electrical issues. This light might show as a battery symbol or the text “ALT” or “GEN” on the dashboard, indicating the battery isn’t charging. Causes include a faulty alternator, worn or broken belts, or battery issues.
To fix, check the battery connections for corrosion or looseness. Test the alternator and belts for damage. Driving with this light on is risky, as it may lead to a dead battery or loss of power. Immediate action is necessary for safety and to avoid further damage.
4. Low Engine Oil Pressure warning light
Understanding the Low Engine Oil Pressure warning light is crucial for the safety and performance of your vehicle. This light indicates when the engine oil pressure drops too low.
Common causes include insufficient oil levels, a malfunctioning oil pump, oil system blockage, or using oil of inadequate quality. Immediate action is necessary to avoid engine damage.
First, check and, if needed, replenish the oil level. If the light remains on, inspect for oil leaks or a damaged oil pump, and replace a clogged oil filter.
Driving with this warning active risks severe engine harm, such as seizure. Seek professional diagnosis and repair to ensure vehicle safety and dependability.
5. Security indicator
The Security Indicator light on the Toyota Sienna is a vital alert system, indicating the vehicle’s security system is active. If the light flashes or stays on without the ignition on, it suggests a malfunction. Troubleshooting steps include checking the key fob battery and ensuring the vehicle’s immobilizer system recognizes the key.
Electronic issues in the security module may also cause problems. To fix, consult the vehicle’s manual or seek professional help. Proper function of this system is crucial to prevent unauthorized access and ensure driver safety.
6. TRAC OFF indicator
Toyota Sienna drivers might see the TRAC OFF indicator light, which means the traction control system is off. This system helps with grip on slippery or uneven roads and can be shut off manually or due to a fault.
Common reasons for the TRAC OFF light include problems with wheel speed sensors, a faulty steering angle sensor, or issues in the anti-lock braking system (ABS).
First, check if the system was turned off by accident. If the light stays on, run a diagnostic scan to find any error codes linked to the traction control. Fixing these issues often needs a professional to ensure the vehicle’s traction control works safely and efficiently.
Causes vary from natural air loss, temperature fluctuations, to punctures. To address this, check and adjust all tires’ pressure to the suggested levels by the manufacturer using a reliable gauge. If the light remains on, consult a professional for potential leaks or sensor problems.
Regular checks and maintenance of tire pressure are essential for safe driving.
8. Electrical Power Steering (EPS) warning light
Focusing on the Electrical Power Steering (EPS) warning light, this alert signals a malfunction in the Toyota Sienna’s steering system. It warns of possible steering difficulties, impacting vehicle control and occupant safety.
Addressing the EPS warning light is vital for safe driving.
9. Seatbelt reminder light
The seatbelt reminder light, a key safety feature in vehicles like the Toyota Sienna, activates when seatbelts are unfastened. It combines visual and audio alerts to prompt the driver and passengers to buckle up.
The light turns on because one or more occupants haven’t secured their seatbelts. To fix this, passengers should fasten their seatbelts. Once secured, the light automatically shuts off.
Troubleshooting isn’t usually needed; simply fastening the seatbelt resolves the issue. This feature ensures that all occupants comply with traffic laws and safety standards, significantly enhancing driving safety.
10. Low Fuel Level Warning Light
The Low Fuel Level Warning Light signals when the fuel tank is nearly empty, necessitating immediate refueling to avoid engine stalling. This light activates when the fuel drops to a critical low, threatening the car’s operation.
To solve this, refuel promptly. The light automatically turns off after refueling, indicating a sufficient fuel level. Ignoring this warning risks safety, as it can lead to stalling in dangerous situations, endangering all occupants.
No complex troubleshooting or resetting is needed – simply fill the tank.
11. Headlight high-beam indicator
The High-Beam Indicator in a Toyota Sienna lights up to show the high-beams are on, improving visibility at night or in dim conditions.
Feature
Details
Indicator Meaning
Indicates active high-beams.
Causes for Activation
Driver activates for better visibility.
How to Fix/Reset
Turn off high-beams or switch to low-beam to deactivate indicator.
Driving Safety
Enhances visibility but must be used carefully to not blind others.
Knowing how and when to use the high-beam indicator is crucial for safe driving and obeying road laws, ensuring safety for all.
12. ABS warning light
Focusing on the ABS warning light in the Toyota Sienna signals issues with the anti-lock braking system (ABS). This light means the ABS is not working correctly, potentially due to a blown fuse, faulty wheel speed sensors, or a malfunctioning ABS module.
To troubleshoot, first check the brake fluid level. If adequate, use a diagnostic scan tool to read ABS error codes.
Driving with the ABS light on can reduce safety in slippery conditions by failing to prevent wheel lock-up during braking.
13. Cruise Control indicator
The Cruise Control indicator on the Toyota Sienna lights up to show the cruise control system’s status. It helps keep a steady speed, aiding in comfort and fuel efficiency on long drives. But, a persistent or flashing light without activation suggests a problem.
Indicator State
Meaning
Solid Light
Cruise control is on.
Flashing Light
A malfunction exists in the cruise control system.
No Light
Cruise control is off.
To fix, try resetting by switching it off and on. If this fails, see a technician for diagnosis and repair to ensure safety.
14. Slip indicator**
In Toyota Sienna models, the slip indicator light activation means the traction control system is working to prevent a loss of traction, especially on wet or icy surfaces. The light flashes when the system actively maintains grip.
Causes for the slip indicator light staying on include traction control system malfunctions, wheel sensor issues, or vehicle computer system problems.
To troubleshoot, first determine if the condition resolves after driving stabilizes. If the light persists, a diagnostic scan is necessary to identify fault codes.
Professional help is recommended to ensure safety and system functionality.
15. Turn Signal Indicator
The Toyota Sienna’s turn signal indicator is essential for signaling turns or lane changes, crucial for road safety and legal driving. This indicator triggers blinking lights on the vehicle’s front and rear, notifying nearby drivers and pedestrians of the Sienna’s intended direction. Proper function is key for clear communication on the road.
Common issues include burnt-out bulbs or electrical faults, impairing signal operation. To fix, inspect and replace faulty bulbs or fuses. Refer to the vehicle’s manual or seek a mechanic’s help for complex electrical problems.
Maintaining functional turn signals is critical for avoiding accidents and traffic fines.
16. SRS Warning Light
The SRS Warning Light on the Toyota Sienna, crucial for vehicle safety, signals issues within the airbag system. This light, representing the Supplemental Restraint System (SRS), alerts drivers to potential problems with airbags or seatbelt pretensioners.
Causes range from minor sensor malfunctions to significant faults needing professional repair. To troubleshoot, first check the passenger seat sensor for heavy objects. If the light remains, use a diagnostic scan tool to identify the issue.
Repairs may include sensor replacement, wiring fixes, or an airbag module reset. Driving with an active SRS warning light is unsafe, as airbags may not deploy in a crash, making prompt attention critical.
Safety Warning Lights You Shouldnt Ignore
On your Toyota Sienna’s dashboard, certain safety warning lights are critical for vehicle and occupant safety. Ignoring these lights can escalate into severe issues or accidents. Act immediately when these lights illuminate.
Brake System Warning Light: Signals a potential failure in the braking system, essential for stopping the vehicle safely.
Temperature Warning Light: Alerts to engine overheating, which can cause engine damage.
Seat Belt Reminder: Urges passengers to buckle up, reducing injury risk in a crash.
Troubleshooting and Maintenance Tips
To ensure your Toyota Sienna operates effectively, it’s critical to address safety warning lights immediately and maintain your vehicle. Here are concise, actionable steps:
Consistently monitor and refill necessary fluids, including engine oil, coolant, and brake fluid.
Examine brake pads and rotors for wear; replace them when needed.
Keep an eye on tire pressure and tread depth, making adjustments or replacements as necessary.
Regularly perform engine and transmission diagnostics to identify potential issues early.
Clean battery terminals and regularly check the battery’s charge to prevent power loss.
These steps help prevent unexpected vehicle problems and ensure safety and reliability.
FAQ
What does the red oil pressure warning light on my Toyota Sienna indicate?
The red oil pressure warning light on a Toyota Sienna indicates low oil pressure, signaling a risk of inadequate lubrication and potential engine damage. It’s essential to stop driving and turn off the engine immediately to avoid further issues.
After the engine cools, check the oil level; if low, adding oil might solve the problem. If the oil level is normal, the issue could be a faulty oil pump or a leak in the system, necessitating professional inspection and repair.
Why is the ABS warning light on in my Toyota Sienna, and what should I do?
Immediately consult a certified mechanic or dealership.
Your Toyota Sienna’s ABS warning light indicates a potential fault within the Anti-lock Braking System, which could be due to issues like a malfunctioning sensor, low brake fluid, or a problem with the ABS module.
It’s critical for safety to diagnose and fix this issue promptly to ensure optimal braking performance and reduce accident risk.
Can I still drive my Toyota Sienna if the check engine light is on?
Yes, you can drive your Toyota Sienna with the check engine light on, but it’s important to address the issue soon.
The check engine light indicates a problem in the engine or emission control system. The severity can vary, and continued driving could lead to more serious issues.
Get the problem diagnosed and fixed promptly to avoid further damage or safety risks.
What steps should I take if the battery warning light appears on my Toyota Sienna dashboard?
If the battery warning light turns on in your Toyota Sienna, it indicates a problem in the charging system, potentially leading to a dead battery or electrical issues. Follow these steps to address the issue:
Examine the battery terminals for any signs of corrosion or loose connections. Corrosion can interfere with the electrical connection, while loose terminals may prevent the battery from charging properly.
Check the alternator belt for signs of wear or improper tension. A worn or loosely fitted belt can impair the alternator’s ability to charge the battery.
Use a voltmeter to measure the battery’s charge level. A low reading indicates the battery is not holding a charge, which may require recharging or replacement.
Refer to the Toyota Sienna’s manual for specific troubleshooting steps. The manual often contains model-specific advice and solutions.
Contact a certified Toyota mechanic or an auto electrical specialist. Professional diagnosis and repair are crucial for electrical system issues to ensure your vehicle’s safety and reliability.
Act promptly to mitigate the risk of breakdowns and maintain your Toyota Sienna’s performance.
How do I reset the tire pressure warning light in my Toyota Sienna after inflating my tires?
Step 1: Ensure all tires, including the spare, are inflated to the recommended pressure for your Toyota Sienna.
Step 2: Locate the tire pressure reset button. This is typically found under the steering wheel or inside the glove box.
Step 3: Press and hold the tire pressure reset button until the warning light blinks three times, indicating that the reset process has been initiated.
Step 4: Start driving your vehicle. It may take a few minutes of driving for the system to recalibrate.
Step 5: Check to see if the tire pressure warning light turns off after the system has recalibrated. This confirms a successful reset.
Why is the brake system warning light on in my Toyota Sienna, even after checking the brake fluid?
The brake system warning light staying on indicates a potential issue beyond the brake fluid level, such as worn brake pads, sensor malfunctions, or mechanical failures. Immediate professional diagnosis and repair are crucial.
Potential Issue
Diagnostic Action
Suggested Solution
Worn Brake Pads
Check pad thickness
Replace if below minimum
Sensor Malfunction
Diagnostic scan for error codes
Repair or replace sensor
Mechanical Failure
Inspect system professionally
Conduct repairs or replace parts
A professional mechanic should be consulted to accurately diagnose and address the issue, ensuring the vehicle’s safety and reliability.
What does it mean if the SRS airbag warning light is illuminated on my Toyota Sienna?
The SRS airbag warning light indicates a malfunction in the airbag system.
It means the airbags may not deploy in a crash, risking safety.
You should get your Toyota Sienna checked by a technician who can diagnose the issue using scanning tools and repair it to ensure the system works correctly.
How can I troubleshoot the power steering warning light on my Toyota Sienna?
When the power steering warning light turns on in your Toyota Sienna, it indicates a problem with the power steering system. To troubleshoot, follow these steps:
Examine the power steering fluid. If it’s low, refill it.
Check the power steering belt for signs of wear or damage. Replace it if necessary.
Look for leaks in the power steering system.
Test the power steering pump to ensure it’s working properly.
If the light remains on, consult a professional mechanic.
Address the issue quickly to avoid further damage to the steering system, ensuring safer driving.
What could cause the vehicle stability control (VSC) warning light to activate in my Toyota Sienna?
The Vehicle Stability Control (VSC) warning light in a Toyota Sienna indicates a problem in the stability control system.
Common causes include malfunctions in the system, faulty wheel speed sensors, issues with the steering angle sensor, wheel misalignment, or braking system problems.
The VSC system adjusts engine power and applies brake force to specific wheels to maintain vehicle stability, making it crucial to address any issues promptly.
Is it safe to drive my Toyota Sienna when the coolant temperature warning light is on?
No, it is not safe to drive your Toyota Sienna when the coolant temperature warning light is on.
This light means the engine may be overheating, which can cause serious damage. Stop the vehicle and turn off the engine to allow it to cool. Check the coolant level and for leaks once the engine has cooled.
If the issue persists, seek professional help to avoid further damage.
What should I do if the maintenance required light is flashing in my Toyota Sienna?
Schedule a service appointment for your Toyota Sienna as soon as possible. The maintenance required light flashing signals it’s time for regular maintenance. This may include an oil change, tire rotation, or other service tasks as outlined in your vehicle’s manual. Ignoring this alert can result in lower vehicle performance and higher repair costs in the future.
Schedule Service: Necessary to address the vehicle’s maintenance needs.
Check Vehicle Manual: Provides details on the specific maintenance required.
Monitor Dashboard: Helps in identifying any additional issues.
Taking action promptly ensures your Toyota Sienna remains in good condition.
How do I identify and respond to the warning light indicating a malfunction in the hybrid system of my Toyota Sienna?
If the hybrid system warning light on your Toyota Sienna turns on, immediately reduce your speed, lighten the engine load, and schedule a diagnostic check at a Toyota service center.
When the dashboard shows a battery or engine-shaped warning light, it indicates a problem with the hybrid system. Acting quickly is crucial to prevent further damage or safety issues.
Contact a Toyota service center for a professional assessment and necessary repairs. Ignoring the warning can lead to significant system failures.
Why might the lane departure alert warning light be on in my Toyota Sienna?
The lane departure alert warning light may be on due to several reasons. It illuminates when the system detects a deviation from the lane without a turn signal, indicating active assistance.
Persistent illumination or flashing could indicate a malfunction, possibly due to obstructed sensors from dirt, debris, or adverse weather. Sensor misalignment or a system failure can also cause continuous warning signals.
Professional diagnostic and service are recommended for resolution.
What does the master warning light mean on my Toyota Sienna dashboard?
The master warning light on a Toyota Sienna indicates various potential issues and requires immediate attention.
When the master warning light illuminates on the dashboard, it is a general alert for multiple vehicle systems signaling that a check-up is necessary. It is recommended to consult the vehicle’s manual or contact a dealer for further guidance.
Other indicators like engine temperature and oil pressure have specific actions such as stopping the vehicle to cool the engine or checking and refilling oil, respectively. Professional assistance should be sought for accurate diagnosis and repair.
How can I resolve an issue when the smart key system warning light is displayed on my Toyota Sienna?
To fix the smart key system warning light on your Toyota Sienna’s dashboard, follow these straightforward steps:
Replace the smart key’s battery if it’s dead.
Keep the smart key close enough to start the vehicle.
Avoid keeping the smart key near devices like mobile phones or laptops, as these can disrupt its signal.
Check the vehicle’s smart key system antenna for any damage or blockages.
If the issue remains, seek a thorough diagnosis and repair from a Toyota dealer.
These actions address common problems with the smart key system, ensuring your Toyota Sienna functions correctly and stays secure.
Conclusion
Understanding the warning lights on the Toyota Sienna dashboard is key to vehicle longevity and occupant safety. Recognizing symbols like the engine warning, tire pressure indicator, and oil pressure light enables quick action, preventing serious problems.
Regular maintenance and following the vehicle’s troubleshooting guidelines are essential for its reliable performance. Drivers should learn these indicators to ensure their Toyota Sienna operates safely and efficiently.
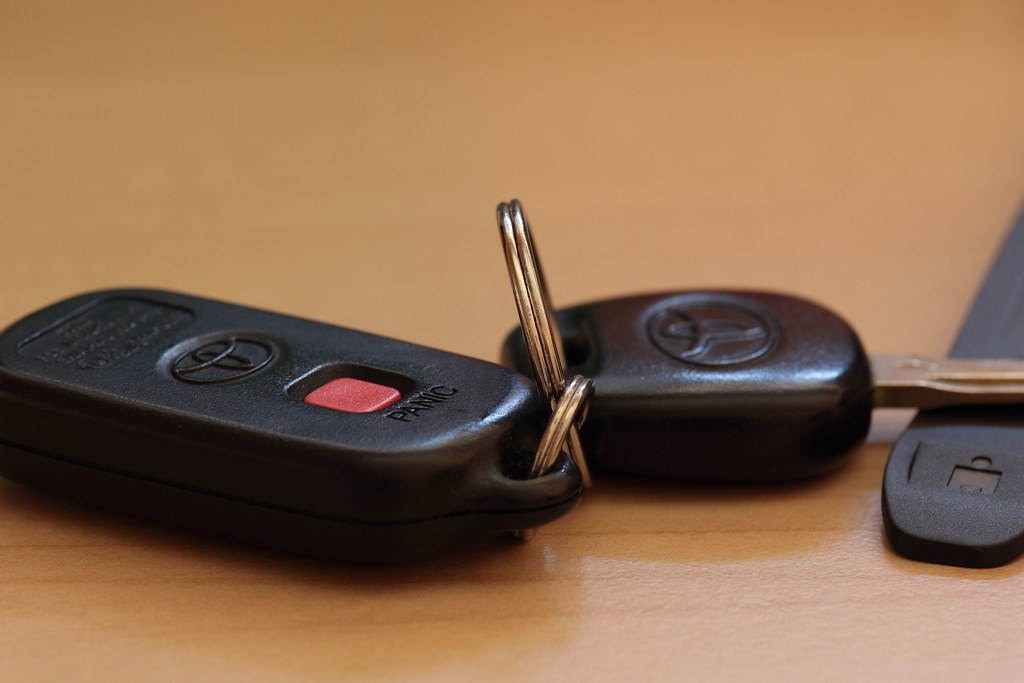
To reprogram a Toyota key fob, you can either follow the self-programming instructions for older models or seek professional help for newer models at dealerships, auto repair shops, or locksmiths.
Credit: www.keithpiersontoyota.com
Understanding Toyota Key Fobs
Understanding Toyota Key Fobs: What is a key fob? A key fob is a small device that allows you to remotely lock, unlock, and start your Toyota vehicle. It uses radio frequency signals to communicate with the car’s security system. How does a Toyota key fob work? When you press a button on the key fob, it sends a signal to the car’s receiver, which activates the corresponding function, such as locking or unlocking the doors. The fob needs to be within a certain range of the car for the signal to be transmitted successfully. It is important to note that not all key fobs are the same. Different Toyota models may have different functions and features, so it’s essential to consult your car’s manual or contact a professional if you are unsure about your specific key fob.
Credit: www.youtube.com
Reasons To Reprogram A Toyota Key Fob
There may be several reasons why you would need to reprogram a Toyota key fob. One common reason is to replace the battery. Over time, the battery in the key fob may die, causing the key fob to stop working properly. In this case, reprogramming the key fob can help restore its functionality.
Another reason for reprogramming a Toyota key fob is if it has been lost or stolen. When a key fob is lost or stolen, there is a risk that someone else may be able to access and use the vehicle. Reprogramming the key fob will ensure that only the new owner has access to the vehicle.
Additionally, if you purchase a new key fob, it will need to be programmed to work with your specific Toyota vehicle. This ensures that the key fob and the vehicle are properly synced and able to communicate with each other.
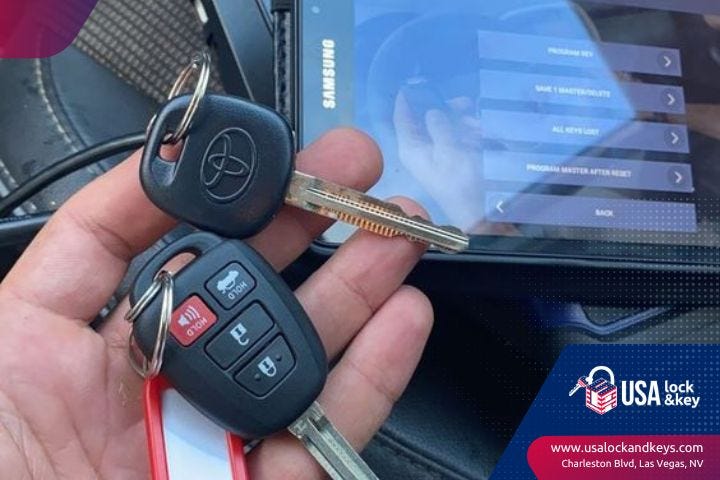
Methods To Reprogram A Toyota Key Fob
How to Reprogram a Toyota Key Fob
If you’re wondering how to reprogram a Toyota key fob manually, you’ll be glad to know that it’s possible. However, keep in mind that this method may vary depending on the specific Toyota model and year. To manually program your key fob, you typically need to follow a series of steps that involve pressing specific buttons on the fob and your vehicle. It’s important to consult your vehicle’s owner’s manual for the exact instructions.
For newer Toyota models, professional programming is usually recommended. This requires the expertise and specialized equipment of professionals such as dealerships, auto repair shops, or locksmiths. They have access to the necessary tools and software to program the key fob to your vehicle’s specifications. This ensures that the reprogramming process is done correctly and avoids any potential issues.
Credit: medium.com
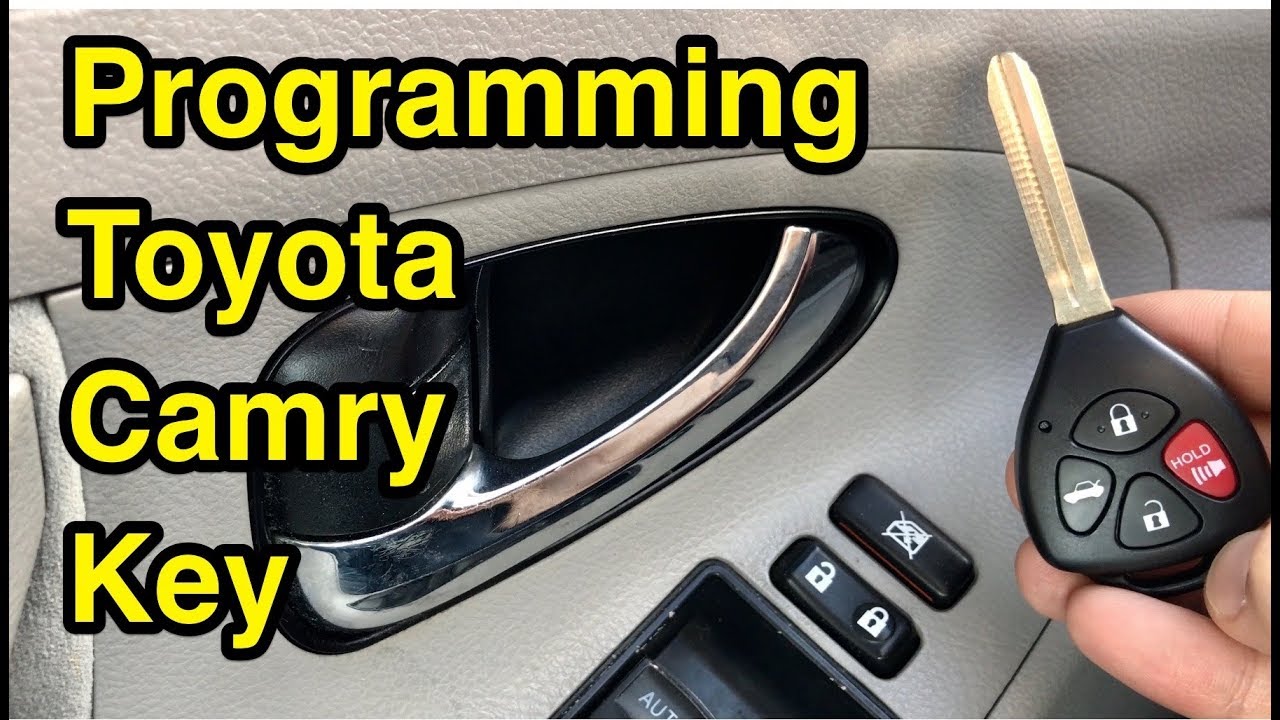
Step-by-step Guide To Reprogramming A Toyota Key Fob
Reprogramming a Toyota key fob is a straightforward process that can be done at home without the need for professional help. The first step is to gather the necessary information, such as the specific model and year of the Toyota vehicle. Once the information is obtained, the next step is to enter programming mode by following the specific instructions provided in the vehicle’s manual or online resources.
After entering programming mode, the new key fob can be programmed by following the designated steps, which typically involve pressing certain buttons in a specific sequence.
Finally, once the new key fob has been programmed, it is important to thoroughly test it to ensure its functionality. This can be done by attempting to lock and unlock the vehicle, as well as testing any other features that may be available on the key fob, such as panic buttons or trunk release.
Frequently Asked Questions For How To Reprogram A Toyota Key Fob
Can You Program A Toyota Key Yourself?
Yes, you can program a Toyota key yourself. Older models may have self-programming instructions, but newer models usually require professional programming. Dealerships, auto repair shops, and locksmiths offer key programming services.
Can I Reprogram My Key Fob Myself?
No, most newer vehicles require a professional to program the key fob to your vehicle. Some older models may have self-programming instructions. Contact a dealership, auto repair shop, or locksmith for assistance.
How Do I Manually Program My Toyota Remote?
To manually program your Toyota remote, follow these steps: 1) Get into the driver’s seat of your Toyota. 2) Close all the doors and insert the key into the ignition. 3) Turn the key to the “On” position and press the “Lock” button on your remote.
4) Repeat step 3 within 40 seconds for any additional remotes. 5) Turn the key to the “Off” position and remove it from the ignition.
Conclusion
Programming a Toyota key fob is a simple process that can save you time and money. By following the step-by-step instructions provided in this blog post, you can easily reprogram your key fob without the need for professional help. Remember to take the necessary precautions and carefully follow the instructions to ensure a successful reprogramming.
With this knowledge, you can confidently manage your Toyota key fob and enjoy the convenience and security it provides.
The Toyota Highlander is a popular SUV known for its spacious and comfortable interior. When considering the purchase of a Highlander, one of the important factors to consider is the seating capacity. Many people want to know exactly how many seats are in a Toyota Highlander and the available seating configurations.
The Highlander offers two different seating configurations, depending on the model and trim level you choose. The base model comes standard with seating for seven people, while higher trims can accommodate up to eight passengers.
Seating Configurations
Let’s take a closer look at the two available seating configurations in the Toyota Highlander:
7-passenger Seating
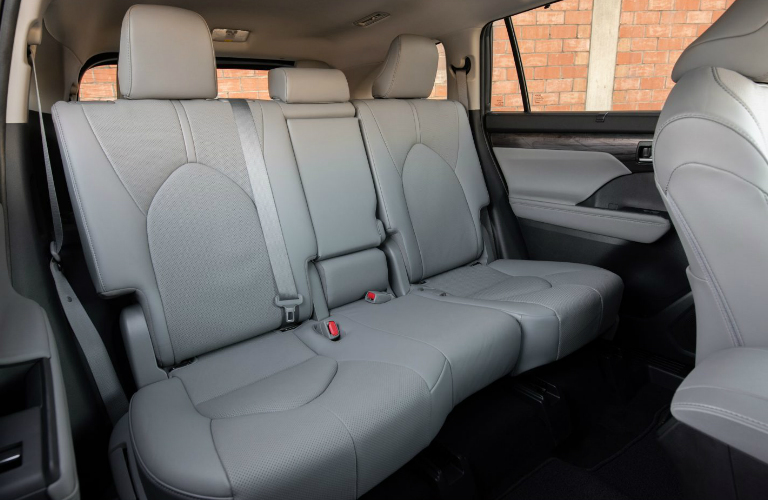
The base model of the Toyota Highlander offers 7-passenger seating. In this configuration, you’ll find two front bucket seats, a second-row bench seat, and a third-row bench seat. The third-row bench seat provides enough space for three passengers, making it ideal for families or larger groups.
With 7-passenger seating, the Highlander still offers ample cargo space behind the third row. This allows for easy transportation of groceries, sports equipment, or luggage without sacrificing passenger comfort.
8-passenger Seating
Higher trim levels of the Toyota Highlander offer the option of 8-passenger seating. In this configuration, you’ll find two front bucket seats, a second-row bench seat, and a third-row bench seat. However, in this case, the second-row bench seat can be replaced with captain’s chairs, creating a more luxurious and spacious feel.
The captain’s chairs provide enhanced comfort and individual seating space for the second-row passengers. This configuration is especially popular among those who prioritize comfort and luxury, as it allows for easy access to the third row without the need to fold or adjust seats.
Interior Comfort and Features
Regardless of the seating configuration you choose, the Toyota Highlander offers a range of interior comfort features to enhance your driving experience:
An eight-way power-adjustable driver’s seat
Cloth or available leather upholstery
Heated and ventilated front seats
Available panoramic moonroof
Spacious legroom and headroom for all passengers
Toyota Audio Multimedia system for entertainment and connectivity
These features ensure that every journey in the Toyota Highlander is comfortable, enjoyable, and well-equipped.
Credit: www.toyotavacaville.com
Credit: www.toyotaofhollywood.com
Frequently Asked Questions For How Many Seats In A Toyota Highlander
Does A Highlander Seat 7 Or 8?
The Toyota Highlander can seat seven or eight people, depending on the configuration. It comes with cloth upholstery and an eight-way power-adjustable driver’s seat as standard. Enjoy the flexibility of seating options and the comfort of the Highlander’s spacious interior.
Do All Highlanders Have 3rd Row?
Yes, all Toyota Highlanders come with a 3rd row of seats. The Highlander can seat up to seven or eight people, depending on the configuration. It features cloth upholstery and an eight-way power-adjustable driver’s seat as standard. Enjoy the spaciousness of the 3rd row and the comfort it provides.
What Year Of Highlander Has 8 Seats?
The Toyota Highlander can seat up to eight people, depending on the configuration. It comes with standard cloth upholstery and an eight-way power-adjustable driver’s seat.
Conclusion
In summary, the Toyota Highlander offers seating for either seven or eight passengers, depending on the configuration and trim level. The 7-passenger configuration includes a second-row bench seat and a third-row bench seat, while the 8-passenger configuration allows for captain’s chairs in the second row.
Whether you have a large family or often travel with a group of friends, the Toyota Highlander provides a spacious and comfortable interior to accommodate your needs. With various seating options and a range of interior features, the Highlander ensures that every passenger enjoys a comfortable and enjoyable ride.
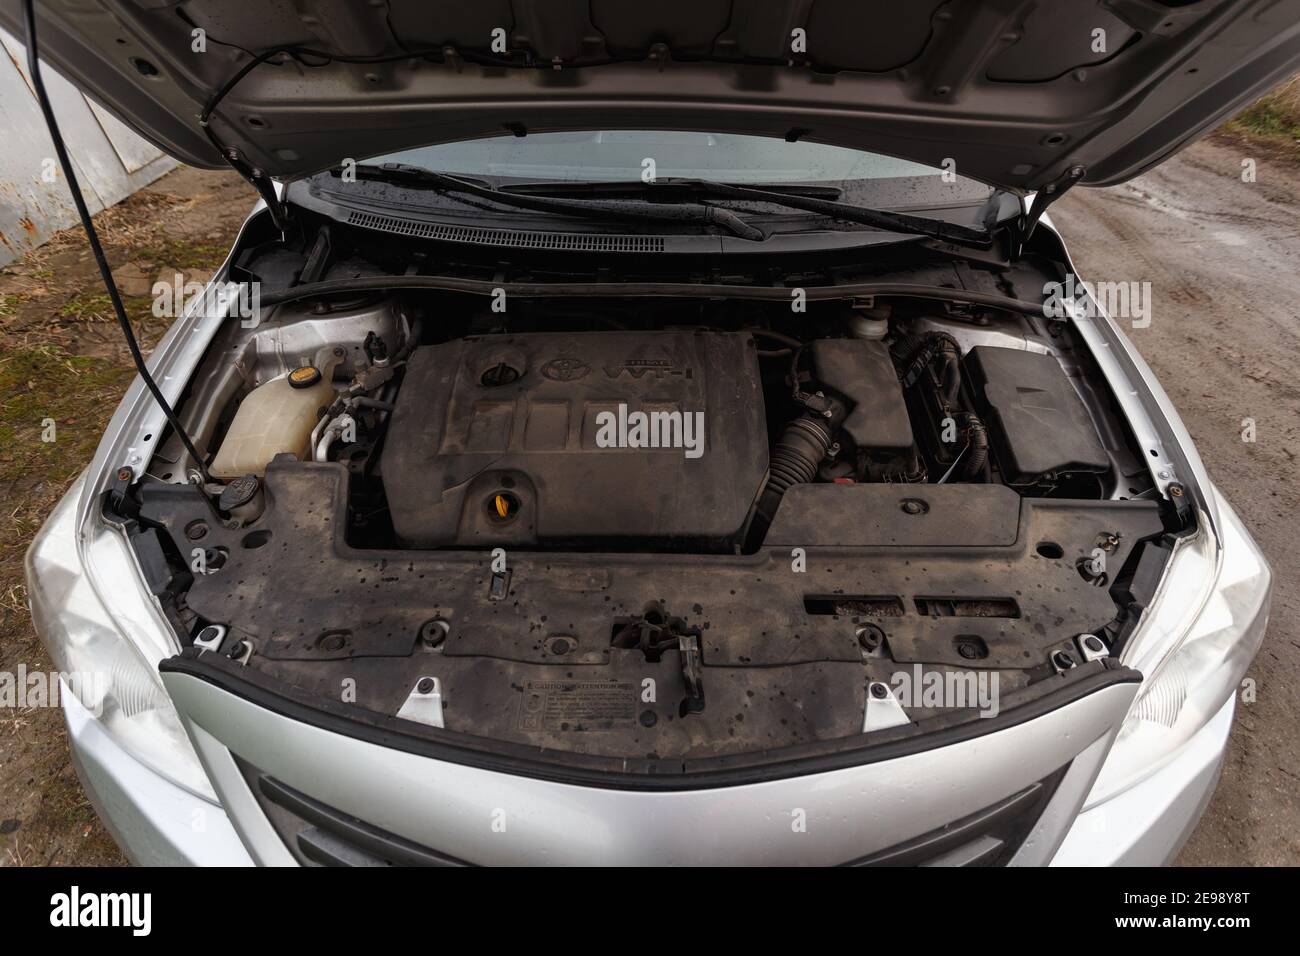
To open the hood of a Toyota Corolla, open the driver door, locate and pull the hood hatch release below the steering wheel, walk to the front of the vehicle, and put your fingers under the hood to push up on the release latch.
Credit: m.youtube.com
Credit: www.alamy.com
Frequently Asked Questions On How To Open Hood Of Toyota Corolla
How Do You Open The Hood Of A Toyota Corolla?
To open the hood of a Toyota Corolla, follow these steps:
1. Open the driver door. 2. Locate and pull the hood hatch release below the steering wheel. 3. Walk to the front of the vehicle. 4. Put your fingers under the hood and push up on the release latch.
That’s it! You can now access the engine compartment.
How Do You Release A Toyota Hood?
To release the hood of a Toyota, follow these steps:
1. Open the driver door. 2. Locate and pull the hood hatch release below the steering wheel. 3. Walk to the front of the vehicle. 4. Put your fingers under the hood and push up on the release latch.
How Do You Open The Hood On A 2016 Toyota?
To open the hood of a 2016 Toyota, follow these steps:
1. Open the driver’s door. 2. Locate and pull the hood hatch release lever below the steering wheel. 3. Walk to the front of the vehicle. 4. Put your fingers under the hood and push up on the release latch.
That’s it! The hood should now be unlocked and ready to open.
Conclusion
To open the hood of a Toyota Corolla, follow these simple steps: First, open the driver door and locate the hood hatch release below the steering wheel. Pull the release lever. Then, walk to the front of the vehicle and put your fingers under the hood to push up on the release latch.
Finally, lift the hood up from above either of the headlights. It’s as easy as that! Happy hood opening!
Misalignment is a common issue that can prevent a door from latching properly. It can occur due to various factors, such as settling of the building, loose hinges, or a sagging door frame.
Wear and tear on the door latch or strike plate can also affect the latching mechanism. Over time, the components may become worn or damaged, making it difficult for the latch to engage properly.
An obstructed strike plate can prevent the door latch from reaching its intended position. Debris or misaligned components can block the latch from fully engaging with the strike plate, resulting in a door that won't latch.
Changes in temperature and humidity can cause materials to expand or contract, leading to doors that no longer fit properly in their frames. This can result in misalignment issues that prevent the door from latching securely.
Misaligned Door and Frame
Often, a door that won't latch is because of the door and frame being misaligned, a problem you can typically diagnose and fix with some basic adjustments. This misalignment can stem from different causes, including door shrinkage because of changes in humidity or temperature, and installation errors that didn't account for house settling or weren't precise in the beginning.
To tackle this issue, initially, inspect the door and frame for any visible gaps or unevenness. If the door has shrunk, it might no longer reach the strike plate correctly. In cases of minor shrinkage, adjusting the strike plate position may suffice. However, significant door shrinkage might require more thorough solutions, such as resizing the door or replacing it.
Installation errors can also lead to a misaligned door and frame. Perhaps the hinges weren't properly screwed into the door or frame, causing the door to hang incorrectly. Tightening loose hinges or reinstalling them may realign the door. In addition, make sure that the door frame is squarely in its opening and not warped, as this can also prevent proper latching. Making these adjustments can often resolve your latching issues without needing to resort to more drastic measures.
Worn Out Latch Mechanism
While addressing misalignment issues can remedy many latching problems, a worn-out latch mechanism might in addition prevent your door from securing properly. Latch material fatigue and improper latch installation are critical factors that lead to this issue. When the material of the latch wears out because of age or excessive use, it can deform, break, or weaken, rendering it incapable of engaging with the strike plate effectively. Likewise, if the latch wasn't installed correctly, it mightn't line up properly with the strike plate, making it difficult for the door to latch.
Here are three practical steps to diagnose and fix a worn-out latch mechanism:
Inspect the Latch for Wear and Tear: Look for obvious signs of material fatigue, such as cracks, bends, or excessive wear on the metal parts of the latch.
Check for Proper Installation: Guarantee that the latch is correctly aligned with the strike plate. Misalignment could be because of improper installation or shifting over time.
Replace or Repair the Latch Mechanism: If the latch is indeed worn out or was improperly installed, your best course of action is to replace or repair it. This might involve adjusting the existing installation or installing a new latch altogether.
Loose or Damaged Hinges
Before diving into other potential causes for a door that won't latch, it's necessary to examine the door's hinges for any signs of looseness or damage. Loose hinges can misalign your door, preventing the latch from catching. Equally, damaged hinges might not hold the door in the correct position for latching.
Initially, tighten any loose screws you find. If screws won't tighten, it might indicate stripped holes. In this case, you'll need to either replace the screws with slightly larger ones or fill the holes with wood filler and re-drill the screw holes once dry.
Hinge replacement becomes essential when you're dealing with bent or severely damaged hinges. Make sure you choose the correct size and type for your door. After installation, proper lubrication is important to maintain smooth hinge movement and prevent future damage.
Sign
Diagnosis
Action
Loose Screws
Hinge not firmly attached
Tighten or replace screws
Resistance in Movement
Hinge lacks lubrication
Apply lubricant
Visible Damage
Hinge is bent or broken
Hinge replacement
Obstructed or Dirty Strike Plate
An obstructed or dirty strike plate can prevent your door from latching correctly, requiring immediate attention for proper function. Over time, dust, debris, or even rust can accumulate around the strike plate, hindering the smooth operation of the door latch. To address this issue, you'll need to undertake strike cleaning and possibly consider a lubrication option to make sure your door latches smoothly again.
Inspect and Clean: To start with, inspect the strike plate for any visible signs of dirt, debris, or obstruction. Use a small brush or a cloth to gently clean around the strike plate. For tougher grime, a mild cleaning solution may be applied.
Adjust for Alignment: Sometimes, the strike plate may not be properly aligned with the door latch. Loosen the screws and adjust the plate as needed to ensure correct alignment. Tighten the screws once the correct position is achieved.
Lubrication Option: Applying a light lubricant can help with smoother operation. Choose a suitable lubricant designed for door hardware. Apply sparingly to both the latch mechanism and the strike plate to reduce friction and prevent future sticking.
Temperature and Humidity Effects
Temperature and humidity levels can greatly impact your door's ability to latch properly, necessitating adjustments or repairs to guarantee smooth functionality. Wood, a common material for doors, is particularly susceptible to expansion and contraction because of changes in these environmental factors. High humidity can cause wood to swell, while low humidity can lead to shrinking. This natural response may result in your door not fitting its frame as intended, making latching difficult or impossible.
To tackle these issues, you'll need to understand the concept of seasonal adjustment. During humid seasons, it's common for doors to expand. You might need to sand down the door's edges slightly or adjust the hinges to provide more space for the door to fit. Conversely, in drier seasons, when the door contracts, you may find gaps that weren't there before, which could impact the door's mechanism. In such cases, tightening the hinges or adding weather-stripping can help.
Conclusion
In ensure, if you're struggling with a door that won't latch, it's likely because of a misalignment between the door and frame, a worn-out latch mechanism, loose or damaged hinges, an obstructed or dirty strike plate, or the effects of temperature and humidity.
Addressing these issues requires a detailed examination and precise adjustments or replacements. Tackling the problem systematically will ensure your door latches securely, enhancing both security and functionality in your home or workspace.