Recent Posts

How to Delete Phone From Toyota Corolla Bluetooth


To delete a phone from your Toyota Corolla's Bluetooth, follow these steps:

  • Navigate to the car's infotainment system.
  • Select 'Settings' and then 'Bluetooth'.
  • Choose the device you wish to remove.
  • Select 'Delete'.

This process keeps your personal information secure and optimizes connectivity.

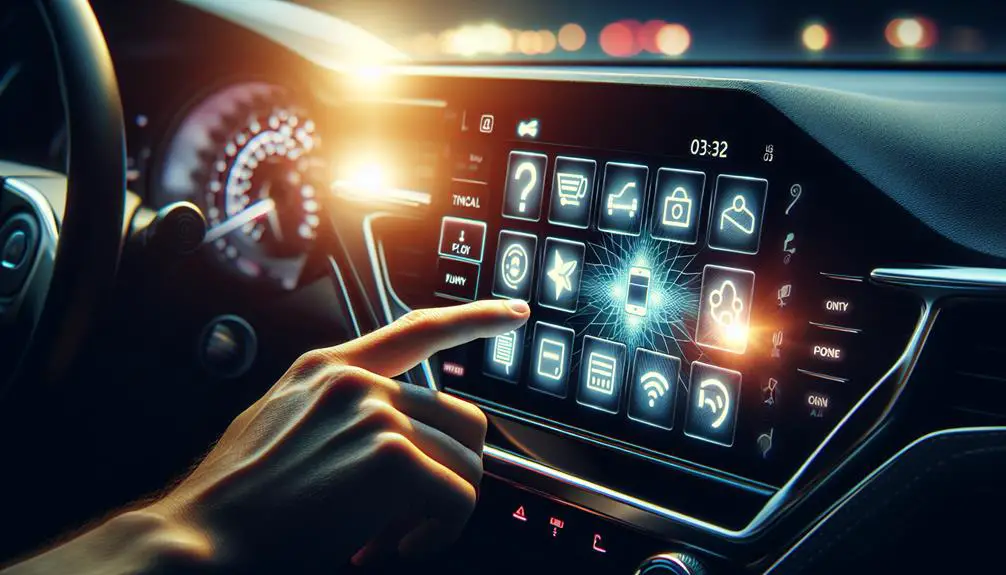
Understanding Your Corolla's Infotainment System

corolla infotainment system guide

To understand how to delete devices, first get to know your Toyota Corolla's infotainment system. This system is more than a radio or CD player. It controls your car's connectivity and entertainment, including Bluetooth. Learning how it works makes managing devices easier.

The system has a touchscreen that lets you control your car's environment. It does more than play music or make calls; it lets you access vehicle settings, information, and multimedia options.

The system is easy to use. Most functions are just a few taps away, and the menus are logically organized. The home screen has shortcuts to common features like audio and phone settings for quick access.

Newer Corolla models have updated infotainment systems with more connectivity options, like Apple CarPlay and Android Auto. These let you use your favorite smartphone apps on the touchscreen.

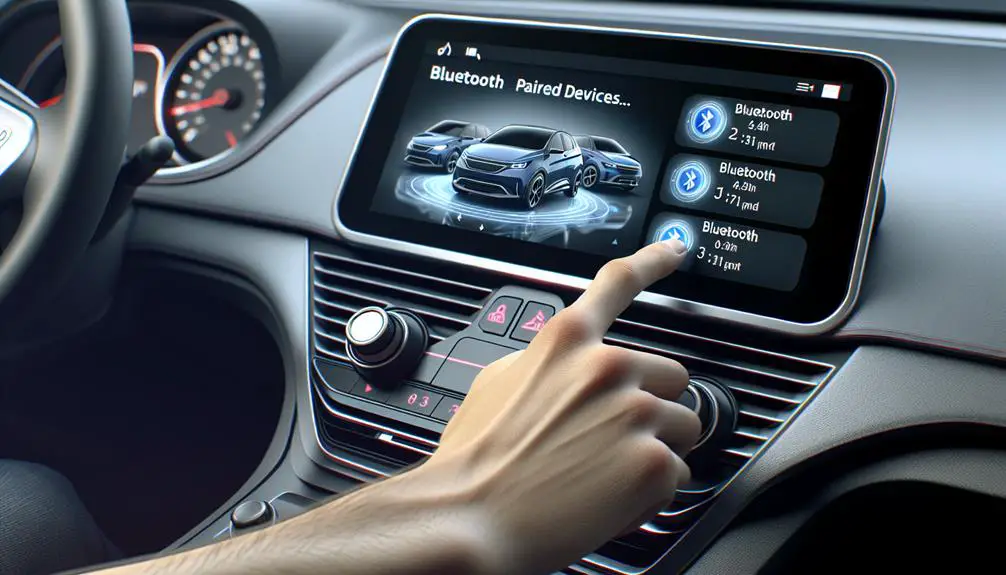
Accessing Bluetooth Settings

To access the Bluetooth settings in your Corolla, first ensure the car is parked. Turn on the infotainment system by pressing the power button or starting the car. Press the 'Menu' button near the screen to open the main menu.

Look for “Setup” or “Settings” and select it. Then, find and select the “Bluetooth” option to manage your Bluetooth connections.

This process is simple once you're used to your Corolla's infotainment system.

Selecting the Device to Remove

choosing which device removed

To remove a phone from your Toyota Corolla's Bluetooth settings, follow these steps:

  1. Find the Right Device: Look for a unique name that identifies each device. This name could be the phone's model, the owner's name, or a custom name. If unsure, check your phone's Bluetooth settings to see its name.
  2. Be Careful: Devices may have similar names. Double-check the name on the list against your phone to make sure you're choosing the right one.
  3. Use Controls: Depending on your car model, use either the touchscreen or buttons to select the device you want to remove.
  4. Take Your Time: Don't rush. Removing the wrong device by mistake can cause inconvenience.

Confirming Device Deletion

To confirm you've removed the phone from your Toyota Corolla's Bluetooth, check twice. First, go to your car's Bluetooth settings and look for your phone's name or identifier. If it's not there, it means you've likely deleted it successfully.

Next, check your phone's Bluetooth settings for your car's name. If you don't see it, the deletion was successful. If your car still appears on your phone, the deletion may not have worked, or your phone might've reconnected. In this case, disconnect or forget the device on your phone to complete the deletion.

Troubleshooting Common Issues

solution focused guide for issues

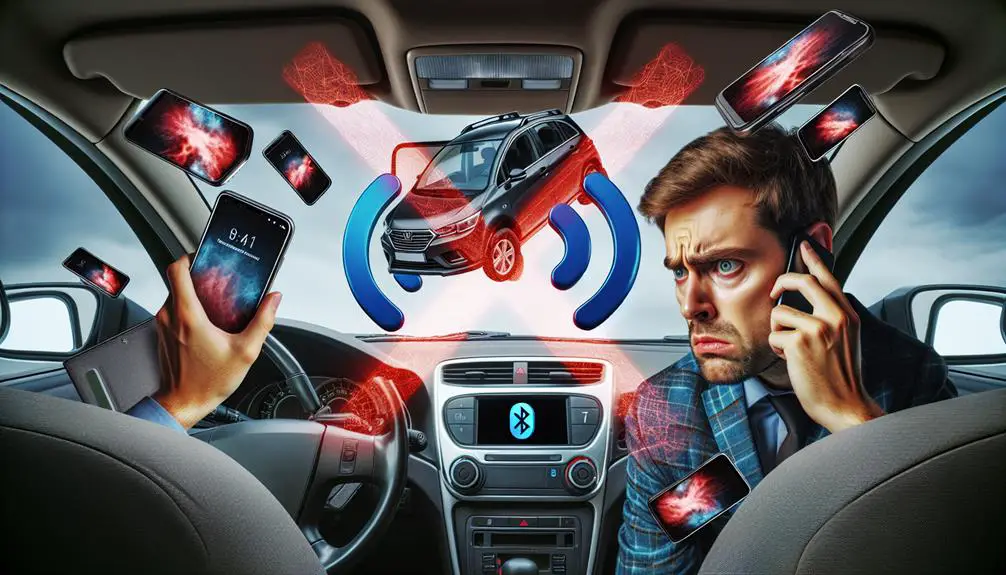
If your device still appears after checking, here are some steps to fix common issues preventing deletion. Your phone might still be connected due to various reasons, but these troubleshooting tips can help.

  1. Restart Both Devices: Restarting can fix many issues. First, turn off your phone's Bluetooth, then restart your phone. Also, turn off your car's engine, wait a bit, and start it again. This might reset the connection and let you delete your phone.
  2. Update Software: Make sure both your phone and your Toyota Corolla's multimedia system have the latest software. Outdated software can cause compatibility problems. Updating might fix these issues.
  3. Clear Bluetooth Cache: Go to Settings > Apps > Bluetooth on your phone (the path might differ) and clear the cache and data. This removes temporary files that could be causing problems.
  4. Factory Reset Car Multimedia System: If nothing else works, do a factory reset on your car's multimedia system. This erases all settings, not just your phone. Check your owner's manual for how to do this correctly.

Conclusion

You learned how to use your Toyota Corolla's screen to take off a phone from the Bluetooth list.

You went to the Bluetooth area, picked the phone you wanted to get rid of, and said yes to remove it.

This makes space for new phones to connect.

If you'd any problems, finding solutions probably helped fix them quickly.

Now, you can connect new phones and have a good time listening to music or talking hands-free while driving.

How to Remote Start Toyota Rav4 2021


Remote starting your Toyota Rav4 2021 can be a convenient feature to have, especially in extreme weather conditions. It allows you to start your vehicle from a distance, letting the engine warm up or cool down before you get in. In this article, we will guide you through the steps to remote start your Toyota Rav4 2021.

Remote Start Feature

Before we delve into the process, it’s important to understand that not all Toyota Rav4 2021 models come equipped with remote start functionality. Some models may require an additional installation or an upgrade. It’s always best to check with your local dealership to confirm if your vehicle has this feature or if it needs any modifications.

Remote Start Activation

If your Toyota Rav4 2021 is equipped with remote start, the activation process is relatively straightforward:

  1. Ensure the Vehicle is Locked: Make sure your vehicle is securely locked before attempting to remote start it.
  2. Press the Remote Start Button: Depending on the specific remote key fob for your vehicle, locate and press the remote start button. This is usually indicated by an icon with a circular arrow.
  3. Wait for Confirmation: After pressing the remote start button, wait for the vehicle to confirm the command. This may be indicated by a flashing light on the key fob or a honking sound from the vehicle.
  4. Approach the Vehicle: Once the remote start is activated, approach your vehicle within a reasonable distance. Some models may require you to be within a certain range for the remote start to remain active.

Note that the specific details and steps for remote starting your Toyota Rav4 2021 may vary based on the trim level or additional features installed in your vehicle. Always refer to your owner’s manual for detailed instructions tailored to your model.

 
How to Remote Start Toyota Rav4 2021

Credit: m.youtube.com

Additional Considerations

While remote starting your Toyota Rav4 2021 can offer convenience, it’s essential to keep a few considerations in mind:

  • Range Limitation: Understand the range limitations of your remote start. Some systems may require you to be within a certain distance from the vehicle for the remote start to function.
  • Weather Conditions: Be mindful of extreme weather conditions when using remote start. It can be advantageous to pre-condition your vehicle’s interior based on the temperature outside.
  • Safety Precautions: Always ensure that the vehicle is in a safe and open environment when initiating the remote start feature. Avoid using the remote start in enclosed spaces.
How to Remote Start Toyota Rav4 2021

Credit: accessorides.com

Frequently Asked Questions Of How To Remote Start Toyota Rav4 2021

How To Remote Start Toyota Rav4 2021?

Remote starting your Toyota Rav4 2021 is a breeze! Simply press the lock button on your key fob for three seconds, then press and hold the remote start button until the engine starts.

Is Remote Start Available On All Toyota Rav4 Models?

Yes, remote start is available as an option on all Toyota Rav4 models. It provides the convenience of starting your vehicle remotely, so you can warm it up or cool it down before getting inside.

Can I Use Remote Start On My Toyota Rav4 From Anywhere?

No, remote start for the Toyota Rav4 operates within a limited range. You can use it from a distance of up to 80 feet, so make sure you are within range when starting your vehicle remotely.

Conclusion

As technology continues to advance, remote starting capabilities have become a sought-after feature in modern vehicles. Understanding how to effectively use the remote start function in your Toyota Rav4 2021 can enhance your driving experience and provide added convenience.

Remember to check with your dealership or refer to your owner’s manual for precise instructions tailored to your specific vehicle model. With the right knowledge and precautions, remote starting your Toyota Rav4 2021 can be a valuable asset, especially in challenging weather conditions.


How Much Does It Cost to Open a Hyundai Dealership


Opening a Hyundai dealership requires a significant financial commitment, including expenses such as the initial franchise fee, real estate costs, showroom construction, inventory investment, equipment, signage, and operating capital.

Stepping into the automotive industry by opening a Hyundai dealership is akin to preparing for a marathon, not a sprint; it requires careful planning, a substantial investment, and a deep understanding of the business landscape.

You'll need to take into account the initial franchise fee, the cost of acquiring real estate and constructing your showroom, the investment in inventory, and the necessary equipment and signage to get your dealership off the ground.

Moreover, operating capital is vital to keep your business running smoothly during its early stages.

Setting out on this adventure, you might wonder what the financial roadmap looks like. Let's investigate the key factors that contribute to the cost of opening a Hyundai dealership, guiding you towards making an informed decision about whether this venture aligns with your business goals and financial capabilities.

Initial Franchise Fee

initial franchise fee payment

Starting on the path to open a Hyundai dealership, you'll initially encounter the initial franchise fee, a critical financial commitment that sets the foundation for your business operations. This fee, often running into several hundred thousand dollars, isn't just a ticket to the brand's name. It's a gateway to thorough franchise benefits that are pivotal to your success.

Delving into the details, your investment covers extensive training programs, access to the company's proprietary sales, service software, and marketing support. These elements are important for gaining a competitive edge in the automotive industry. Additionally, Hyundai's commitment to innovation and customer satisfaction enhances your dealership's appeal to a broad customer base.

Moving through the application process, you'll find it challenging but rewarding. Hyundai scrutinizes your financial stability, business acumen, and compatibility with the brand's vision. This thorough vetting process ensures that only the most qualified candidates are awarded a dealership, maintaining the brand's high standards and market reputation.

In essence, the initial franchise fee is more than just a financial transaction. It's an investment into a partnership that offers strong support systems, aligning with your business growth and sustainability goals in the competitive automotive market.

Real Estate and Construction

After securing the initial franchise fee, you'll next explore the complex terrain of real estate acquisition and construction costs, critical factors that greatly impact your dealership's set-up and operational budget. The success of your Hyundai dealership hinges not just on the cars you sell but equally on where and how you sell them. Location analysis becomes your foremost task, requiring a thorough examination into demographic studies, traffic patterns, and proximity to competitors. This isn't merely about finding a plot of land; it's about securing a location that optimizes your dealership's visibility and accessibility to your target market.

Equally critical are zoning regulations, which dictate what you can build and where. Navigating these rules requires a keen knowledge of local laws and potentially a hefty investment in legal consultations to guarantee compliance.

Cost Factor Estimated Expense
Real Estate Acquisition $1M – $3M
Construction $500K – $2M
Zoning and Compliance $50K – $200K

These figures underscore the importance of thorough financial planning and market research. Underestimating costs in these areas can lead to significant budget overruns, delaying your dealership's launch and impacting its profitability from the start.

Inventory Investment

economic indicator of spending

Securing a prime location and constructing your Hyundai dealership sets the stage, yet it's the strategic investment in inventory that truly fuels your operation's engine, directly influencing sales performance and customer satisfaction. The heart of this strategy rests on effective vehicle sourcing and a thorough market analysis. This dual approach confirms you're not just filling your lot but are stocking it with the models and trims that local buyers require.

Vehicle sourcing demands a keen eye on both current trends and predictive analytics. You'll need to closely monitor Hyundai's lineup, aligning your orders with models that have proven or expected high demand. This might mean investing more heavily in SUVs and hybrids if market analysis indicates a shift in consumer preferences.

Market analysis, on the other hand, provides the data-driven backbone to your inventory decisions. By analyzing local buying trends, economic factors, and even competitor stock levels, you can refine your inventory to meet specific market needs. This isn't a one-time effort but an ongoing process, requiring you to adapt your strategy to market shifts and new model releases.

Balancing these elements isn't just about having cars on your lot; it's about having the right cars that turn browsers into buyers.

Equipment and Signage

Equipping your Hyundai dealership extends beyond the showroom's sleek design, requiring an intricate balance of high-tech service tools and visually appealing signage to create an environment that improves customer experience and operational efficiency. You'll need to invest in state-of-the-art equipment for vehicle service and maintenance, as well as eye-catching signage that aligns with Hyundai's branding guidelines. This investment not only improves operational effectiveness but also plays a critical role in your dealership's marketing strategy.

Category Cost Range Purpose
Diagnostic Equipment $20,000 – $50,000 For accurate vehicle assessments and repairs
Signage $10,000 – $30,000 To strengthen brand visibility and dealership identification
Digital Displays $15,000 – $25,000 To support digital marketing efforts and promotions

Investing in high-quality staff uniforms reinforces a professional image, ensuring that your team looks as polished as the showroom they work in. This, combined with a strong digital marketing strategy, not only attracts potential buyers but also fosters trust and loyalty among your clientele. The initial outlay for equipment and signage might seem steep, but it's necessary for setting a strong foundation for your dealership's success.

Operating Capital Requirements

financial planning for business

Having addressed the initial investments in equipment and signage, you'll now need to focus on the operating capital requirements to guarantee your Hyundai dealership runs smoothly and can sustain its day-to-day activities. Operating capital is the lifeblood of your dealership, ensuring you have the financial flexibility to cover inventory, staff salaries, utility bills, and unforeseen expenses without straining your business.

A significant portion of your operating capital should be allocated to staff training. The automotive industry is rapidly evolving, and a well-trained team is your dealership's backbone. Investing in thorough training programs guarantees your staff is knowledgeable about the latest Hyundai models, technologies, and sales techniques, directly impacting customer satisfaction and sales success.

Moreover, strong marketing strategies are essential in driving traffic to your dealership. You'll need to earmark a substantial part of your operating capital for both traditional and digital marketing campaigns. Data-driven marketing strategies, which leverage customer data to target potential buyers effectively, can markedly improve your dealership's visibility and sales figures. Remember, the goal is to establish a strong brand presence in your local market, necessitating a well-thought-out allocation of funds towards marketing efforts.

Conclusion

Opening a Hyundai dealership is a significant financial undertaking. You'll need to budget for the initial franchise fee, often in the hundreds of thousands, alongside substantial investments in real estate, construction, and inventory, which can run into millions.

Furthermore, equipping your dealership with the necessary tools, technology, and signage, plus ensuring you have adequate operating capital, further escalates costs. Analyzing industry data, the total investment can range between $1 million to over $5 million, depending on location and scale.

How to Check Transmission Fluid Toyota Corolla?


How to Check Transmission Fluid Toyota Corolla? To check the transmission fluid in your Toyota Corolla, follow these steps:

  • Locate the dipstick under the hood.
  • Pull out the dipstick.
  • Wipe it clean.
  • Re-insert the dipstick fully.
  • Remove the dipstick again to check the fluid level and condition.

Regularly checking and maintaining the transmission fluid is vital for your car’s health and performance.

Safety Precautions

beach safety is important

Before checking the transmission fluid in a Toyota Corolla, make sure the car is parked on a flat surface and the engine isn’t hot to avoid accidents. Wear gloves and eyewear for protection against chemicals.

Use a clean rag or paper towels to wipe off the dipstick to prevent dirt from getting into the transmission. Make sure any tools or containers used are clean to avoid introducing dirt into the transmission fluid.

This helps maintain the car’s health without causing new issues.

Identifying the Dipstick

To check your Toyota Corolla’s transmission fluid, locate the dipstick under the hood. Make sure your car is on flat ground and the engine is cool. Open the hood by pulling the release lever under the dashboard on the driver’s side. Secure the hood with the support rod.

Look for the brightly colored dipstick, usually yellow or red, near the front of the engine compartment, close to the radiator or battery. This can vary by model year. The dipstick is in a tube that leads to the transmission fluid reservoir.

Don’t mix it up with the oil dipstick, which is also under the hood, usually with a yellow or orange handle, but closer to the engine block. If unsure, refer to your owner’s manual for a diagram to correctly identify the transmission fluid dipstick.

Checking Fluid Level

fluid level inspection process

To check the transmission fluid level in your Toyota Corolla, follow these steps. Park your car on a flat surface and warm up the engine for a few minutes. This helps get an accurate fluid level reading.

First, find the transmission fluid dipstick and pull it out. Clean it with a cloth, reinsert it completely, and then remove it again to see the fluid level. The fluid should be between the ‘Full’ and ‘Add’ marks. If it’s below ‘Add’, add more fluid but be careful not to overfill to avoid problems.

Remember these key points:

  • Check the fluid when the engine is warm for accurate levels.
  • Make sure your car is parked on flat ground.
  • Regularly check the transmission fluid to prevent issues.

Interpreting Fluid Condition

Checking your Toyota Corolla’s transmission fluid condition is important for its performance and lifespan. After checking the level, you need to analyze the fluid’s color and smell.

Here’s a simple guide:

Color Smell Condition
Bright Red Sweet or None Good
Brownish Slightly Burnt Fair
Dark Brown/Black Burnt Poor

Bright red and sweet or no smell means the transmission is healthy. Brownish and slightly burnt smell indicates it’s okay but getting old, and you should think about changing it soon.

Dark brown or black with a burnt smell means the fluid is bad, possibly from overheating, and needs quick action to avoid damage.

Milky or cloudy fluid could mean coolant is mixing with the transmission fluid, which is a serious issue needing professional help.

Adding or Replacing Fluid

To change your Toyota Corolla’s transmission fluid, follow these steps. First, find the transmission fluid dipstick and filler cap under the hood. Check your car’s manual if you need help. When adding fluid, do it slowly to avoid putting in too much.

Here are the steps to do it right:

  • Use the right fluid: Make sure to use the type of fluid recommended in your Corolla’s manual. Using the wrong fluid can damage your transmission.
  • Check the level often: After adding some fluid, use the dipstick to check the level. It’s better to add a little at a time and check often.
  • Warm up your car: Start your car and let it run for a few minutes before checking the fluid level again. This helps you get a more accurate reading.

Conclusion

To finish, always make sure you’re safe and park on a flat spot before you check the transmission fluid in your Toyota Corolla.

Start by finding the dipstick to see how much fluid you have and if it’s still good. The color and smell of the fluid can tell you a lot about its condition.

If you need more fluid or have to change it, be sure to use the right kind.

Keeping an eye on and taking care of the transmission fluid is really important for keeping your car running well for a long time.

Door Latch Problems


Door latch problems can often be resolved through DIY fixes or by consulting a professional.

Door latch problems are common issues that many homeowners encounter. These problems can range from a misaligned latch to a broken mechanism. By following some simple DIY steps, such as tightening screws or lubricating the latch, you may be able to fix the issue yourself. However, if the problem persists or if you are unsure about how to proceed, it is always best to consult a professional locksmith or handyman. They have the expertise and tools needed to properly diagnose and repair door latch issues, ensuring that your door functions smoothly and securely. Remember that addressing latch problems promptly can help prevent more serious issues down the line.

Identifying Common Issues

identifying and addressing problems

Recognizing common issues with door latches is important for timely and effective troubleshooting. Among the most prevalent problems you'll encounter are latch jamming and broken springs, each requiring a detailed approach for resolution.

Latch jamming often occurs when the mechanism that allows the latch to retract and extend becomes obstructed or fails. This malfunction can stem from a buildup of dirt and debris, or it could be because of internal wear and tear on the latch's components. You'll notice it when the door latch struggles to catch or, conversely, fails to release.

Broken springs, on the other hand, affect the tension and functionality of the latch. The spring inside the latch mechanism is vital for creating the force necessary for the latch to engage and disengage correctly. When this spring breaks or weakens, the door latch may not fully return to its intended position, leading to a door that won't close or latch properly.

Addressing these issues requires a careful examination of the door latch mechanism. Identifying if you're dealing with latch jamming or broken springs is the initial step towards implementing a precise and effective solution, ensuring the door operates smoothly once again.

Misalignment Solutions

When addressing door latch misalignment, it's critical to initially assess the alignment of the door and frame to identify the root cause of the issue. Misalignment can stem from a variety of factors, including seasonal adjustments or foundational shifts affecting the door frame. It's essential to understand that even minor misalignments can prevent a door latch from functioning correctly, leading to security concerns or damage to the door mechanism over time.

One effective solution involves lubrication techniques. Properly applying a suitable lubricant to the latch mechanism can alleviate sticking issues, allowing for smoother operation. This is particularly beneficial in cases where the misalignment is slight and doesn't warrant more invasive adjustments. However, it's crucial to select a lubricant that's compatible with the door's material to avoid any potential damage.

Seasonal adjustments are another critical factor to consider. Temperature and humidity fluctuations can cause wood doors and frames to expand or contract, leading to misalignment. In such cases, adjusting the hinges to realign the door with the frame can provide a straightforward solution. This might involve tightening or loosening the hinge screws or installing additional shims to achieve the desired alignment. By addressing these factors, you can ensure the door latch operates smoothly and securely.

Wear and Tear Fixes

maintaining household items condition

Beyond addressing misalignment, it's vital to tackle wear and tear issues that can impair a door latch's functionality over time. Regular maintenance, focusing on lubrication strategies and seasonal adjustments, plays a pivotal role in extending the lifespan of your door hardware.

Lubrication, a key preventive measure, guarantees smooth operation and minimizes the friction that accelerates wear. You'll want to apply a high-quality lubricant specifically designed for door mechanisms. Avoid common mistakes, such as using WD-40 or cooking oils, as these can attract dirt or become sticky, worsening the problem. Instead, opt for a silicone-based lubricant or graphite powder for the best results.

Seasonal adjustments are equally vital. Temperature and humidity changes can cause door materials to expand or contract, affecting latch alignment and function. Inspect your doors as seasons change, adjusting strike plates and hinge screws as necessary to maintain proper alignment and prevent undue stress on the latch mechanism.

DIY Repair Tips

Before diving into professional repair services, it's worthwhile to investigate some DIY repair tips that can effectively address common door latch problems. First and foremost, proper tool selection plays a critical role in the success of your repair efforts. Make sure you have a set of screwdrivers, a pair of pliers, and perhaps a lubricant spray or graphite powder at your disposal. These tools will assist you in disassembling and reassembling the door latch mechanism with precision.

Lubrication techniques are also vital in resolving sticking or squeaky door latches. A dry lubricant, such as graphite powder, is highly recommended for internal latch mechanisms, as it won't attract dirt and grime over time. For the application, gently dust the powder into the keyhole and along the moving parts of the latch. If you're using a spray lubricant, aim the nozzle directly at the problematic areas, making sure there's minimal overspray onto the door's surface.

Professional Help Options

help for mental health

If your door latch issues persist after attempting DIY repairs, seeking professional assistance becomes an necessary step. Engaging with certified locksmith services ensures a thorough examination and resolution of the problem. A skilled locksmith can diagnose complex issues beyond the reach of typical DIY methods, offering solutions that restore the functionality and security of your door latch.

When selecting locksmith services, it's important to validate their credentials and experience. Look for professionals who specialize in residential security systems, as they're more likely to understand the subtleties of different door latch mechanisms. They can also advise on upgrades or replacements if your current system is outdated or compromised.

Moreover, consider the warranty claims process for your door latch. If your product is still under warranty, the manufacturer may offer free repairs or replacements. It's vital to have your documentation ready and understand the terms of your warranty. Contacting the manufacturer for warranty claims can sometimes solve the problem without incurring additional costs.

Conclusion

In summary, addressing door latch issues involves a systematic approach. Initially, identify the root cause, whether it's misalignment, wear and tear, or another factor.

For misalignment, realign the latch with precision. For wear, replace or upgrade components. When opting for DIY repairs, make sure you're equipped with the right tools and knowledge.

However, if the problem persists or you're unsure, seeking professional assistance is advisable to guarantee a secure and functional door latch, safeguarding your property and peace of mind.

Hyundai Door Won't Close


Hyundai door won't close troubleshooting:

Imagine you're late for an appointment and rush to your Hyundai, but the door refuses to close, bouncing back open. This frustrating issue can have several causes, from debris in the door latch to mechanical failures.

To potentially resolve this without ruining your day, follow initial troubleshooting steps. Discover how to fix your Hyundai's stubborn door and ensure it doesn't disrupt your schedule again.

Identifying the Problem

solving the root cause

To accurately identify the issue with your Hyundai's door not closing, you'll need to initially inspect the door's alignment, latching mechanism, and surrounding seals for signs of wear or damage. Proper door alignment is important for seamless operation. If the door appears misaligned, it could be because of worn hinges or an accident that slightly shifted the door's position. You'll want to check if the door sits flush with the car's body when closed. Any gap or unevenness suggests alignment issues.

Next, inspect the weather stripping around the door. This rubber seal plays an important role in keeping elements out and ensuring the door closes tightly. Over time, weather stripping can become hard, cracked, or even start to disintegrate, compromising the door's ability to close. Look for any noticeable breaks or gaps in the seal that could prevent the door from shutting correctly.

Quick Fixes at Home

After identifying potential issues with your Hyundai's door alignment or weather stripping, you can attempt several straightforward repairs at home to resolve the problem. Focusing on door alignment and lubrication needs can often rectify the issue without needing professional intervention.

Step Action Purpose
1 Check door alignment Misalignment can prevent proper closing
2 Clean and lubricate hinges Reduces friction and aids in smoother operation
3 Adjust strike plate Ensures the latch engages correctly
4 Inspect and replace weather stripping if necessary Seals the door properly and corrects alignment issues

For door alignment, you'll want to look at how the door sits when closed. If it's visibly off, adjusting the hinges might be necessary. This requires a basic toolset and some patience, as minor adjustments can have a significant impact.

Lubrication needs are often overlooked but are important for door functionality. Using a suitable lubricant, apply it to the door's hinges and latch mechanism. This not only makes the door easier to operate but can also solve sticking issues that prevent it from closing.

These steps offer a practical starting point for at-home repairs, addressing common issues without the need for professional repair solutions.

Professional Repair Solutions

precise repair service provided

If your Hyundai's door issues persist nevertheless at-home fixes, seeking professional repair solutions becomes a necessary step. A technician will initially examine the problem in detail, focusing on the mechanics and structure of the door itself. They'll assess the door alignment meticulously, making sure it matches the manufacturer's specifications. Misalignment can occur from everyday use or after a collision. If the door isn't properly aligned, it won't close correctly, leading to potential security and safety issues. The professional will use specialized tools to adjust the door hinges and frame, making sure a snug, correct fit.

Further, if the door's latch mechanism is damaged or worn out, latch replacement becomes inevitable. This component is essential for the door's operation, locking it into place once closed. A technician will remove the faulty latch, inspect the surrounding area for additional damage, and install a new, compatible latch. They'll test the door multiple times to make certain it closes and locks smoothly, without any hitches.

Opting for professional repair solutions ensures a thorough, lasting fix, addressing both door alignment and latch issues with precision and expertise.

Preventative Maintenance Tips

Having explored professional repair solutions for persistent Hyundai door issues, it's also important to contemplate preventative maintenance measures to avoid these problems in the future.

First, always check your Hyundai's warranty coverage. Extensive warranties often include periodic maintenance that could prevent door malfunctions. Regularly scheduled visits to an authorized service center can identify potential issues before they escalate, making sure that components like door latches and seals are in best condition.

Seasonal changes greatly impact door mechanisms. During colder months, lubricate the door's moving parts to prevent freezing and guarantee smooth operation. Conversely, in warmer seasons, inspect seals and weather stripping for wear and tear that could allow moisture and debris to affect the door's functionality. Keeping these components clean and intact maintains the integrity of your vehicle's doors.

Moreover, be proactive in inspecting the door frame and hinges for signs of rust or damage. A minor misalignment can escalate into a door that won't close if not addressed promptly. Utilizing a silicone-based lubricant can protect these parts from corrosion and wear, enhancing their longevity.

Safety Considerations

important safety measures needed

When addressing the safety implications of a Hyundai door that won't close, it's essential to contemplate the potential risks to vehicle occupants and pedestrians. An improperly secured door due to misaligned door alignment or a faulty latch mechanism can greatly compromise safety.

Risk Factor Explanation
Ejection Risk If the door suddenly opens during a collision, you're at a higher risk of being ejected from the vehicle.
Occupant Security A door that doesn't close properly compromises the structural integrity of the cabin, putting you at greater risk in an accident.
Pedestrian Safety A door that swings open unexpectedly can strike a pedestrian, especially in crowded urban areas.
Compromised Locks Faulty latch mechanisms may prevent doors from locking, increasing the risk of theft or unauthorized entry.

Ensuring proper door alignment and a functioning latch mechanism are essential for your safety and the security of the vehicle. Regular checks and maintenance are essential to identify and rectify these issues promptly. Ignoring these concerns not only puts you at risk but endangers those around you. Always consult a professional if you're unsure about the condition of your vehicle's doors.

Conclusion

To sum up, if your Hyundai's door won't close, start by identifying the root cause through a detailed inspection. You can attempt quick fixes like realigning the latch or lubricating hinges.

However, for complex issues, professional repair is recommended to guarantee safety and functionality. Regular preventative maintenance, such as checking door mechanisms and seals, can avert future problems.

Always prioritize safety by addressing door issues immediately to avoid potential hazards while driving.