Recent Posts

How to Reset Oil Light Toyota Sienna


To reset the oil light on a Toyota Sienna, turn the ignition to the “On” position without starting the engine. Next, press and hold the odometer trip reset button until the light resets.

If you own a Toyota Sienna and are unsure about how to reset the oil light, don’t worry. It’s a simple process that you can easily do yourself. Regular oil changes are essential for maintaining the performance and longevity of your vehicle, and resetting the oil light after an oil change is crucial to ensure accurate oil change intervals.

In this guide, we will walk you through the steps to reset the oil light on your Toyota Sienna so that you can drive with peace of mind knowing that your vehicle is properly maintained.

How to Reset Oil Light Toyota Sienna

Credit: oilreset.com

Understanding The Toyota Sienna Oil Light

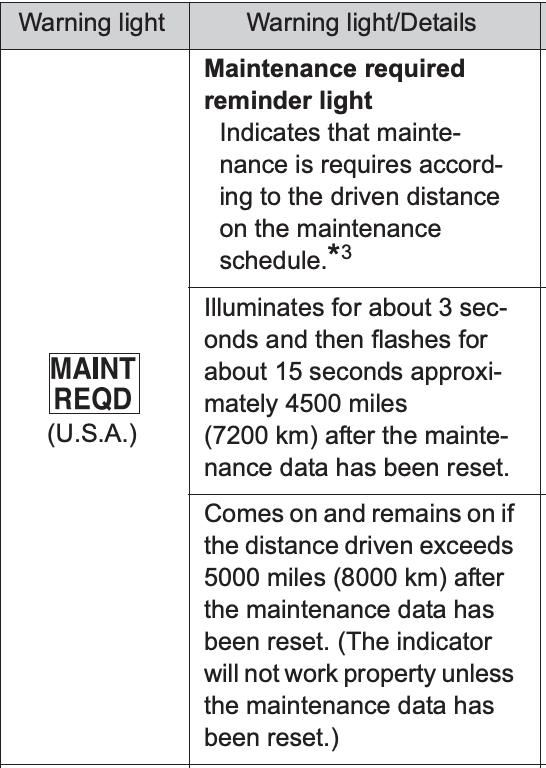
Toyota Sienna is a popular choice for families, known for its reliability and high performance. Understanding the Toyota Sienna Oil Light is crucial for maintaining the longevity of the vehicle. This indicator light serves as a vital component in notifying drivers about the condition of the engine oil, ensuring that the vehicle runs smoothly and efficiently. Familiarizing yourself with the function and activation indicators of the oil light is essential for every Toyota Sienna owner.

Function Of The Oil Light

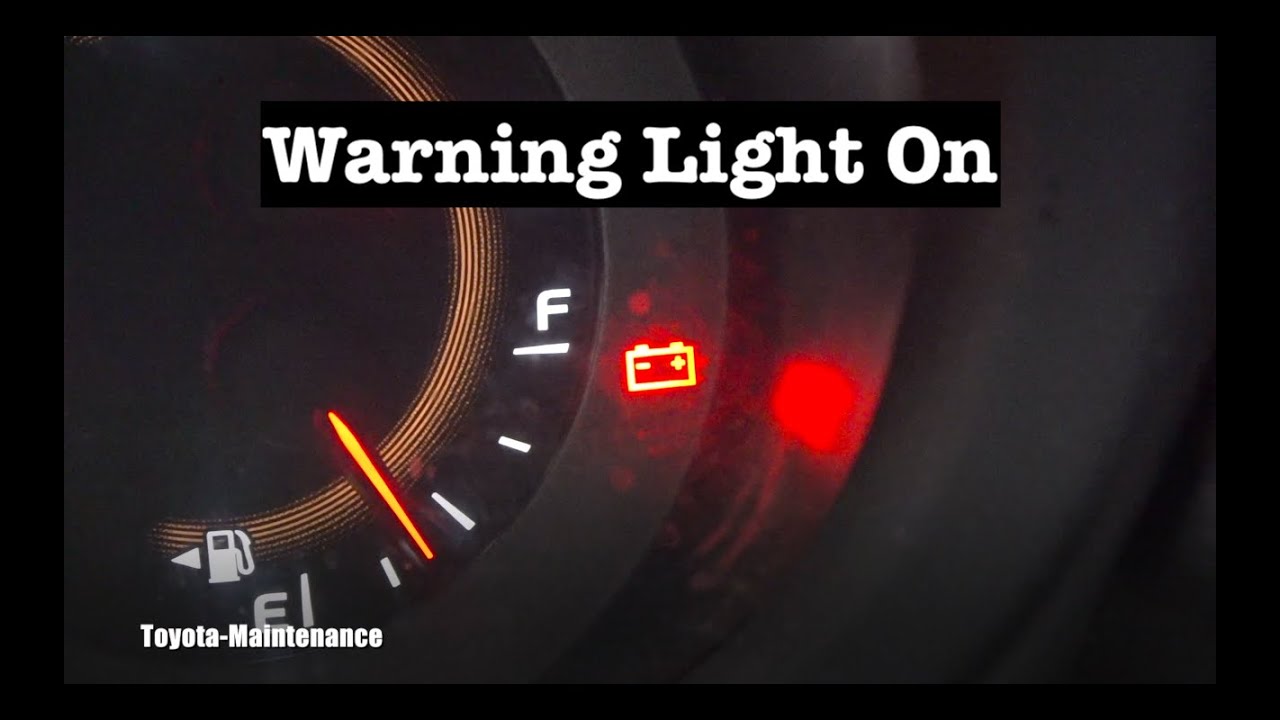
The oil light in a Toyota Sienna serves as a warning system to alert drivers about the oil pressure in the engine. This indicator light is designed to activate when the oil pressure drops below a safe level. When the oil light illuminates, it signals that the engine oil is reaching a critically low level or that the oil pressure is insufficient, posing a potential threat to the engine’s well-being. Ignoring this warning light can lead to severe and costly damage to the engine.

Indications Of Oil Light Activation

The activation of the oil light in a Toyota Sienna can occur due to various reasons, such as low oil level, oil pump failure, or a clogged oil filter. When the oil light comes on, it is crucial to promptly check the engine oil level and quality. Additionally, if the oil light remains illuminated even after ensuring the oil level is adequate, it might indicate a more complex issue that requires professional inspection and maintenance.

How to Reset Oil Light Toyota Sienna

Credit: www.youtube.com

Steps To Reset Oil Light

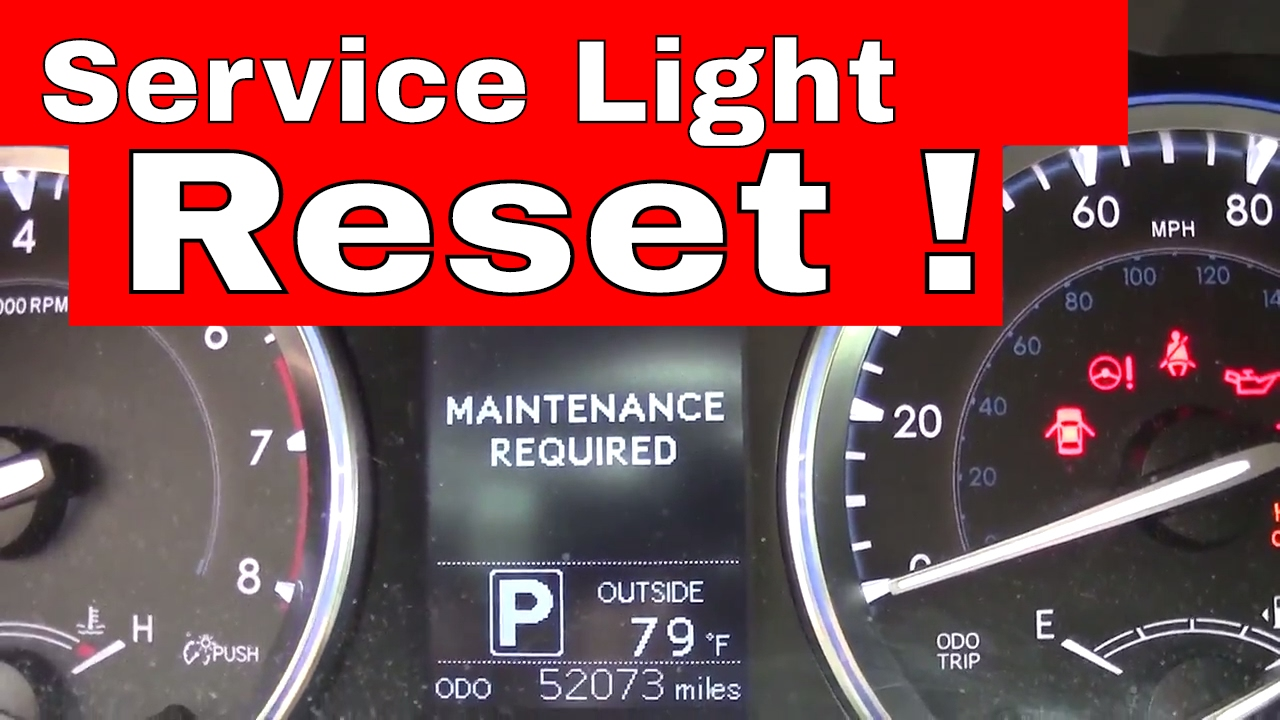
The oil light in your Toyota Sienna indicates when it’s time to change the oil, ensuring your vehicle stays in top condition. Knowing how to reset the oil light after an oil change is essential to maintain the accuracy of the reminder. Follow these simple steps to reset the oil light on your Toyota Sienna.

Step 1: Locate The Reset Button

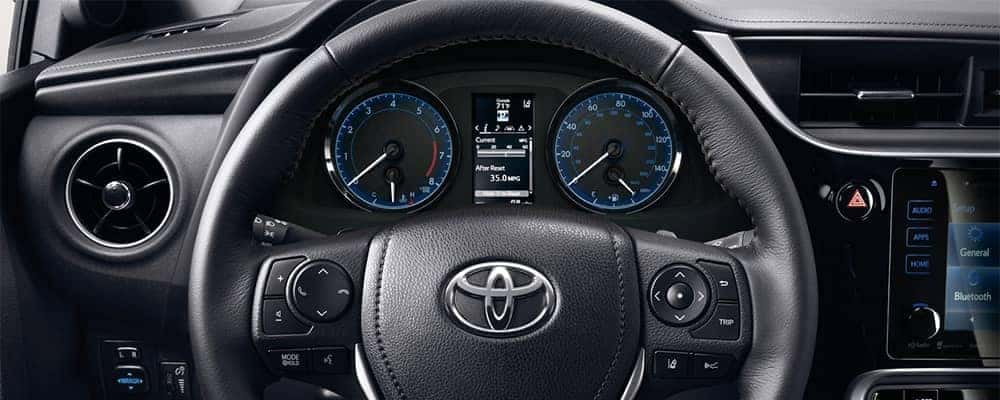
First, you need to locate the reset button in your Toyota Sienna. Typically, it’s located on the dashboard, near the speedometer or tachometer. Consult your owner’s manual if you’re having difficulty finding it.

Step 2: Turn The Ignition On

Next, insert the key into the ignition and turn it to the “on” position. Ensure the engine is off, and the car is in park before continuing.

Step 3: Press And Hold Reset Button

Once the ignition is on, press and hold the reset button until the oil light on the dashboard begins to flash. This usually takes a few seconds, so be patient and keep holding the button.

Step 4: Release The Button

Finally, release the reset button once the oil light stops flashing. This indicates that the oil light has been successfully reset. You may want to start the engine to verify that the oil light has turned off.

Common Issues And Troubleshooting

Learn how to reset the oil light on your Toyota Sienna with these troubleshooting tips. Follow our step-by-step guide to easily resolve common issues and ensure smooth functioning of your vehicle.

Common Issues and troubleshooting are integral when dealing with resetting the oil light on a Toyota Sienna. Being aware of possible reasons the oil light may not reset and the troubleshooting steps involved can help you efficiently address the issue. Below we delve into these aspects to help you navigate through resetting the oil light on your Toyota Sienna.

`

Possible Reasons Oil Light Doesn’t Reset

1. Incorrect Reset Procedure: Performing the reset steps inaccurately may lead to the oil light not resetting.

2. Faulty Oil Sensor: A malfunctioning oil sensor can prevent the oil light from resetting despite following the correct steps.

3. Electrical Issues: Issues with the electrical system of the vehicle can also hinder the oil light reset process.

Troubleshooting Steps

1. Follow Correct Reset Procedure: Ensure you are following the manufacturer’s recommended steps precisely to reset the oil light.

2. Check Oil Level: Verify that the oil level in your vehicle meets the recommended levels as low oil can trigger the oil light to stay on.

3. Inspect Oil Sensor: If the oil sensor is suspected to be faulty, consider having it checked and replaced if necessary.

4. Address Electrical Problems: If there are electrical issues, it is advisable to consult a professional mechanic to diagnose and fix the problem.

By understanding these common issues and following the troubleshooting steps diligently, you can effectively reset the oil light on your Toyota Sienna. Remember to prioritize regular maintenance to prevent such issues in the future.

Maintenance Tips For Toyota Sienna Owners

As a Toyota Sienna owner, it’s important to prioritize regular maintenance to keep your vehicle running smoothly. One crucial aspect of this is taking care of your engine oil. By following these maintenance tips, you can ensure that your Toyota Sienna is always in optimal condition.

Regular Oil Changes

Regular oil changes are essential to extend the lifespan of your Toyota Sienna and keep it performing at its best. Over time, engine oil can become contaminated with debris and lose its lubricating properties. It is recommended to change your oil every 5,000 miles or every six months, whichever comes first. By adhering to this schedule, you can prevent engine damage and ensure that your Sienna operates smoothly.

Monitoring Oil Levels

It is crucial to regularly check the oil levels in your Toyota Sienna to prevent any damage to the engine. Insufficient oil levels can cause excessive friction and overheating, leading to engine failure. To monitor the oil levels, follow these simple steps:

  1. Park your Sienna on a flat surface and let the engine cool down.
  2. Locate the oil dipstick, usually located near the front of the engine.
  3. Remove the dipstick, wipe it clean, and re-insert it fully into the dipstick tube.
  4. Remove the dipstick again and check the oil level. It should be between the minimum and maximum marks on the dipstick. If it’s low, add the recommended oil until it reaches the proper level.
  5. Don’t forget to securely reinsert the dipstick once you are finished.

By regularly monitoring and maintaining the proper oil levels, you can prevent costly repairs and keep your Toyota Sienna running smoothly for years to come.

How to Reset Oil Light Toyota Sienna

Credit: www.jdpower.com

Frequently Asked Questions Of How To Reset Oil Light Toyota Sienna

How Do I Reset The Oil Light On Toyota Sienna?

To reset the oil light on your Toyota Sienna, simply follow these steps:
1. Turn the ignition key to the “ON” position, but do not start the engine. 2. Press and hold the trip meter reset button until the trip meter displays “000000”. 3. Turn the ignition key to the “OFF” position and then back to the “ON” position. 4. The oil light should now be reset. If not, repeat the process or consult your owner’s manual.

What Does It Mean When The Oil Light Comes On?

When the oil light comes on in your Toyota Sienna, it typically means there is a problem with the engine oil level or pressure. It’s important to check the oil level and add more if necessary, and also have your vehicle inspected by a qualified mechanic to determine the cause of the issue.

Why Is It Important To Reset The Oil Light After An Oil Change?

Resetting the oil light after an oil change is important because it allows the vehicle’s computer system to accurately monitor the engine oil life and provide accurate maintenance reminders. If the oil light is not reset, you may receive unnecessary or incorrect warnings about your oil’s condition, which can lead to unnecessary oil changes or potential engine damage.

Conclusion

In just a few simple steps, you can easily reset the oil light on your Toyota Sienna. Remember to consult your owner’s manual for specific instructions. Keeping your vehicle well-maintained is crucial for optimal performance. Stay safe on the road by staying updated on routine maintenance tasks like oil light resets.

How to Reset Maintenance Light on Toyota 4Runner 2007


To reset the maintenance light on a 2007 Toyota 4Runner, turn the key to the “on” position without starting the engine and press the odometer button until the maintenance light resets. The 2007 Toyota 4Runner is a reliable and practical SUV known for its off-road capabilities and durability.

However, like any vehicle, regular maintenance is essential to keep it running smoothly. One common task many 4Runner owners may encounter is resetting the maintenance light after completing routine service. Knowing how to perform this simple task can save time and money by preventing unnecessary trips to the dealership or mechanic.

We will discuss the step-by-step process to reset the maintenance light on a 2007 Toyota 4Runner, allowing you to take control of your vehicle’s maintenance schedule.

Locating The Maintenance Light

When it comes to resetting the maintenance light on a Toyota 4Runner 2007, the first step is to locate the maintenance light. The maintenance light is a helpful indicator that reminds the driver when the vehicle is due for a scheduled maintenance checkup. Understanding where to find this light is crucial for effectively resetting it.

Dashboard Display

The dashboard display of the Toyota 4Runner 2007 is equipped with a variety of warning lights and indicators to keep the driver informed about the vehicle’s status. Among these, you will find the maintenance light, which is a small illuminated symbol that signals when maintenance is required.

Understanding The Symbol

Before proceeding with the reset, it’s important to understand the maintenance light symbol. This symbol resembles an exclamation mark in a circle, often accompanied by the word “MAINT” or “MAINT REQD” nearby. Recognizing this symbol will ensure that you are resetting the correct indicator.

How to Reset Maintenance Light on Toyota 4Runner 2007

Credit: www.dailymotion.com

Resetting The Maintenance Light

How to Reset Maintenance Light on Toyota 4Runner 2007

If you own a Toyota 4Runner 2007, you’ve likely encountered the maintenance light, which can be a source of confusion for many drivers. Fortunately, resetting this light is a relatively simple process that can be done in just a few minutes. Here, we will provide you with step-by-step instructions on how to reset the maintenance light on your Toyota 4Runner 2007, as well as some alternative methods to consider.

Step-by-step Instructions

  1. Start by ensuring that your 4Runner’s odometer is set to its regular reading display.
  2. Turn the ignition switch to the “off” position.
  3. Now, press and hold the trip meter reset button while turning the ignition switch to the “on” position.
  4. Continue holding the trip meter reset button until the maintenance light turns off.
  5. Once the maintenance light has turned off, release the reset button. Your maintenance light should now be reset.

Alternative Methods

If the above method doesn’t work for some reason, an alternative method you can try is disconnecting and reconnecting the car battery. However, it’s important to note that this method may also reset other settings in your vehicle, so it’s best to stick to the standard procedure if possible.

Preventative Maintenance Tips

Regular Servicing Importance

Regular servicing ensures your Toyota 4Runner operates smoothly.

Routine maintenance helps avoid major issues.

Scheduled check-ups preserve vehicle longevity.

Keeping Track Of Maintenance

  • Maintain records for future reference.
  • Use a notebook or digital tool for tracking.
  • Follow maintenance schedule as recommended.
How to Reset Maintenance Light on Toyota 4Runner 2007

Credit: m.youtube.com

How to Reset Maintenance Light on Toyota 4Runner 2007

Credit: carsandbids.com

Frequently Asked Questions On How To Reset Maintenance Light On Toyota 4runner 2007

How Do I Reset The Maintenance Light On My Toyota 4runner 2007?

To reset the maintenance light on your Toyota 4Runner 2007, follow these simple steps:
1. Start with the ignition off and your vehicle parked. 2. Press and hold the trip meter reset knob. 3. While holding the knob, turn your ignition key to the “on” position. 4. Continue holding the knob until the maintenance light starts flashing and turns off. 5. Once the light goes off, release the knob and you’re done! Your maintenance light has been successfully reset.

Why Is My Maintenance Light On In My Toyota 4runner 2007?

If the maintenance light is on in your Toyota 4Runner 2007, it indicates that your vehicle is due for routine maintenance. This light is a reminder to schedule an appointment with your Toyota dealer or trusted mechanic to ensure that your vehicle is in optimal condition and to prevent any potential issues.

What Is The Purpose Of The Maintenance Light On My Toyota 4runner 2007?

The maintenance light on your Toyota 4Runner 2007 serves as a reminder for you to schedule regular maintenance and servicing for your vehicle. It helps you stay on top of necessary maintenance tasks, such as oil changes, filter replacements, and inspections, ensuring that your vehicle runs smoothly and efficiently for a longer time.

Following the maintenance schedule provided by Toyota will help prevent any major repairs in the future and may even extend the life of your 4Runner.

Conclusion

Resetting the maintenance light on your Toyota 4Runner 2007 is a simple task that can save you time and money. By following the steps outlined in this guide, you can easily reset the light yourself without the need for a mechanic.

Stay proactive in maintaining your vehicle to ensure its longevity and optimal performance. Remember, regular maintenance is key to a smooth driving experience.


How to Reset Maintenance Light on 2021 Toyota Tacoma


To reset the maintenance light on a 2021 Toyota Tacoma, turn the key to the “On” position without starting the engine, press the trip meter button until your odometer reading appears, turn the key to the “Off” position, and then turn it back to the “On” position. Lastly, release the trip meter button.

If you’re a proud owner of a 2021 Toyota Tacoma, knowing how to reset the maintenance light is essential for keeping your vehicle running smoothly. Over time, the maintenance light may illuminate to indicate that it’s time for an oil change or other routine service.

Learning how to reset the light can save you time and money by allowing you to perform this simple task at home. In this guide, we’ll walk you through the process of resetting the maintenance light on your 2021 Toyota Tacoma, ensuring that you can keep your truck in top condition without unnecessary trips to the dealership or mechanic.

How to Reset Maintenance Light on 2021 Toyota Tacoma

Credit: www.jdpower.com

How to Reset Maintenance Light on 2021 Toyota Tacoma

Credit: www.youtube.com

Frequently Asked Questions On How To Reset Maintenance Light On 2021 Toyota Tacoma

How Often Should I Reset The Maintenance Light On My 2021 Toyota Tacoma?

You should reset the maintenance light on your 2021 Toyota Tacoma after each scheduled maintenance service is completed.

What Happens If I Don’t Reset The Maintenance Light On My 2021 Toyota Tacoma?

If you don’t reset the maintenance light on your 2021 Toyota Tacoma, it will continue to remind you to perform maintenance even if it has already been done.

How Do I Reset The Maintenance Light On My 2021 Toyota Tacoma?

To reset the maintenance light on your 2021 Toyota Tacoma, simply turn the ignition key to the “ON” position without starting the engine, and press and hold the Trip Meter Reset button until the maintenance light turns off.

Conclusion

Maintaining your 2021 Toyota Tacoma is essential for its longevity and performance. By following the simple steps outlined in this post, you can easily reset the maintenance light without any hassle. Stay on top of your vehicle’s maintenance to ensure a smooth driving experience.

Keep your Tacoma running smoothly!


How to Reset Battery Light on Toyota Highlander


To reset the battery light on a Toyota Highlander, simply disconnect the negative terminal of the battery, wait for a few minutes, then reconnect it. This will reset the light and clear any error codes.

If you drive a Toyota Highlander, you may at some point encounter the battery light turning on. This can be a sign of a minor issue or a major electrical problem. We will discuss how to reset the battery light on a Toyota Highlander.

We will also explore the possible reasons for the light coming on and what to do if it continues to illuminate. So, if you’re wondering about resetting the battery light on your Toyota Highlander, read on for a step-by-step guide.

Understanding The Battery Light

Understanding the Battery Light:

What Does The Battery Light Indicate?

The battery light in your Toyota Highlander signals potential issues with the electrical system or charging system.

Importance Of Addressing The Battery Light

Ignoring the battery light can lead to car breakdowns and battery failure, impacting the safety of your vehicle.

How to Reset Battery Light on Toyota Highlander

Credit: m.youtube.com

Troubleshooting The Battery Light

` If the battery light on your Toyota Highlander dashboard has lit up, it could be a sign of a potential problem with the vehicle’s charging system. Troubleshooting the battery light can help identify the underlying issue and resolve it effectively. Here are some steps to troubleshoot the battery light on your Toyota Highlander. `

` Check The Battery Connections `

` Start by checking the battery connections for any signs of corrosion or loose connections. Ensure that the terminals are securely connected to the battery and there is no build-up of corrosion that could disrupt the flow of electricity. `

` Inspect The Battery For Any Damages `

` Thoroughly inspect the battery for any visible signs of damage such as cracks, leaks, or bulges. Any of these can indicate a faulty battery that may need to be replaced. `

` Test The Battery Voltage `

` Using a multimeter, conduct a voltage test on the battery to ensure it is delivering the appropriate voltage. A healthy battery should typically read around 12.6 to 12.8 volts when fully charged. `

` Examine The Alternator `

` Finally, examine the alternator to ensure that it is functioning properly and charging the battery as it should. If the alternator is not working correctly, it could lead to the battery light turning on. `

Resetting The Battery Light

Resetting the battery light on your Toyota Highlander is a simple procedure that can help clear a potential electrical issue and ensure your vehicle’s safety. If the battery light remains illuminated, it may indicate a problem with the charging system, and resetting it can help troubleshoot the issue.

Disconnect The Negative Terminal Of The Battery

To begin the process of resetting the battery light, carefully disconnect the negative terminal of the battery using a suitable wrench or socket. Be sure to take precautions to avoid short-circuiting the battery or causing damage to the vehicle’s electrical system.

Wait For 10-15 Minutes

After disconnecting the negative terminal, allow the battery and vehicle’s electrical system to fully discharge residual power. This waiting period of 10-15 minutes ensures that any lingering electrical charge is dissipated, allowing for a clean reset of the battery light system.

Reconnect The Negative Terminal

Once the waiting period has elapsed, carefully reconnect the negative terminal of the battery to its original position. Ensure that the terminal is securely fastened, and there is no play or looseness to prevent any future issues related to poor connections.

Start The Vehicle And Check If The Battery Light Is Reset

Once the negative terminal is reconnected, start the vehicle and observe the dashboard for the battery light indicator. If the reset was successful, the light should be off, indicating that the electrical issue has been resolved. If the light remains illuminated, seek professional assistance to diagnose and resolve any underlying problems.

How to Reset Battery Light on Toyota Highlander

Credit: www.sterlingmccalltoyota.com

Seeking Professional Help

When should you consult a mechanic?

1. If the battery light keeps returning after resetting, it indicates a deeper issue.

2. Noises or strange smells while driving also warrant a mechanic’s inspection.

1. Professional diagnostics can uncover complex underlying issues accurately.

2. Inexperienced attempts at repair may exacerbate the problem.


Maintaining A Healthy Battery

Proper maintenance is essential to ensure the longevity and performance of your Toyota Highlander’s battery. By following these simple steps, you can keep your battery in great shape, avoid unexpected breakdowns, and reset the battery light when necessary.

Regularly Check The Battery

Regularly checking your battery is a simple yet effective way to maintain its health. Every few months, inspect the battery for any signs of damage, such as leaks or cracks. Ensure that the connections are tight and free of corrosion. If you notice any issues, replace the battery immediately.

Clean The Battery Terminals

Corrosion on the battery terminals can hinder the flow of electricity and lead to battery problems. Regularly cleaning the terminals can help prevent this. Start by disconnecting the negative terminal, followed by the positive terminal. Gently scrub the terminals with a mixture of baking soda and water, using a wire brush. Rinse with clean water and dry thoroughly before reattaching the terminals.

Avoid Excessive Battery Drain

Excessive battery drain can shorten the lifespan of your battery. To avoid this, make sure to turn off all lights, electronics, and accessories when not in use. Avoid leaving your vehicle parked for extended periods without starting the engine, as this can drain the battery. Additionally, check for any electrical components that might be causing a parasitic drain and address them promptly.

Consider Using A Battery Maintainer

A battery maintainer, also known as a battery tender, is a device that keeps your battery charged and healthy. It is particularly beneficial if you don’t drive your Toyota Highlander frequently or plan to leave it unused for an extended period. Simply connect the maintainer to the battery and let it do its job, ensuring that your battery remains fully charged and in optimal condition.

By following these battery maintenance tips, you can keep your Toyota Highlander’s battery in excellent condition and reset the battery light when needed. Regularly checking the battery, cleaning the terminals, avoiding excessive drain, and using a battery maintainer will contribute to a longer-lasting, reliable battery.

How to Reset Battery Light on Toyota Highlander

Credit: www.sterlingmccalltoyota.com

Frequently Asked Questions For How To Reset Battery Light On Toyota Highlander

How Do You Reset The Battery Light On A Toyota Highlander?

To reset the battery light on a Toyota Highlander, simply disconnect the negative battery terminal for a few minutes, then reconnect it. The battery light should reset.

Why Is The Battery Light On In My Toyota Highlander?

The battery light in your Toyota Highlander may indicate a problem with the charging system, such as a faulty alternator or a weak battery. It’s recommended to have it checked by a professional.

Can A Low Battery Cause The Battery Light To Come On In A Toyota Highlander?

Yes, a low battery can cause the battery light to come on in a Toyota Highlander. When the battery doesn’t have enough power, it can’t properly charge the system, triggering the light.

Conclusion

The process to reset the battery light on your Toyota Highlander is simple yet crucial. By following the steps outlined, you can ensure the smooth functioning of your vehicle’s electrical system. Keep up with routine maintenance to avoid future issues and enjoy a stress-free driving experience.

How to Reset Maintenance Light on Toyota Highlander 2019


To reset the maintenance light on a Toyota Highlander 2019, follow these steps: Turn the ignition to ON mode, but do not start the engine. Press the trip meter button until the ODO display appears.

Turn the ignition off. Press and hold the trip meter reset button, then turn the ignition to ON mode. Continue holding the button until the ODO reading resets to zero. Release the button, and the maintenance light should be reset.

Maintaining your Toyota Highlander 2019 is essential for its performance and longevity. Knowing how to reset the maintenance light is a helpful skill for keeping track of necessary service intervals. By following simple steps, you can quickly reset the maintenance light without needing to visit a dealership. This guide will provide you with a clear understanding of how to perform this task, ensuring that your Highlander remains in optimal condition.

Understanding The Maintenance Light

When the maintenance light comes on in your Toyota Highlander 2019, it is essential to know its significance and how to reset it efficiently. Let’s delve into what the maintenance light represents and when it illuminates to ensure proper maintenance of your vehicle.

Meaning Of The Maintenance Light

The maintenance light in your Toyota Highlander serves as a reminder for routine vehicle maintenance. It indicates that your vehicle is due for servicing to keep it running smoothly and efficiently.

When The Maintenance Light Turns On

The maintenance light typically turns on at specific mileage intervals or when certain maintenance tasks are required, such as oil changes, tire rotations, or other routine maintenance checks. It is crucial to address the maintenance light promptly to ensure the optimal performance and longevity of your vehicle.

How to Reset Maintenance Light on Toyota Highlander 2019

Credit: www.youtube.com

Methods To Reset The Maintenance Light

When it comes to maintaining your Toyota Highlander 2019, resetting the maintenance light is a key aspect. Don’t worry, there are easy and efficient methods to reset the maintenance light on your Toyota Highlander 2019. In this post, we will walk you through the process and guide you step by step. Let’s dive into it!

Method 1: Using The Trip Button

To reset the maintenance light on your Toyota Highlander 2019 using the Trip Button, follow these simple steps:

  1. Insert the key into the ignition and turn it to the “ON” position without starting the engine.
  2. Press and hold the Trip Button until the maintenance light flashes and then turns off.
  3. Release the Trip Button and turn the ignition off.
  4. Start the engine to verify if the maintenance light has been successfully reset.

Method 2: Using The Odometer Button

If you prefer to use the Odometer Button to reset the maintenance light on your Toyota Highlander 2019, here’s what you need to do:

  1. Turn the ignition switch to the “OFF” position.
  2. Press and hold the Odometer Button.
  3. While holding the Odometer Button, turn the ignition switch to the “ON” position.
  4. Continue holding the Odometer Button until the maintenance light resets.
  5. Release the Odometer Button and turn the ignition off.
  6. Start the engine to ensure the maintenance light has been reset successfully.

Step-by-step Guide: Using The Trip Button

When it comes to maintaining your Toyota Highlander, it’s essential to stay on top of your vehicle’s maintenance light. In this step-by-step guide, we will walk you through the process of resetting the maintenance light on your Toyota Highlander 2019 using the trip button. Following these simple steps will help you ensure that your vehicle is properly maintained and running smoothly for years to come.

Step 1: Start Your Toyota Highlander

The first step is to start your Toyota Highlander. Make sure that the vehicle is in park and that the engine is running.

Step 2: Locate The Trip Button

Next, locate the trip button on the dashboard of your Toyota Highlander. It is usually located near the speedometer or odometer display.

Step 3: Press And Hold The Trip Button

Press and hold the trip button until you see the maintenance light appear on the dashboard display. This may take a few seconds.

Step 4: Continue Holding Until Maintenance Light Resets

Continue holding the trip button until the maintenance light on the dashboard resets. This may take up to 10 seconds. Once the light resets, release the trip button. That’s it! You have successfully reset the maintenance light on your Toyota Highlander 2019 using the trip button. By following these simple steps, you can easily ensure that your vehicle’s maintenance light is properly reset, keeping your Highlander in top condition for all your future adventures. “`

How to Reset Maintenance Light on Toyota Highlander 2019

Credit: www.brentbrowntoyota.com

Step-by-step Guide: Using The Odometer Button

When it comes to resetting the maintenance light on your Toyota Highlander 2019, using the odometer button method is a straightforward process. Follow this step-by-step guide to clear the maintenance light efficiently.

Step 1: Sit In The Driver’s Seat

Before starting the reset process, position yourself comfortably in the driver’s seat of your Toyota Highlander 2019.

Step 2: Turn The Ignition To The ‘on’ Position

Insert your car key into the ignition and turn it to the ‘ON’ position without starting the engine.

Step 3: Switch The Display To ‘odo’

Locate the trip meter button near the speedometer and press it until the display changes to ‘ODO’ mode.

Step 4: Turn The Ignition Off And Then Back On

Turn the ignition off, then swiftly switch it back to the ‘ON’ position within a few seconds.

Step 5: Release The Odometer Button

Press and hold the odometer button until the maintenance light resets and disappears from the dashboard.


How to Reset Maintenance Light on Toyota Highlander 2019

Credit: www.mariettatoyota.com

Frequently Asked Questions Of How To Reset Maintenance Light On Toyota Highlander 2019

How Do I Reset The Maintenance Light On My Toyota Highlander 2019?

To reset the maintenance light on your Toyota Highlander 2019, simply follow these steps:
1. Turn the ignition switch to the “ON” position without starting the engine. 2. Locate the trip meter reset button and press and hold it until the trip meter displays “000000”. 3. Turn the ignition switch off and then back on. The maintenance light should now be reset.

What Does The Maintenance Light On Toyota Highlander 2019 Indicate?

The maintenance light on your Toyota Highlander 2019 is an indicator that it’s time to perform routine maintenance on your vehicle. This can include things like an oil change, tire rotation, or other scheduled services recommended by the manufacturer. It’s important to address these maintenance needs to keep your Highlander running smoothly and to prevent potential problems down the line.

How Often Should I Reset The Maintenance Light On My Toyota Highlander 2019?

You should reset the maintenance light on your Toyota Highlander 2019 each time you perform routine maintenance on your vehicle. This ensures that the light accurately reflects when your next service is due and helps you stay on top of your car’s maintenance schedule.

It’s recommended to refer to your owner’s manual for specific maintenance intervals for your Highlander model.

Conclusion

Keeping up with regular maintenance is crucial for your Toyota Highlander’s longevity. By following the simple steps outlined in this blog, you can easily reset the maintenance light on your 2019 Highlander. Stay proactive in caring for your vehicle to ensure smooth rides ahead.

Trust the process and drive stress-free!

2012 Hyundai Veloster Power Window problems, Symptoms, Causes and How to Fix


The 2012 Hyundai Veloster can experience power window issues, causing frustration for owners. Common symptoms include windows that won’t roll up or down, slow or sluggish movement, strange noises like grinding or squeaking, and intermittent operation. These problems can stem from various causes, such as a faulty window regulator, a failing window motor, a blown fuse, damaged wiring, or debris obstructing the window tracks.

To fix power window problems, start by checking fuses and switches, then inspect the window regulator, motor, and wiring for any signs of damage or malfunction. Lubricating the tracks and replacing worn components may also be necessary. In some cases, professional assistance from a mechanic may be required for proper diagnosis and repair.

2012 Hyundai Veloster Common Power Window Problems

  • Windows not rolling up or down: This can be due to a faulty window motor, regulator, or switch.
  • Slow or sluggish window movement: Often caused by a dying motor or obstructions in the window tracks.
  • Intermittent operation: Could be due to loose or damaged wiring, or a failing switch.
  • Window misalignment: Windows may shift forward or leave gaps, often due to improper installation or a bent window frame.
  • Auto window feature not working: Common after battery replacement or disconnection, requiring a reset procedure.
  • Window bounce back: Caused by the pinch protection feature activating due to high resistance or obstructions in the window frame.
  • Unresponsive passenger window: Can be due to a blown fuse, faulty switch, or burnt-out motor.

Potential Causes

  • Blown fuse: A common cause that can prevent power windows from operating.
  • Faulty window switch: The switch may fail, especially the driver’s master switch, leading to non-responsive windows.
  • Broken window motor: The motor may burn out or fail, preventing the window from moving.
  • Damaged window regulator: The regulator can break or become misaligned, causing the window to get stuck or move improperly.
  • Loose or damaged wiring: Wiring issues can disrupt the electrical connection needed for window operation.
  • Obstructions in window tracks: Debris or misalignment in the tracks can hinder window movement.
  • Defective actuator: The actuator may fail, affecting the window’s ability to move up or down.
  • Broken cable: A snapped or frayed cable can prevent the window from operating correctly.

How to Diagnose Power Window Issues in Your 2012 Hyundai Veloster?

Diagnosing power window issues in a 2012 Hyundai Veloster involves a systematic approach to identify the root cause. Here are the steps to follow:

1.Check the Fuses

    • Locate the fuse box and identify the fuse related to the power windows.
    • Inspect the fuse to see if it is blown and replace it if necessary.

    2. Inspect the Window Switch

      • Test the window switch by pressing it and listening for any sound from the window motor.
      • If the switch is unresponsive, it may need to be replaced.

      3. Examine the Window Motor

        • Remove the door panel to access the window motor.
        • Apply power directly to the motor to see if it operates. If the motor does not work, it may need to be replaced.

        4. Check the Window Regulator

          • Inspect the window regulator for any signs of damage or misalignment.
          • Ensure that the regulator is properly connected and functioning.

          5. Inspect Wiring and Connections

            • Check all wiring and connections for any signs of damage or disconnection.
            • Ensure that all connectors are securely attached and free of corrosion.

            6. Test the Body Control Module (BCM)

              • If multiple electrical components are failing, the BCM may be at fault.
              • Consult a professional to test and diagnose the BCM.

              7. Lubricate Window Tracks

                • Clean and lubricate the window tracks to ensure smooth operation.
                • Use a silicone spray to reduce friction and prevent the window from getting stuck.

                8. Reset the Auto Window Feature

                  • If the auto window feature is not working, reset it by holding the window switch in the up position for a few seconds after the window is fully closed.

                  How to Fix 2012 Hyundai Veloster Power Window Problems– Step by step

                  To fix power window problems in a 2012 Hyundai Veloster, follow these step-by-step instructions:

                  Step 1: Check the Fuses

                  1. Locate the fuse box, typically found under the dashboard or in the engine compartment.
                  2. Identify the fuse related to the power windows using the owner’s manual.
                  3. Remove the fuse and inspect it for any signs of being blown. Replace it with a fuse of the same rating if necessary.

                  Step 2: Inspect the Window Switch

                  1. Test the window switch by pressing it and listening for any sound from the window motor.
                  2. If the switch is unresponsive, remove the door panel to access the switch.
                  3. Disconnect the switch and use a multimeter to check for continuity. Replace the switch if it is faulty.

                  Step 3: Examine the Window Motor

                  1. Remove the door panel to access the window motor.
                  2. Disconnect the motor and apply power directly to it using jumper wires. If the motor does not operate, it needs to be replaced.
                  3. Install the new motor and reconnect all wiring.

                  Step 4: Check the Window Regulator

                  1. With the door panel removed, inspect the window regulator for any signs of damage or misalignment.
                  2. If the regulator is broken or misaligned, remove it by detaching the bolts and disconnecting it from the window.
                  3. Install a new regulator, ensuring it is properly aligned and securely fastened.

                  Step 5: Inspect Wiring and Connections

                  1. Check all wiring and connections for any signs of damage, corrosion, or disconnection.
                  2. Repair or replace any damaged wiring and ensure all connectors are securely attached.

                  Step 6: Lubricate Window Tracks

                  1. Clean the window tracks to remove any debris or obstructions.
                  2. Apply a silicone spray lubricant to the tracks to ensure smooth window operation.

                  Step 7: Reset the Auto Window Feature

                  1. If the auto window feature is not working, reset it by holding the window switch in the up position for a few seconds after the window is fully closed.

                  Step 8: Test the Window Operation

                  1. Reconnect the battery if it was disconnected.
                  2. Test the window operation to ensure it moves smoothly and responds to the switch commands.
                  3. Reassemble the door panel and secure all screws and clips.

                  Repairing 2012 Hyundai Veloster Power Window Problems: DIY or Professional Help?

                  Repairing power window problems in a 2012 Hyundai Veloster can be approached as a DIY project or with professional help, depending on the complexity of the issue and your comfort level with car repairs.

                  DIY Repair

                  Pros:

                  • Cost Savings: DIY repairs can save money on labor costs.
                  • Convenience: You can work on your own schedule.
                  • Learning Experience: Gaining knowledge and skills in car maintenance.

                  Steps for DIY Repair:

                  1. Check Fuses: Inspect and replace any blown fuses related to the power windows.
                  2. Inspect the Switch: Test the window switch for functionality. Replace if faulty.
                  3. Examine the Motor and Regulator: Remove the door panel to access and test the window motor and regulator. Replace if necessary.
                  4. Check Wiring: Inspect for any damaged or disconnected wires and repair as needed.
                  5. Lubricate Tracks: Clean and lubricate the window tracks to ensure smooth operation.

                  Professional Help

                  Pros:

                  • Expertise: Professionals have the experience and tools to diagnose and fix issues accurately.
                  • Time-Saving: Repairs are typically faster with a professional.
                  • Warranty: Many repair shops offer warranties on parts and labor.

                  When to Seek Professional Help:

                  • Complex Issues: If the problem involves intricate electrical work or major component replacement.
                  • Lack of Tools/Experience: If you do not have the necessary tools or are uncomfortable performing the repairs.
                  • Persistent Problems: If DIY attempts do not resolve the issue.

                  Cost Considerations:

                  • Labor Costs: Professional repairs include labor costs, which can vary.
                  • Parts Costs: Parts may be marked up at repair shops compared to buying them yourself.

                  2012 Hyundai Veloster Power Window Problems Repairing Cost

                  The cost of repairing power window problems on a 2012 Hyundai Veloster can vary depending on the specific issue and the required parts and labor. Here are some common repair costs:

                  Window Regulator Replacement

                  The window regulator is the mechanism that moves the glass up and down. Replacing a window regulator typically costs:

                  • Parts: $200 – $300 for an OEM regulator assembly
                  • Labor: $70 – $150

                  Window Motor Replacement

                  If the window motor itself has failed, replacement costs are:

                  • Parts: $50 – $150 for a new window motor
                  • Labor: $70 – $150

                  Window Switch Replacement

                  A faulty window switch may need to be replaced:

                  • Parts: $30 – $100 for a new switch
                  • Labor: $50 – $100

                  Wiring Repair

                  Issues with damaged or disconnected wiring can range from:

                  • Minor repair with splicing: $50 – $150
                  • Extensive wiring replacement: $200 – $500

                  Preventing Future Power Window Problems in 2012 Hyundai Veloster

                  To prevent future power window problems in a 2012 Hyundai Veloster, consider the following maintenance and preventive measures:

                  Regular Maintenance

                  1. Inspect and Clean Window Tracks

                    • Regularly clean the window tracks to remove dirt and debris that can obstruct window movement.
                    • Use a silicone spray lubricant to keep the tracks smooth and reduce friction.

                    2. Check and Replace Fuses

                      • Periodically check the fuses related to the power windows to ensure they are in good condition.
                      • Replace any blown fuses promptly to prevent electrical issues.

                      3. Test Window Switches

                        • Regularly test all window switches to ensure they are functioning correctly.
                        • Replace any switches that show signs of wear or intermittent operation.

                        Preventive Measures

                        1. Avoid Overuse

                          • Avoid excessive use of the power windows, especially in extreme weather conditions, to reduce wear on the motor and regulator.

                          2. Protect from Moisture

                            • Ensure that the door seals are intact to prevent water from entering and damaging the window motor and electrical components.
                            • Avoid operating windows in heavy rain to minimize the risk of water ingress.

                            3. Regular Inspections

                              • Periodically inspect the window regulator and motor for signs of wear or damage.
                              • Address any issues promptly to prevent more significant problems.

                              4. Professional Check-ups

                                • Have a professional mechanic inspect the power window system during regular vehicle maintenance.
                                • Early detection of potential issues can prevent costly repairs.

                                5. Avoid Force

                                  • Do not force the windows up or down if they are stuck, as this can damage the motor and regulator.
                                  • Investigate and resolve the cause of any resistance before operating the window.

                                  Can I drive my 2012 Hyundai Veloster with a malfunctioning Power Window?

                                  Yes, you can drive with a malfunctioning power window, but it is advisable to repair the issue promptly to avoid safety risks, security vulnerabilities, and legal complications.