Recent Posts

How Long Does a Toyota Corolla Transmission Last


The Toyota Corolla's transmission typically lasts up to 200,000 miles.

Longevity depends on maintenance, driving habits, and climate.

Proper care can extend its life, making it a durable component of this reliable vehicle.

Transmission Lifespan Basics

transmission maintenance and longevity

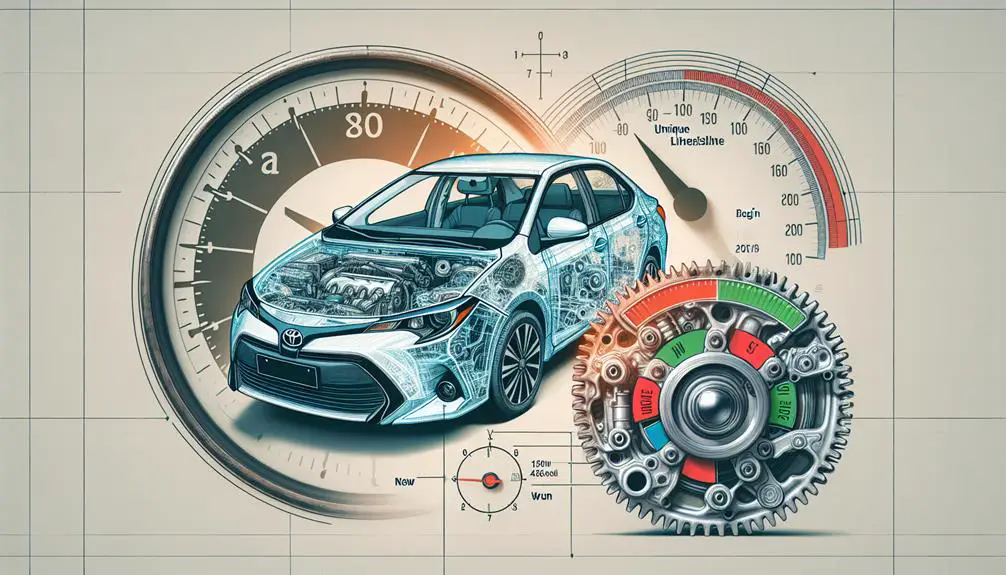
Knowing how long a Toyota Corolla's transmission lasts is important for its overall life. The transmission helps the car change gears and drive at different speeds. Toyota Corollas are known for having durable transmissions that can last over 100,000 miles, sometimes even up to 200,000 miles, with the right care.

The life of a transmission depends on how the car is used and maintained. Regular checks and fluid changes are crucial for keeping the transmission in good condition. Not doing these can cause damage and shorten its life.

In short, the longevity of your Toyota Corolla's transmission depends on your maintenance efforts. Proper care ensures it stays reliable for a long time.

Factors Affecting Longevity

Several factors can affect how long your Toyota Corolla's transmission lasts, including your driving habits and how well you maintain the vehicle. Here's a closer look at what influences your car's transmission life.

  • Driving Habits: Driving aggressively or with frequent stops and starts can wear out the transmission faster.
  • Maintenance Schedule: It's important to regularly change the oil and follow the manufacturer's service recommendations to avoid early transmission failure.
  • Towing and Load: Pulling heavy loads often or overloading your Corolla can reduce the transmission's lifespan.
  • Cooling System Health: A working cooling system is essential to prevent the transmission from overheating and getting damaged.
  • Use of Correct Fluids: Using the right transmission fluid and keeping it at the correct level helps prevent problems.

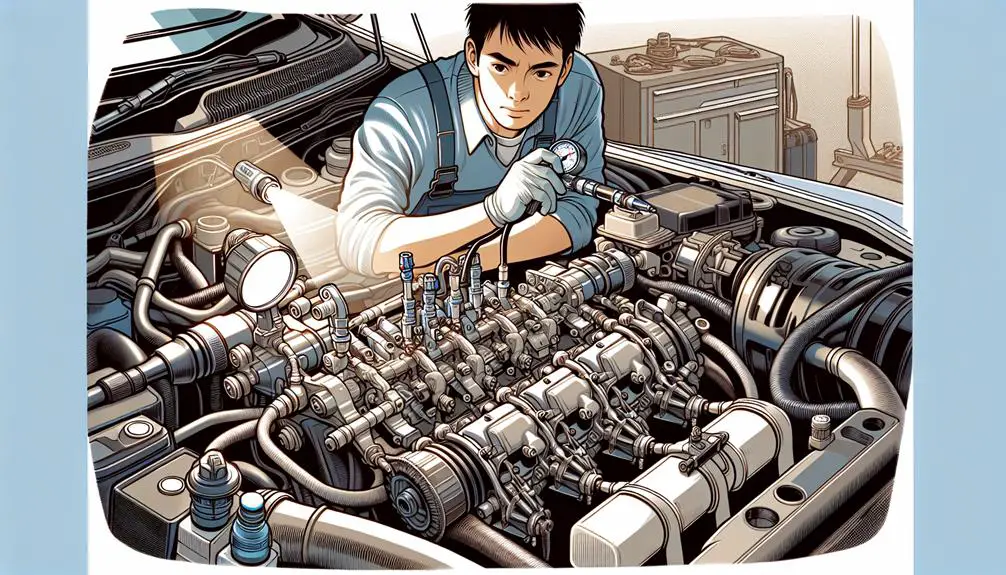
Recognizing Wear and Tear

preserving furniture from damage

To maintain your Toyota Corolla's transmission, it's important to recognize signs of wear and tear early. Look out for these indicators:

  1. Difficulty shifting gears: This could mean the transmission fluid is low, incorrect, or old and needs replacing.
  2. Unusual noises: Humming, buzzing, or whining sounds while driving could signal transmission problems.
  3. Leaking fluid: Bright red, sweet-smelling fluid under your car indicates a transmission fluid leak.
  4. Burning smell: This suggests the transmission fluid has overheated, which can damage the transmission.

Addressing these issues promptly can help keep your Toyota Corolla in good condition.

Maintenance Tips

To keep your Toyota Corolla's transmission working well and avoid expensive repairs, follow these maintenance tips:

  • Check the transmission fluid often: This fluid is essential for lubrication and cooling. Every few months, check if the fluid is low or dirty and change or top it up if needed.
  • Use the correct fluid: Make sure to use the transmission fluid recommended by Toyota for your Corolla. Using the wrong fluid can cause damage.
  • Service your transmission: Stick to Toyota's recommended transmission service schedule. This usually involves changing the fluid and replacing the filter to remove dirt and ensure smooth operation.
  • Don't tow heavy loads if not recommended: Towing more than your Corolla can handle can damage the transmission. Follow Toyota's guidelines on towing.
  • Warm up your car in cold weather: Before driving in cold weather, let your car warm up for a few minutes. This helps the transmission fluid warm up and circulate properly, which is better for performance and longevity.

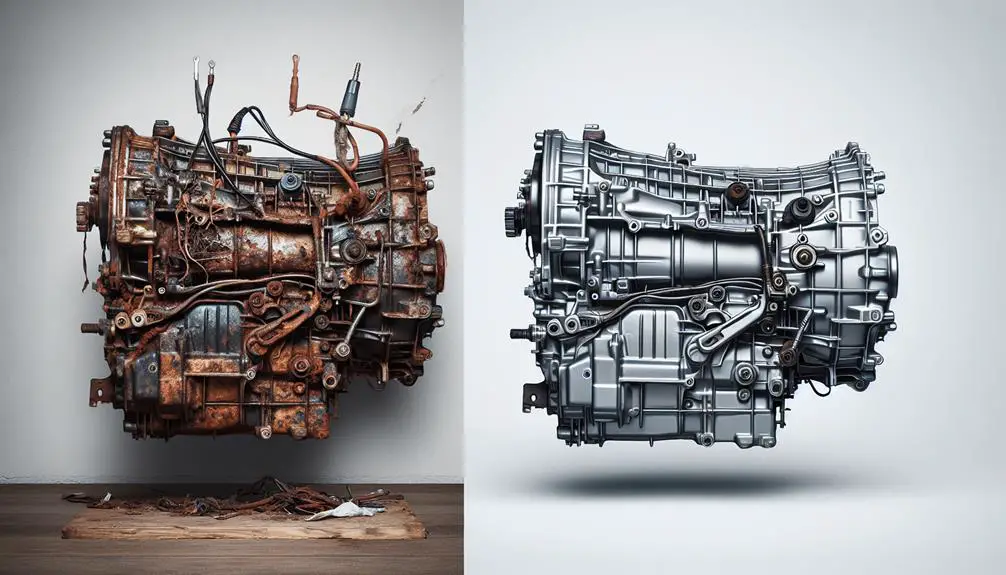
Real-World Owner Experiences

valuable insights from owners

Toyota Corolla owners have shown that good maintenance can make the car's transmission last longer. Many owners have shared online that their Corolla's transmission worked well even after 200,000 miles because they followed the car's maintenance schedule closely. Some transmissions have lasted over 300,000 miles with regular fluid changes and proper servicing. Using high-quality parts and fluids seems to help transmissions last longer.

However, there are also stories of transmissions failing around 100,000 miles. Often, these cases involve neglected maintenance or the use of low-quality parts. This shows that not taking care of the car can lead to early transmission problems.

Conclusion

You've learned how long your Toyota Corolla's transmission can last and what can make it last longer or shorter. Taking good care of it's important. Other car owners say that if you take good care of it, your Corolla's transmission can last more than 200,000 miles.

Remember, it's not just about how long it lasts, but also about having a smooth and trouble-free drive every time.

Where To Buy The Hyundai Porest A Guide For Rv Lovers


To buy the perfect Hyundai Porest, start at official Hyundai dealerships. Explore online RV marketplaces to broaden your search. Consider international sellers for unique options. Check private listings for potential deals.

Financing options include dealership financing, which may offer special rates or promotions. Bank loans are another avenue to consider for competitive interest rates. Personal loans could be an option if you prefer more flexibility in terms.

Official Hyundai Dealerships

hyundai dealerships authorized only

At official Hyundai dealerships, you can buy the Hyundai Porest, an RV for adventures. These dealerships offer real products, warranties, and good service.

They explain the Porest's features, like its size and modern comforts. You can also talk about financing options to help afford the Porest.

After buying, you get help with maintenance and parts from the dealership.

Online RV Marketplaces

To find a Hyundai Porest, you can check online RV marketplaces besides visiting Hyundai dealers. These websites let you see many options, compare prices, and check details from home. You can view photos, seller info, and reviews to help you decide.

Here are top online RV marketplaces for the Hyundai Porest:

  • RV Trader: Lots of listings, easy to use.
  • Outdoorsy: Rent or buy from owners.
  • RVT: Many choices, specific search options.
  • Camping World: Offers new and used RVs, available nationwide.

Each site has benefits, like a wide range or rental options. Always ask sellers questions before buying.

International Buying Options

global purchasing opportunities available

Looking for Hyundai Porest models from other countries can offer unique choices not found locally. Some countries have exclusive models due to their own preferences and rules.

Though buying internationally involves dealing with shipping, taxes, and possibly making changes to meet local standards, it can be manageable. Many dealers and services help with these steps, including paperwork and ensuring the RV meets requirements.

Private Sellers Insights

When looking to buy a Hyundai Porest, consider buying from a private seller. This option allows you to learn about the RV's history, maintenance, and how it has been used from the owner directly. Often, private sellers offer better prices than dealerships because they don't have extra costs. You might also negotiate a better price with a seller who wants to sell quickly.

Buying from a private seller means you can ask detailed questions and get honest feedback about the RV, such as performance on long trips, fuel efficiency, and unique features. This information can help you decide if the Porest is the right RV for you.

Financing Your Porest

navigating financial challenges effectively

Getting financing for your Hyundai Porest is essential. Look for the best rates and terms that fit your budget.

First, check with your bank or credit union for competitive rates. Ask about loan pre-approval to know what you can afford.

Then, consider RV dealership financing. Dealers often work with lenders who specialize in RV loans and may offer flexible terms. Dealership financing can also make the buying process quicker.

Conclusion

If you want to buy a Hyundai Porest, an RV for adventures and comfort, start by looking at official Hyundai stores. They've the newest ones.

You can also look online for more choices, even from other countries. Sometimes, people selling their own RV can have good deals too.

There are ways to pay for it over time, making it easier to buy your dream RV. Good luck finding your RV!

How Much Are Brake Pads for Hyundai Sonata


The average cost of brake pads for a Hyundai Sonata varies based on factors like the model year, pad quality, purchase location, and installation choice.

This essential maintenance task's price can be influenced by whether you opt for DIY installation or professional service, alongside the type of brake pads you select.

Discovering ways to economize without sacrificing safety involves understanding these cost determinants.

Understanding Brake Pad Costs

analyzing brake pad expenses

Understanding brake pad expenses is vital, as they're a fundamental component of your vehicle's safety system. When you're driving a Hyundai Sonata, knowing what you're likely to spend on brake pads can help you budget for maintenance and avoid surprises. Remember, the cost isn't just a number; it reflects the importance of keeping your car in top condition to guarantee your safety and the safety of others on the road.

You might wonder why there's such a variation in the price of brake pads. It's due to not all brake pads being created equal. They come in different materials, each offering distinct advantages in terms of performance, durability, and noise reduction. Although we're not delving into the specifics of what influences the price in this section, it's worth noting that these factors play a significant role in determining the cost.

For your Hyundai Sonata, you'll find a range of options available, from more affordable to premium choices. It's important to understand that while it might be tempting to go for the cheapest option, this isn't always the wisest decision. Investing in quality brake pads can save you money in the long run by reducing the need for frequent replacements and possibly avoiding damage to other parts of your braking system.

Factors Influencing Price

Several factors influence the price of brake pads for your Hyundai Sonata, including material, brand reputation, and compatibility with your vehicle model. Understanding these factors can help you make an informed decision when it's time to replace your brake pads.

  1. Material: Brake pads are made from different materials, each offering different levels of performance and durability. Common types include ceramic, semi-metallic, and organic. Ceramic pads generally offer quieter operation and less dust but tend to be pricier. Semi-metallic pads provide excellent performance but may wear down your rotors faster. Organic pads are softer, providing quieter stops but tend to have a shorter lifespan and aren't as effective in extreme driving conditions.
  2. Brand Reputation: The brand of brake pads can have a significant impact on their price. Well-known brands often charge more because of their reputation for quality and reliability. However, don't overlook lesser-known brands that may offer comparable quality at a more affordable price.
  3. Compatibility with Your Vehicle Model: Not all brake pads are a one-size-fits-all solution. Certain pads are designed specifically for the braking system of your Hyundai Sonata. These specialized pads may cost more but ensure performance and safety.
  4. Where You Buy: Prices can vary greatly between retailers. Dealerships typically charge more, while auto parts stores and online retailers might offer competitive pricing. Shopping around can help you find the best deal.

Price Ranges Explained

understanding price ranges precisely

Understanding the price ranges for Hyundai Sonata brake pads can help you budget more effectively for this important maintenance. Prices vary widely based on several factors including brand, material, and if you're opting for front or rear pads. Let's delve deeper to understand what you might expect to pay.

Brake pads for the Hyundai Sonata typically fall into three main categories: economy, mid-range, and premium. Economy pads are the most affordable but might wear out faster, mid-range pads offer a balance between cost and durability, while premium pads, made from higher quality materials, offer the best longevity and performance but at a higher price.

Here's a simplified breakdown to give you an idea of the price ranges:

Category Price Range
Economy $20 – $35
Mid-Range $36 – $60
Premium $61 – $90+

Economy pads are your go-to if you're on a tight budget and need a quick fix. However, investing in mid-range or premium pads can save you money in the long run, as they generally last longer and perform better, reducing the frequency of replacements.

DIY Replacement Tips

After comprehending the cost implications of different brake pad types for your Hyundai Sonata, let's look at how you can replace them yourself to further save on expenses. Doing your brake pad replacement isn't just about saving money; it's also about comprehending and maintaining your vehicle better.

Here's a simplified guide to help you through the process:

  1. Gather Your Tools and Parts: Before you start, make sure you have all the necessary tools and the new brake pads ready. You'll need a jack, jack stands, a lug wrench, a socket set, and of course, your new brake pads. Don't forget to wear safety glasses and gloves to protect yourself during the process.
  2. Remove the Wheel: Use the lug wrench to loosen the lug nuts slightly while the car is on the ground. Then, jack up your Sonata and secure it on jack stands. Remove the lug nuts and wheel to access the brake assembly.
  3. Replace the Brake Pads: Locate the caliper, and use your socket set to remove it. Be careful not to damage the brake line. Once the caliper is off, the old brake pads should slide right out. Compare them with the new ones to ensure a correct fit before sliding the new pads into place.
  4. Reassemble and Test: After installing the new brake pads, reattach the caliper and make sure everything is tightened properly. Put the wheel back on, lower the car, and tighten the lug nuts. Before you call it a day, take your Sonata for a test drive to make sure the brakes are functioning correctly, listening for any unusual sounds.

Saving Money on Brake Pads

frugal brake pad shopping

While replacing your Hyundai Sonata's brake pads yourself can greatly cut costs, there are other strategies you can employ to save even more money on this necessary maintenance task. First, don't wait until the end to buy brake pads. Monitoring their condition and planning ahead allows you to shop around for the best deals, rather than being forced to make a hasty, often pricier, purchase.

You should also consider buying brake pads online. E-commerce platforms often offer competitive prices compared to brick-and-mortar auto parts stores. Just make sure you're purchasing from a reputable source to avoid counterfeit or substandard products. Moreover, look out for sales, discounts, or coupon codes that can slash prices even further.

Comparing prices and quality across brands is another savvy move. While it's tempting to go for the cheapest option, investing in mid-range or higher-quality brake pads can actually be more cost-effective in the long run. They tend to last longer and perform better, which means you won't be replacing them as frequently.

Lastly, don't overlook the value of cashing in on loyalty programs or signing up for newsletters from auto parts retailers. These can offer exclusive discounts or points that add up to savings on future purchases. By combining these strategies with the DIY replacement approach, you'll maximize your savings on brake pads for your Hyundai Sonata without compromising on safety or performance.

Conclusion

To sum up, the price of brake pads for your Hyundai Sonata depends on different factors, including the type and quality you choose. Typically, prices range from $30 to $100, but high-end options can cost more.

You can save money by opting for a DIY replacement if you're handy. Remember, investing in good quality brake pads not only guarantees your safety but also saves you money in the long run by reducing the need for frequent replacements.

How to Replace Hyundai Sonata Tail Light Assembly


  • Replacing a Hyundai Sonata tail light assembly involves gathering tools and preparing the workspace.
  • Ensuring the car is safely parked is crucial before starting the replacement process.
  • Removing the old assembly and installing the new one are the next steps in the process.
  • Choosing the correct replacement part is essential to ensure proper fit and functionality.
  • Finally, performing final safety checks after installation is necessary to ensure everything is in working order.

Preparing Your Vehicle

getting your car ready

Before starting the replacement of your Hyundai Sonata tail light assembly, double-check your vehicle is parked on a flat surface and the engine is turned off. This ensures your safety and prevents the car from rolling. Next, you'll want to gather all the necessary tools and parts for the job. Typically, you'll need a Phillips head screwdriver, a flat head screwdriver, and a new tail light assembly that's compatible with your Sonata's model year.

You need to make sure you're wearing the right protective gear. A pair of gloves can protect your hands from sharp edges and dirt. Safety glasses are a good idea too, as they'll keep your eyes safe from any unexpected debris.

Once you've got your tools and safety gear ready, it's time to locate your vehicle's tail light assembly. In most Hyundai Sonatas, you'll find it on the rear of the vehicle, behind the trunk area. However, the exact location can vary slightly depending on the model year of your Sonata. It's a good idea to consult your car's manual to be sure.

Before you plunge into the task, take a moment to inspect the area around the tail light assembly. Make sure it's clean and free of any debris that might get in the way. If there's dirt or grime, give it a quick wipe down. This not only makes the process smoother but helps you avoid any unnecessary scratches or damage to your vehicle's exterior.

Now that you've properly prepared, you're ready to move on to removing the old assembly.

Removing the Old Assembly

With your vehicle prepped and tools in hand, you're now ready to remove the old tail light assembly from your Hyundai Sonata. This step is important for ensuring that the replacement process goes smoothly and that your car's rear end is both functional and aesthetically pleasing once again. Here's how you can efficiently remove the old assembly:

  1. Open the Trunk: Start by opening your Sonata's trunk to access the back of the tail light assembly. You'll often find a trunk liner or panel that needs to be removed or pulled back to reveal the assembly's mounting points. This might require gently prying off or unscrewing any fasteners holding the liner in place.
  2. Disconnect the Wiring Harness: Before you can remove the assembly, you need to disconnect the wiring harness. Look for a connector that links the tail light to the car's electrical system. Press down on the clip or tab to detach the connector. It's important to do this gently to avoid damaging the wiring.
  3. Remove Mounting Bolts or Screws: The tail light assembly is usually secured with bolts or screws. Using the appropriate screwdriver or socket, remove these fasteners. Keep them in a safe place, as you'll need them to install the new assembly.
  4. Pull Out the Assembly: With the fasteners removed and the wiring disconnected, you can now carefully pull the old tail light assembly away from the vehicle. It may require a bit of wiggling to free it from its position, but it should come out without too much force.

Choosing the Right Replacement

selecting the correct spare

Choosing the correct replacement tail light assembly for your Hyundai Sonata is crucial for guaranteeing compatibility and functionality. You've got to make sure you're selecting the right part that fits your car's specific model year. Hyundai Sonata models can vary greatly from year to year, so grabbing the initial tail light you see mightn't cut it.

Commence by checking your car's manual or the old tail light assembly for any part numbers. These numbers are like a secret code, guiding you to the exact match for your vehicle. If you can't find the manual or any numbers, don't fret. Head over to reputable auto parts retailers' websites. They often have user-friendly tools where you input your car's make, model, and year, and they'll display parts tailored to your Sonata.

Take into account the quality of the replacement parts. While it's tempting to opt for the cheapest option, bear in mind that lower-priced tail lights mightn't offer the same longevity or brightness as higher-quality ones. It's worth investing a bit more for a tail light that'll last longer and perform better.

Moreover, think about if you want an OEM (Original Equipment Manufacturer) part or an aftermarket option. OEM parts are made by Hyundai and will ensure a perfect fit and function, but they can be pricier. Aftermarket parts can be just as good and more budget-friendly but make sure you're selecting a reputable brand.

Installing the New Assembly

Once you've secured the right replacement tail light assembly for your Hyundai Sonata, it's time to start on the installation process. Installing the new assembly is straightforward if you follow these steps carefully. You'll not only save time but also guarantee your tail lights function correctly, keeping you safe on the road.

  1. Prepare Your Vehicle: Before you begin, make sure your Sonata is parked on a level surface and the engine is turned off. For added safety, engage the parking brake. Open the trunk to access the back of the tail light assembly. You might need to remove any trunk lining or panels that cover the tail light assembly screws or bolts.
  2. Remove the Old Assembly: Using a screwdriver or a socket wrench (depending on your Sonata model), carefully remove the screws or bolts that secure the tail light assembly to the car. Gently pull out the old assembly, being careful not to damage any wiring connected to it.
  3. Disconnect the Wiring Harness: Locate the wiring harness that connects the tail light assembly to the car's electrical system. Press down on the tab or squeeze the connector to disconnect it. It's crucial to handle the harness gently to avoid damage.
  4. Install the New Assembly: Take the new tail light assembly and connect it to the wiring harness. Guarantee the connection is secure. Then, align the assembly with the mounting area on your Sonata. Use the screws or bolts you removed earlier to secure the new assembly in place. Tighten them sufficiently to ensure the assembly is firmly attached but be careful not to overtighten and damage the assembly or the car body.

Final Checks and Testing

final quality assurance tasks

After installing your new tail light assembly, it's important to perform some final checks to make sure everything works properly. You've come a long way, but ensuring that your efforts have paid off is important for both safety and satisfaction. Now, let's get into what you need to do next.

First, double-check all the connections you've made. It's easy to overlook a small clip or wire in the process. Make sure each connector is securely attached and that there's no loose wiring that could cause issues later. This step is necessary for preventing any electrical problems or malfunctions.

Next, it's time to test the tail lights. Turn on your Hyundai Sonata and activate the tail lights, brake lights, turn signals, and reverse lights. You'll need to either have someone assist you by observing the lights as you activate them or set up a mirror behind your car so you can see them yourself. This is the moment of truth; every light should illuminate brightly and respond promptly to your controls.

If you find that a light isn't working as expected, don't panic. Check the bulb and the connections again. Sometimes, a simple adjustment is all it takes to resolve the issue. If everything checks out, give yourself a pat on the back. You've successfully replaced your Hyundai Sonata's tail light assembly!

Conclusion

You've successfully navigated the replacement of your Hyundai Sonata tail light assembly, from preparation to installation. By carefully removing the old assembly, selecting the perfect match for your vehicle, and installing the new one, you've guaranteed your Sonata's safety and style aren't compromised.

Always remember to perform final checks and test the new lights to confirm everything's in working order. With these steps, you've maintained your car's integrity and are ready to hit the road safely once again.

How Do I Fix the Code P0171 on My Toyota Corolla


To fix the P0171 code on a Toyota Corolla, you should check for vacuum leaks. Inspect the fuel system thoroughly to ensure there are no issues affecting fuel delivery. If the problem persists, consider replacing the oxygen sensor. These steps address the engine running too lean and can help reset the engine light.

This structured approach will help in efficiently diagnosing and resolving the P0171 trouble code on your Toyota Corolla.

Understanding Code P0171

diagnosing vehicle s engine problem

Code P0171 means your Toyota Corolla is running with too much air and not enough fuel. This can cause problems like rough idling and poor fuel efficiency. The engine has sensors that detect when the air to fuel ratio is off. When there's too much air, the P0171 code is triggered. This usually happens because of issues in the fuel system or air intake components.

To fix this, it's important to find the exact problem. It might involve checking the fuel injectors for blockages, making sure the fuel pressure is right, or ensuring the mass airflow sensor is working properly. Fixing Code P0171 means diagnosing and repairing the specific issue causing the lean condition, not just making quick fixes. This helps make sure your Corolla runs well.

Checking for Vacuum Leaks

Understanding Code P0171 is important. It suggests checking for vacuum leaks because these leaks can cause problems. Vacuum leaks allow extra air into the engine, which messes up the air-fuel mix, leading to a lean condition that Code P0171 shows.

Here's how to check for vacuum leaks in your Toyota Corolla.

First, visually inspect all vacuum hoses and connections for wear, tear, or disconnections. Sometimes, the problem is just a loose or cracked hose.

If you can't find the problem by looking, you might need a smoke test. This test involves putting smoke into the vacuum system and seeing where it comes out. If smoke comes out somewhere, it means there's a leak. This method works well but needs special equipment.

Here's a quick summary of what to do when checking for vacuum leaks:

  • Visual Inspection: Look for damaged or disconnected hoses.
  • Smoke Test: Look for smoke coming out of hoses or connections to find leaks.

Inspecting the Fuel System

examining vehicle fuel system

To fix Code P0171 on your Toyota Corolla, which shows the fuel mixture is too lean (more air, less fuel), check the fuel system as follows:

  1. Fuel Filter: Look at the fuel filter first. If it's blocked, fuel can't flow well, causing a lean mix. Replace it if it's dirty or old.
  2. Fuel Pump: The fuel pump sends fuel to the engine. If it's weak, not enough fuel gets to the engine, leading to the P0171 code. Listen for odd sounds from the pump and check the fuel pressure to make sure it's right for a Toyota.
  3. Fuel Injectors: If fuel injectors are dirty or broken, they can't give the right amount of fuel to the engine. Test each injector's resistance with a multimeter and match it against the correct values. Think about getting them cleaned if they're blocked.
  4. Fuel Pressure Regulator: This part keeps the fuel pressure steady. If it's not working right, it can change the pressure, messing up the fuel-air mix. Look for any leaks or damage, and test the vacuum line to make sure it works properly.

Replacing the Oxygen Sensor

When dealing with a P0171 code in your Toyota Corolla, check the oxygen sensor. This sensor is important for making sure your car runs efficiently. It might be causing the problem.

First, find the oxygen sensor in the exhaust system. Your car might have more than one sensor either before or after the catalytic converter. Use a diagnostic tool to figure out which sensor isn't working right.

Before you start, make sure the engine is cool to prevent burns. Turn off the battery for safety, then find the oxygen sensor. You'll need an oxygen sensor socket and a wrench to remove the sensor without damaging anything.

Unscrew the faulty sensor. If it's hard to remove, use penetrating oil to loosen it. Before installing the new sensor, check that it matches the old one. Screw in the new sensor by hand first to avoid damaging the threads, then tighten it with the wrench.

After that, reconnect the battery. Make sure everything is put back correctly and there are no loose parts.

Changing the oxygen sensor can improve your Corolla's performance. This task requires some tools and patience but is important for fixing the P0171 code.

Resetting the Engine Light

resetting the engine light

Resetting the engine light after fixing the P0171 code in your Toyota Corolla is important. It clears error codes from the computer, helping it monitor the car properly. Here's how to do it:

  1. Use an OBD-II Scanner
  • Connect an OBD-II scanner to the port under the dashboard. Turn the ignition to 'ON' but don't start the car. Follow the scanner's steps to clear codes and turn off the engine light.
  1. Disconnect the Battery
  • Without a scanner, you can reset the computer by disconnecting the car battery. Turn off the car, remove the negative battery terminal, and wait 15 minutes. This resets the computer. Reconnect and start the car; the engine light should be off.
  1. Drive Your Car
  • Driving for 50 to 100 miles might also reset the light as the computer checks and finds no issues.
  1. Check for Other Issues
  • If the light stays on, check for unresolved problems or see a mechanic.

Resetting the light ensures your Corolla runs well and avoids emissions problems.

Conclusion

You're fixing code P0171 on your Toyota Corolla. First, check for any air leaks. Next, look at the fuel system. You might also need to change the oxygen sensor.

Don't forget to reset the engine light to see if your fixes worked. If the light turns on again, go through the steps another time or ask someone who knows a lot about cars for help.

Be patient and pay attention to what you're doing, and your Corolla will run well again soon.

How to Take off Maintenance Light on Toyota Corolla


How to Take off Maintenance Light on Toyota Corolla? To turn off the maintenance light on a Toyota Corolla:

  • Turn the ignition key to the ‘On’ position.
  • Press the odometer button until it reads ‘Trip A.’
  • Turn the key to ‘Off.’
  • Press and hold the odometer while turning the key back to ‘On.’

Understanding the Maintenance Light

resetting the maintenance reminder

The maintenance light on a Toyota Corolla is a reminder to check the car and do needed services. It’s important and shouldn’t be ignored. It usually lights up based on the car’s mileage to remind you of regular services like oil changes and tire rotations. Ignoring it can cause problems like lower performance and engine damage.

Sometimes the light turns on for other reasons, like low tire pressure or engine issues, not just for regular maintenance.

Preparing to Reset the Light

Before resetting the maintenance light on your Toyota Corolla, complete all necessary services to avoid turning the light on too soon. Check the vehicle’s oil level, replace the oil filter, inspect brake pads, and ensure tires are properly inflated and have enough tread. Also, check your owner’s manual for any specific maintenance your model needs. Ignoring these steps can cause the maintenance light to turn on again or lead to bigger problems.

After ensuring all maintenance tasks are done, get any tools needed for the reset. Most models don’t need special tools, but having the car’s manual can help. If you lost your manual, you can find help online, such as Toyota forums and websites.

If you’re not comfortable doing these checks or the reset, it’s okay to get professional help. Visiting a certified Toyota service center can make sure maintenance is done right, and the light is reset correctly.

Resetting the maintenance light is about making sure your Corolla is in good condition. So, take this time to care for your car for a better driving experience.

Step-by-Step Reset Procedure

step by step reset instructions provided

To reset the maintenance light on your Toyota Corolla, follow these steps:

  1. Turn off your car and sit in the driver’s seat.
  2. Find the odometer button or knob near the speedometer on the dashboard.
  3. Press and hold the odometer button.
  4. Turn the key to the ‘On’ position without starting the car. If your car has a push-button start, press the Start button twice without pressing the brake pedal.
  5. Watch the odometer display. It will either flash or show dashes.
  6. Keep holding the odometer button until the display stops flashing and shows the normal reading. This may take a few seconds.
  7. Release the odometer button and turn your car off.

To check if the reset was successful:

  • Start your car normally. The maintenance light should be off. If it’s still on, you might’ve missed a step, or there’s another issue not fixed by the reset.

This procedure resets the maintenance light and helps keep track of service needs. Regular maintenance checks are important for your Corolla’s performance.

Troubleshooting Common Issues

If the reset steps didn’t work and your maintenance light is still on, check the steps again for any mistakes. If all steps were correct, the problem could be a faulty maintenance light circuit due to electrical issues like a short circuit or a blown fuse. Check the fuse box and replace any blown fuses. If fuses are fine, the problem could be with the wiring or the bulb of the maintenance light.

The light might also stay on because of engine problems detected by the vehicle’s computer. This could be something small like a loose gas cap or more serious like a faulty sensor. To identify the problem, run a diagnostic scan. You can get this done for free at most auto parts stores or use a home scanner.

If the light is still on after trying these solutions, it might require a professional’s help. The reset steps can vary between models, so consulting a mechanic or your dealership could provide the specific help your model needs.

Maintaining Your Toyota Corolla

car care for corolla

Learning how to fix the maintenance light on your Toyota Corolla is important for taking care of your car. After understanding that, follow these steps to keep your Corolla in good condition:

  1. Change your oil regularly. This keeps your engine running well. Depending on your car model, you might need an oil change every 5,000 to 10,000 miles. Check your owner’s manual to know the exact timing for your car.
  2. Check your tires often for the right pressure and tread wear. Wrong pressure can make your car use more fuel and wear out tires faster. Worn out treads can make driving unsafe. Rotating tires as recommended can make them last longer.
  3. Pay attention to your brakes. If they squeal or make the car vibrate when you use them, they need to be checked. You’ll need to replace brake pads and rotors from time to time.
  4. Make sure all your lights work, including headlights, brake lights, and turn signals. This keeps you safe and helps you avoid fines.

Conclusion

You’ve successfully turned off the maintenance light on your Toyota Corolla. This light is just a reminder to take good care of your car. If the light comes back on or something doesn’t seem right, it’s important to ask a professional for help.

Make sure to regularly check your car to keep it running well. You’re all set! Feel confident as you drive, knowing your Corolla is in great shape and ready for any journey.